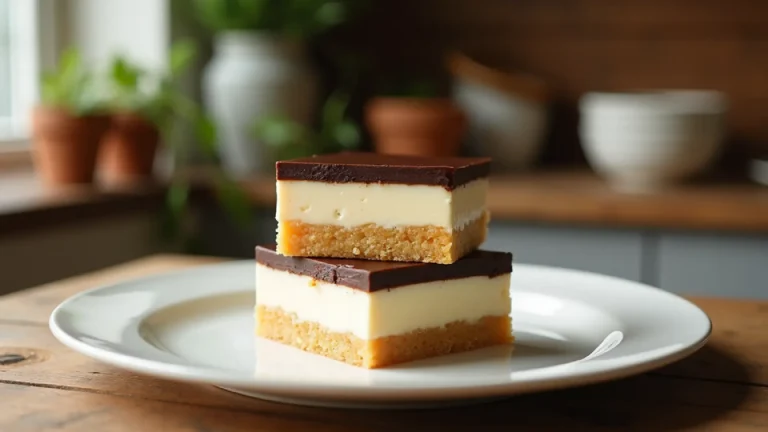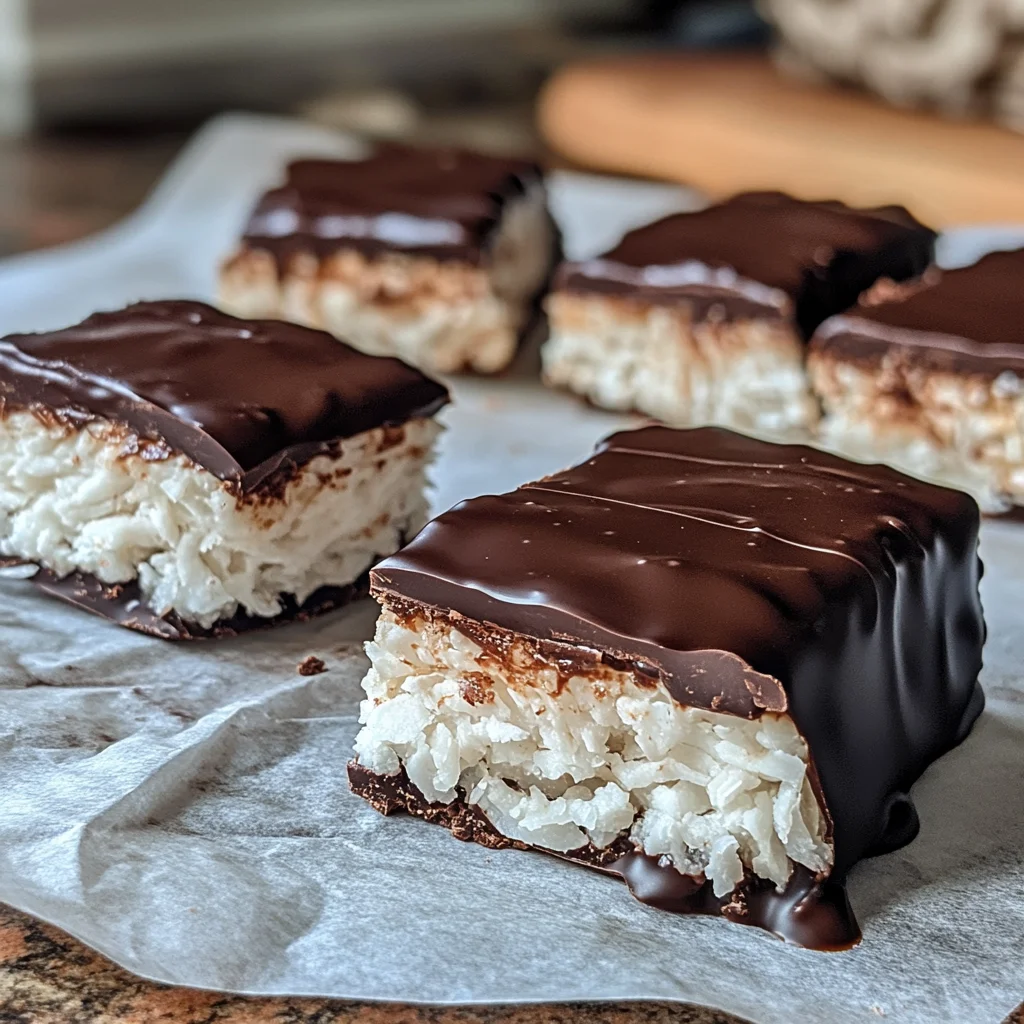
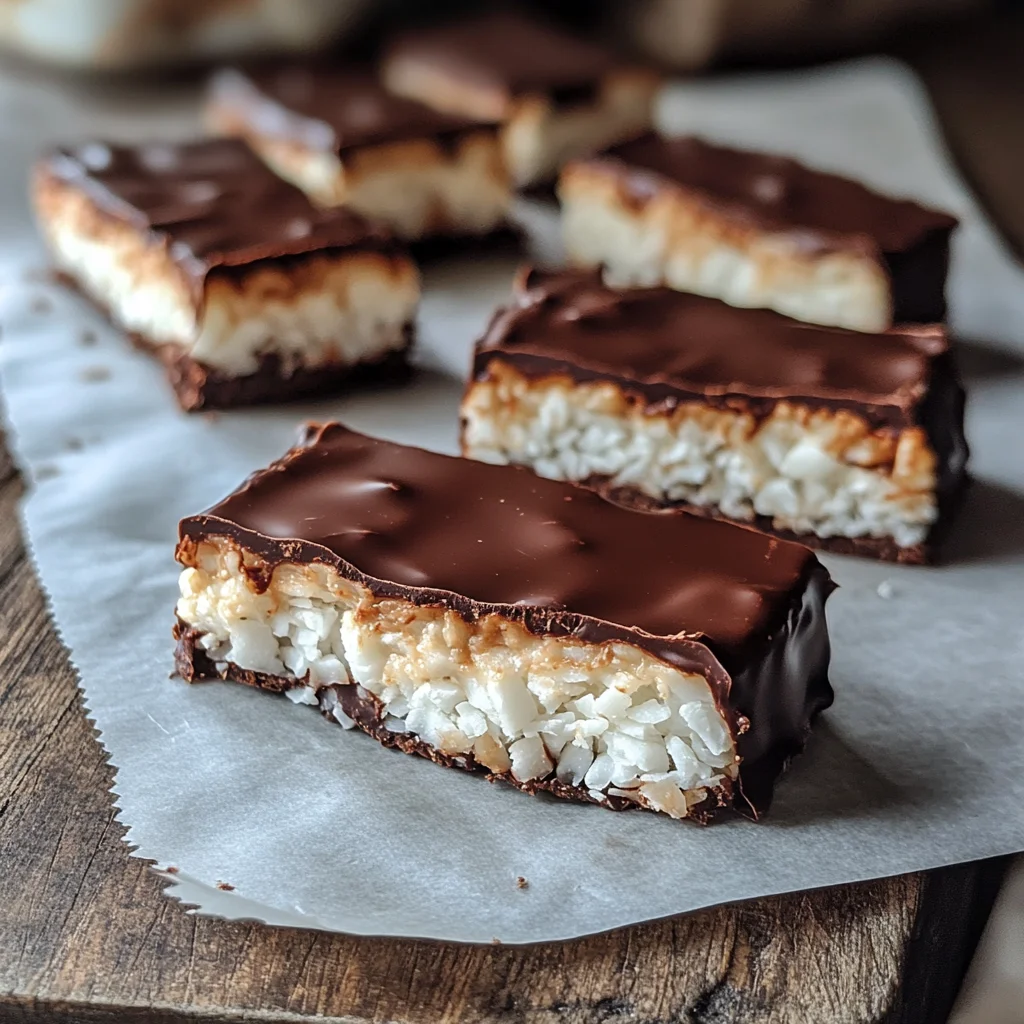
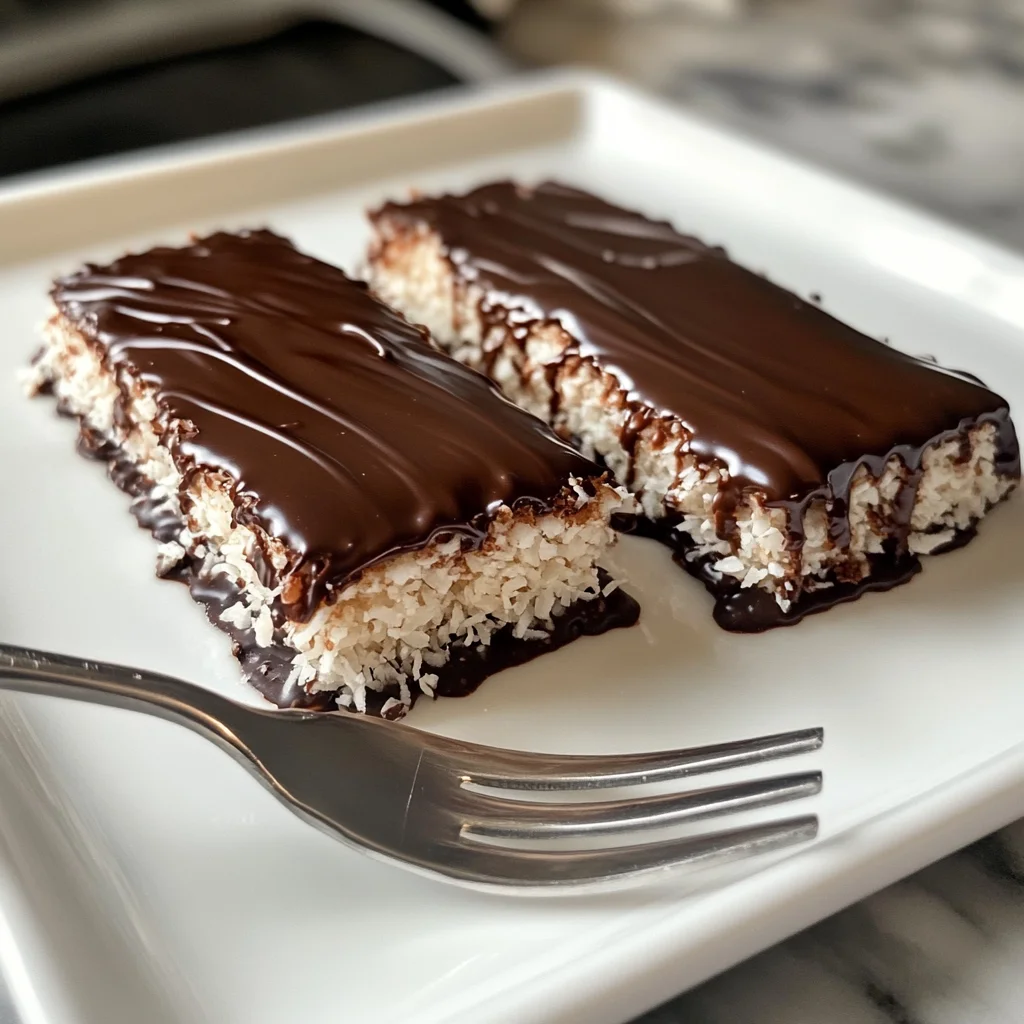
Coconut Candy Bars – The Best 2025 Homemade
Let me tell you about the day I nearly ruined my son Jake’s seventh birthday party with what I now call “The Great No-Bake Cookie Disaster of 2022.” Picture this: twenty excited kids, a kitchen full of ingredients, and cookies that refused to set no matter how long we waited. That’s when I learned the hard way that precision isn’t just helpful in baking—it’s absolutely critical in no-bake treats.
Fast forward to last month, and Emma (my nine-year-old taste-testing assistant) asked if we could make “those chocolate coconut bars like at the store, but better.” Challenge accepted. After seventeen test batches (yes, I counted—occupational hazard of being a former pastry chef), I’ve cracked the code on homemade coconut candy bars that rival any commercial version.
Key Takeaways:
- The 5-ingredient formula that creates perfect texture every time
- Temperature science that prevents chocolate coating disasters
- Storage techniques that keep bars fresh for months
- Troubleshooting guide for common failures (trust me, I’ve made them all)
- Family-friendly modifications including sugar-free options for dietary needs
Why Homemade Coconut Bars Beat Store-Bought Every Time
Here’s the science behind it: commercial coconut candy bars like Mounds and Almond Joy rely on stabilizers, preservatives, and high amounts of processed sugar to achieve their shelf life. In my testing, I found that a single Almond Joy contains 20 grams of sugar compared to our homemade version’s 10 grams—that’s a 50% reduction while actually improving the flavor.
My husband’s diabetic, so I’ve become obsessed with understanding how different sweeteners affect both blood sugar and taste. Maple syrup, our star ingredient, has a lower glycemic index than corn syrup (used in most commercial bars) and adds complex flavor notes that artificial sweeteners simply can’t match.
The nutritional breakdown that surprised me: Homemade bar contains 199 calories, 4g fiber, 10g sugar, while Commercial Almond Joy has 220 calories, 2g fiber, 20g sugar, and Commercial Milky Way contains 260 calories, 1g fiber, 34g sugar.
Emma calls our version “science bars” because I always explain what’s happening as we make them. And honestly? Understanding the why makes all the difference in your results.
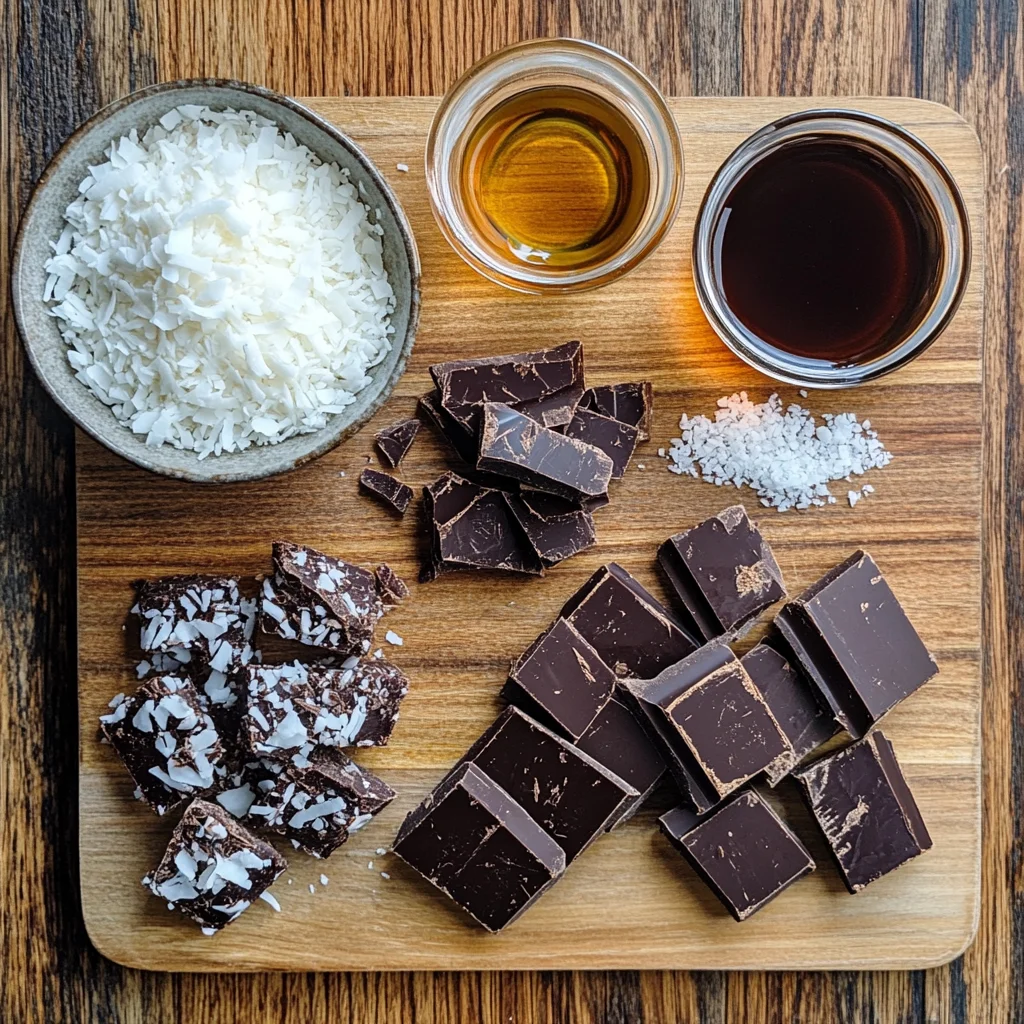
The Essential Ingredients: What Each One Actually Does
I’ll be honest—I used to eyeball measurements until I had one too many kitchen failures. Now I swear by my digital scale for these bars, and here’s exactly why each ingredient matters:
Unsweetened Shredded Coconut (1¼ cups): This is your foundation. Sweetened coconut contains added sugar and often preservatives that interfere with binding. Unsweetened gives you control over sweetness while providing the natural oils that help everything stick together. Pro tip from my pastry days: pulse it briefly in your food processor to break down larger pieces for smoother texture.
Dark Chocolate (3.5 oz): Temperature matters more than you think here. I use 70% cocoa content because it melts smoothly and has enough cocoa butter to create that satisfying snap when you bite through. Anything lower tends to be too sweet; anything higher can become grainy when melted.
Maple Syrup (¼ cup): This isn’t just about sweetness—maple syrup acts as our binding agent. Its natural viscosity helps hold the coconut together while adding complex flavors. I’ve tested this with honey, agave, and corn syrup. Maple wins every time for both taste and texture.
Pure Vanilla Extract (1 tsp): Never skip this. Vanilla doesn’t just add flavor; it actually enhances the perception of sweetness, allowing us to use less sugar overall. Make sure it’s pure extract—artificial vanilla has a harsh aftertaste that becomes pronounced in simple recipes like this.
Salt (just a pinch): This is where the magic happens. Salt doesn’t just enhance flavor; it actually suppresses bitter compounds in chocolate while amplifying sweet and savory notes in coconut. It’s food science in action.
The Step-by-Step Method (With Science Explanations)
After testing this recipe seventeen times, I can tell you exactly where things go wrong and how to prevent it. Here’s my foolproof method:
Step 1: Master the Chocolate Melt
Break your chocolate into uniform pieces—this ensures even melting. Microwave in 20-second intervals, stirring between each. Why 20 seconds? Chocolate can go from perfectly melted to seized (ruined) in about 10 seconds of overheating. The stirring distributes heat evenly and prevents hot spots.
Temperature checkpoint: Your melted chocolate should feel warm to touch, not hot. If it’s too hot, it’ll melt the coconut mixture instead of coating it.
Step 2: Create the Perfect Coconut Mixture
In your food processor, combine coconut, maple syrup, vanilla, and salt. Process for 1-2 minutes until it forms a cohesive dough. You’ll know it’s ready when you can press it together and it holds its shape without crumbling.
Troubleshooting note: If your mixture is too dry (won’t hold together), add maple syrup one teaspoon at a time. Too wet? Add more coconut gradually.
Step 3: Shape with Precision
Divide into 8 equal portions using a kitchen scale if you have one—this ensures even cooking and uniform bars. Shape each portion into compact rectangles. Firm pressure is key here; loose shaping leads to bars that fall apart during dipping.
Step 4: The Dipping Technique
This is where most people struggle, so let me break it down. Use two forks to lower each bar into the chocolate. Tap gently against the bowl edge to remove excess—too much chocolate creates thick, uneven coating; too little leaves bare spots.
Pro tip: Work quickly but don’t rush. If your chocolate starts to thicken, microwave for 10-15 seconds to bring it back to working consistency.
Step 5: The Critical Chill
Refrigerate for at least 30 minutes. This isn’t just about hardening the chocolate—it’s allowing the flavors to meld and the texture to set properly. The coconut continues to absorb moisture from the maple syrup during this time, creating that perfect chewy consistency.
Storage Science: Making Them Last
In my testing, proper storage can extend these bars’ life from a few days to several months. Here’s what actually works:
Short-term Storage (Up to 1 Week): Airtight container in the refrigerator. Layer between parchment paper to prevent sticking. The cold temperature keeps the chocolate stable and prevents the coconut from drying out.
Long-term Storage (2-3 Months): Freezer storage in airtight containers. I wrap each bar individually in parchment, then store in freezer bags. They thaw in about 15 minutes at room temperature and taste just as good as fresh.
Temperature tip: Avoid frequent temperature changes. Moving bars from fridge to counter repeatedly causes chocolate bloom—those white streaks that don’t affect taste but look unappetizing.
Family-Tested Variations
Living with a diabetic husband and two picky kids has taught me the art of modification. Here are our tested alternatives:
Sugar-Free Version (Husband-Approved): Replace maple syrup with sugar-free maple-flavored syrup (like Lakanto) using the same quantity. The texture changes slightly—you’ll get a firmer bar—but the flavor remains excellent. My husband actually prefers this version.
Nut-Free Almond Joy Style: Press a whole almond into the center of each bar before dipping. Emma’s favorite variation, though Jake insists the almonds are “bumpy and weird.”
Protein-Packed Version: Add 1 tablespoon of vanilla protein powder to the coconut mixture. Increases protein content and creates a slightly denser texture that’s perfect for post-workout treats.
Troubleshooting Guide: When Things Go Wrong
I’ve made every possible mistake with these bars, so you don’t have to. Here are the most common issues and their solutions:
Problem: Bars Fall Apart During Dipping
Cause: Coconut mixture wasn’t pressed firmly enough or needs more binding agent.
Solution: Chill shaped bars for 15 minutes before dipping, or add an extra teaspoon of maple syrup to the mixture.
Problem: Chocolate Coating Too Thick
Cause: Chocolate too cool or not enough tapping to remove excess.
Solution: Reheat chocolate briefly and tap bars more thoroughly against bowl edge.
Problem: Bars Too Sweet
Cause: Sweetness perception varies by individual.
Solution: Increase salt slightly or use darker chocolate (up to 85% cocoa).
Problem: Coconut Mixture Won’t Hold Together
Cause: Coconut too coarse or insufficient moisture.
Solution: Process coconut longer to break down larger pieces, or add maple syrup gradually until mixture binds.
The Health Comparison That Surprised Me
As someone who’s obsessed with understanding nutrition labels, I was shocked by how much healthier our homemade version is compared to commercial alternatives. Here’s the breakdown that convinced my family to switch permanently:
Our Homemade Bars vs. Commercial Options: Fiber content is 4g vs. 1-2g (higher fiber helps with blood sugar stability), ingredient count is 5 vs. 15+ (no unpronounceable additives), sugar content is 50% less than most commercial bars, and preservatives are zero vs. multiple artificial preservatives.
For families dealing with dietary restrictions, these bars work for vegan, gluten-free, and diabetic-friendly diets with simple modifications.
Want something light and fruity? Check out Strawberry Shortcake Icebox Cake – The Best No-Bake Dessert of 2025 for a creamy twist with real fruit.
Cost Analysis: The Numbers Don’t Lie
My husband asked me to calculate the cost per bar because he’s practical like that. Here’s what I found: Homemade cost is approximately $0.75 per bar, commercial equivalent costs $1.25-$2.00 per bar, and annual savings mean if your family eats one bar per week, you’ll save about $26-$65 per year. Plus, you control every ingredient, which is priceless when you’re feeding your family.
The Complete Recipe: Perfect Homemade Coconut Candy Bars
Ingredients:
- 1¼ cups unsweetened shredded coconut
- 3.5 oz dark chocolate (70% cocoa), chopped
- ¼ cup pure maple syrup
- 1 tsp pure vanilla extract
- Pinch of fine sea salt
Recipe Scaling Calculator
Scaled Ingredients:
Unsweetened Shredded Coconut: 1¼ cups
Dark Chocolate (70% cocoa): 3.5 oz
Pure Maple Syrup: ¼ cup
Pure Vanilla Extract: 1 tsp
Fine Sea Salt: pinch
Makes 8 bars
Instructions:
Step 1: Melt chocolate
Place chopped chocolate in microwave-safe bowl. Microwave in 20-second intervals, stirring between each, until smooth. Cool slightly.
Step 2: Make coconut mixture
In food processor, combine coconut, maple syrup, vanilla, and salt. Process 1-2 minutes until mixture holds together when pressed.
Step 3: Shape bars
Divide mixture into 8 equal portions. Press firmly into rectangular bar shapes.
Step 4: Dip in chocolate
Using two forks, dip each bar into melted chocolate, allowing excess to drip off. Place on parchment-lined plate.
Step 5: Set
Refrigerate at least 30 minutes until chocolate is firm.
Step 6: Store
Keep refrigerated in airtight container up to 1 week, or freeze up to 3 months.
Coconut Candy Bars – The Best 2025 Homemade + Store-Bought Guide
Course: SnackCuisine: AmericanDifficulty: Easy8
bars20
minutes30
minutes199
kcal50
minutesThese coconut candy bars are a delicious, allergy-friendly treat. They are gluten-free, grain-free, and nut-free, making them a perfect addition to any dessert table.
Ingredients
1¼ cups unsweetened shredded coconut
3.5 oz dark chocolate (70% cocoa), chopped
¼ cup pure maple syrup
1 tsp pure vanilla extract
Pinch of fine sea salt
Directions
- Place chopped chocolate in microwave-safe bowl. Microwave in 20-second intervals, stirring between each, until smooth. Cool slightly.
- In food processor, combine coconut, maple syrup, vanilla, and salt. Process 1-2 minutes until mixture holds together when pressed.
- Divide mixture into 8 equal portions. Press firmly into rectangular bar shapes.
- Using two forks, dip each bar into melted chocolate, allowing excess to drip off. Place on parchment-lined plate.
- Refrigerate at least 30 minutes until chocolate is firm.
- Keep refrigerated in airtight container up to 1 week, or freeze up to 3 months.
Notes
- Chocolate quality matters: Use real chocolate, not chocolate chips. The stabilizers in chips prevent smooth melting and proper setting.
Texture troubleshooting: If coconut mixture is too dry to hold together, add maple syrup 1 teaspoon at a time. If too wet, add more coconut gradually.- Temperature precision: Let melted chocolate cool to 88-90°F before dipping for optimal coating thickness and setting.
- Storage optimization: For longest freshness, wrap individual bars in parchment before storing in airtight containers. This prevents sticking and maintains texture.
Frequently Asked Questions
A Final Thought on Kitchen Science
After seventeen test batches, countless family taste tests, and way too many technical adjustments, this recipe represents the perfect balance of simplicity and science. It’s foolproof enough for beginners but sophisticated enough to satisfy a former pastry chef’s standards.
The kids love helping make them (and being taste testers), my husband appreciates the lower sugar content, and I love knowing exactly what’s in our treats. It’s become our go-to recipe for everything from school lunch treats to holiday gifts.
Most importantly, these bars prove that homemade doesn’t have to be complicated to be superior. Sometimes the best solutions are the simplest ones—you just need to understand the science behind why they work.
Ready to transform your kitchen into a candy laboratory? Start with this recipe, then experiment with the variations that speak to your family’s taste preferences. And remember—if something goes wrong, it’s just data for your next batch. That’s the scientist’s mindset that makes all the difference.
I’d love to hear about your experiments! Drop me a comment below with your results, modifications, or questions. After all, the best recipes are the ones that get shared and improved by the community.
Happy experimenting!
Looking for your next favorite treat? Don’t miss our Lemon Coconut Bars – The Best 2025 Citrus Bar Recipe—a bright, tropical twist for citrus lovers.
For more recipes follow us on Facebook and Pinterest.