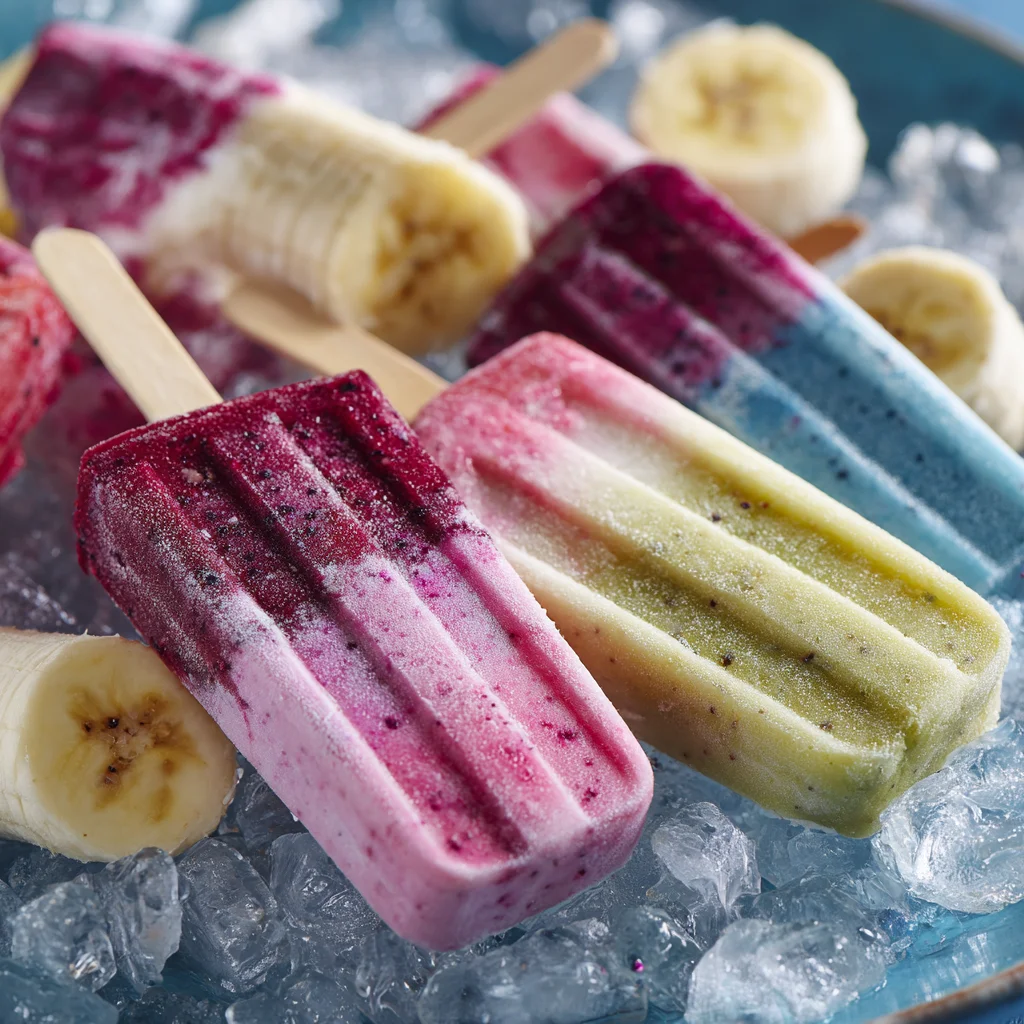
Frozen Banana Pops – The Best Healthy & Fun Treat for 2025
There’s something almost mystical about watching a child’s face light up when they bite into their first homemade chocolate-covered banana pop. Last week, during one of my cooking workshops, I watched eight-year-old Sofia take that magical first bite, and her eyes widened with pure delight. “Signora Zara,” she whispered, chocolate melting at the corners of her mouth, “this tastes like happiness!”
That moment took me straight back to my nonna’s kitchen in Tuscany, where simplicity wasn’t just a cooking philosophy—it was a way of life. She used to say, “Zara, cara mia, the best recipes don’t need a long list of ingredients. They need amore.” And honestly? These three-ingredient chocolate banana pops embody that wisdom perfectly.
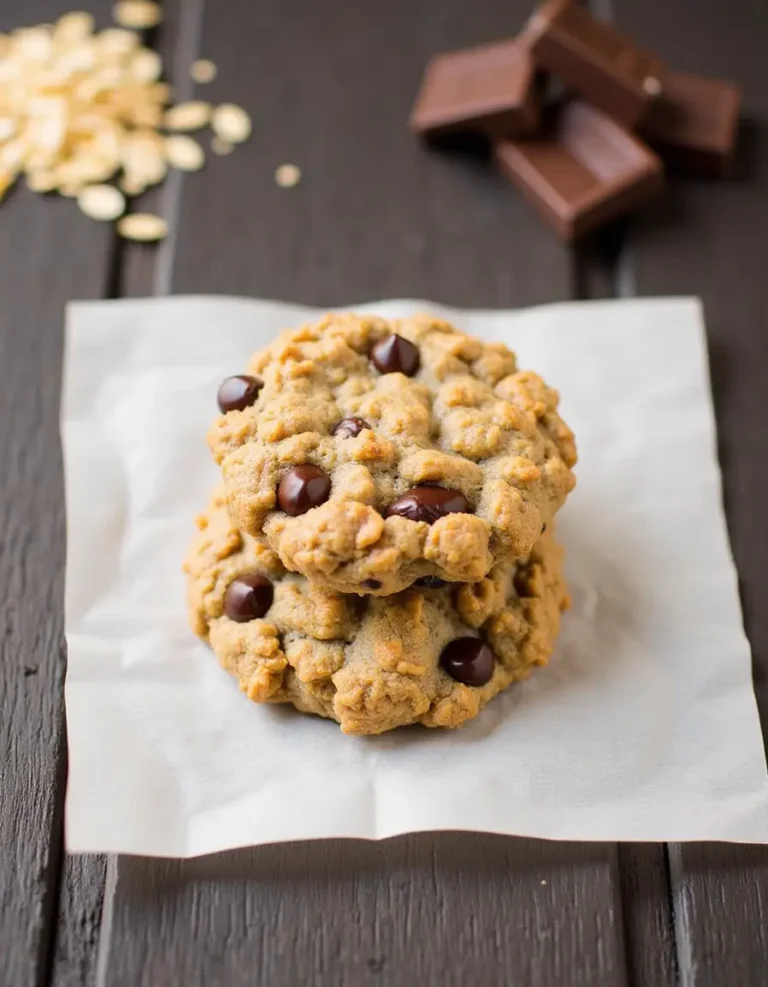
Looking for inspiration? Try our frozen Greek yogurt recipe too!
Quick Takeaways: Why You’ll Fall in Love with These Pops
- Ridiculously Simple: Just bananas, quality chocolate, and coconut oil—that’s it!
- Guilt-Free Indulgence: Naturally vegan, gluten-free, and refined sugar-free
- Kid and Adult Approved: Perfect for birthday parties, summer gatherings, or Tuesday night treats
- Customizable Magic: Endless topping possibilities to match any party theme or dietary need
- Make-Ahead Friendly: Stays fresh in the freezer for up to two months (if they last that long!)
The Story Behind My Obsession with Banana Pops
When I first moved to Portland, I was desperately homesick and clinging to every Italian recipe I knew. But then my neighbor’s daughter knocked on my door with a question that changed everything: “Can you make something frozen for my birthday party that doesn’t have all those weird chemicals?”
Picture this: me, standing in my tiny apartment kitchen, staring at overripe bananas and wondering how on earth I could create something special with what I had. That’s when it hit me—what if I treated these bananas like I would treat fruit for gelato back home, but with an American twist?
The result? Pure magic. And the best part? Every parent at that birthday party asked for the recipe. I’ve been perfecting it ever since, and now it’s become my signature treat for workshops, family gatherings, and those moments when you need something sweet but wholesome.
Why These Aren’t Your Average Frozen Treats
Let’s be honest—most store-bought frozen treats are loaded with ingredients you can’t pronounce and sugar that sends kids (and adults!) into orbit. These banana pops are different. When you bite through that glossy chocolate shell, you’re getting real fruit, quality chocolate, and the satisfaction of knowing exactly what you’re eating.
The science is beautiful, too. As bananas freeze, their natural starches convert to sugars, creating this incredibly creamy, almost ice cream-like texture. It’s like nature’s own gelato base! And when you pair that with high-quality chocolate that snaps perfectly between your teeth? Pure bliss.
I’ve served these at elegant dinner parties alongside sophisticated desserts, and guess what disappears first? Yep, these humble banana pops. There’s something universally appealing about that satisfying crunch followed by creamy sweetness.
The Art of Choosing Your Ingredients
Now, here's where my Italian sensibilities kick in. We're only using three ingredients, which means each one has to be absolutely perfect. Think of it like a beautiful aria—every note matters.
Bananas: Your Sweet Canvas
You want bananas that are yellow with just a few brown spots—what I like to call "perfectly imperfect." They should still feel firm when you press them gently. Too green, and they'll taste starchy and bitter when frozen. Too ripe, and they become icy instead of creamy. It's all about finding that sweet spot where the natural sugars have developed but the texture remains intact.
I learned this the hard way during my early experiments. My first batch used overripe bananas because, well, waste not, want not, right? Wrong! They turned into banana-flavored ice cubes. Not exactly the creamy dream I was going for.
Chocolate: The Star of the Show
This is where I get a little passionate (okay, very passionate). Please, please don't use chocolate chips for this recipe unless you're absolutely certain they're wax-free. Most commercial chocolate chips contain wax to help them hold their shape during baking, which means they won't melt into that gorgeous, glossy coating we're after.
Instead, invest in a good-quality chocolate bar and chop it yourself. I personally love Pacari or Hu Kitchen for their clean ingredients and incredible flavor. Dark chocolate works beautifully, but don't be afraid to experiment with milk chocolate or even white chocolate for variety.
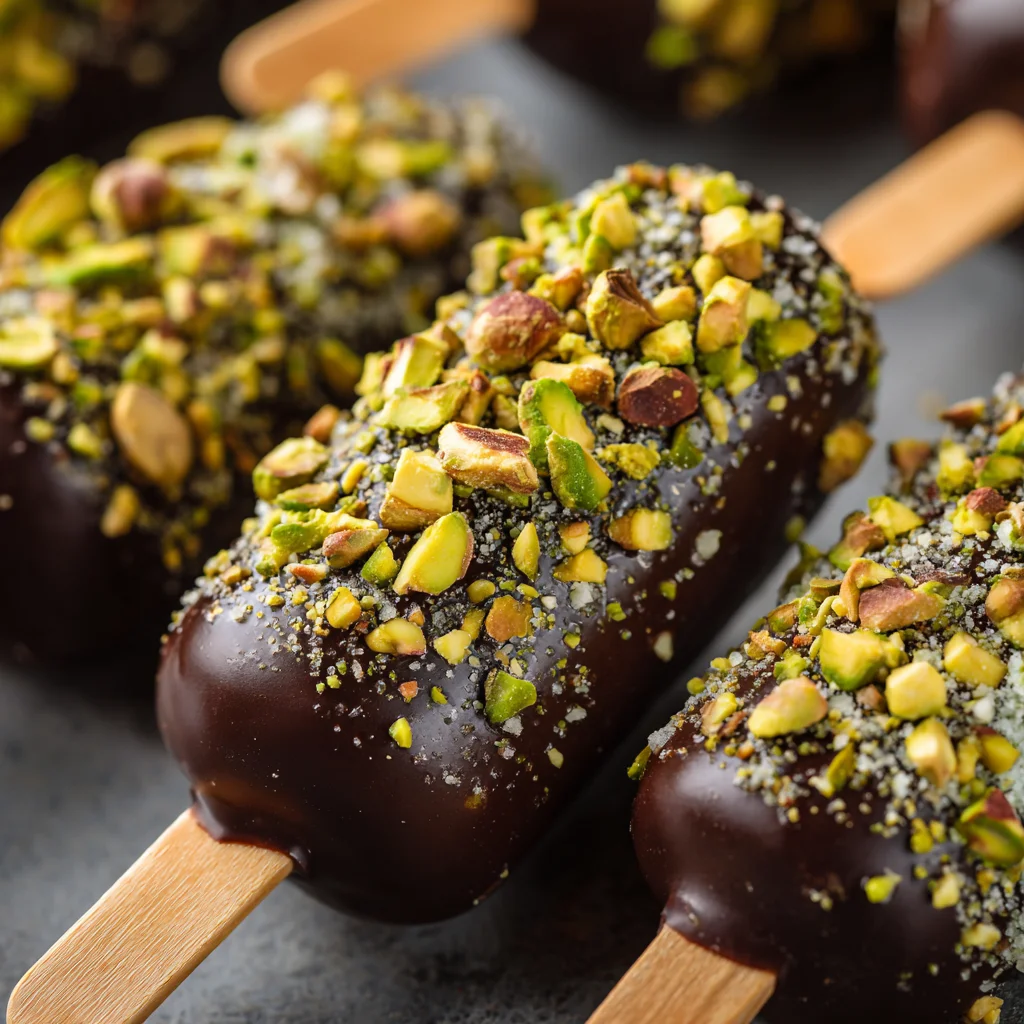
Here's a little insider secret: if you're making these for a party, try using different types of chocolate for visual variety. Some dark, some milk, maybe even some with interesting flavors like sea salt or espresso. Your guests will think you're a genius!
Coconut Oil: The Unsung Hero
This is the ingredient that transforms your chocolate from good to absolutely spectacular. Refined coconut oil (the kind with no coconut flavor) makes your chocolate coating smooth, glossy, and perfectly snappy when frozen. It's like having a professional chocolatier's secret weapon in your home kitchen.
You could skip it, but trust me—don't. The difference is remarkable. Without it, your chocolate coating might be a bit thick and less elegant. With it? Pure perfection.
The Step-by-Step Magic (It's Easier Than You Think!)
Honestly, calling this a "recipe" feels almost too formal. It's more like a delightful kitchen adventure that happens to result in the most amazing frozen treats.
The Prep: Setting Yourself Up for Success
Start by lining a baking sheet with parchment paper—this is your staging area. Peel your bananas and cut them in half crosswise. Now comes the fun part that kids absolutely love: inserting the popsicle sticks! Push them gently into the cut side of each banana half, about halfway through.
Space them out on your prepared baking sheet like little soldiers, making sure they're not touching. Into the freezer they go for at least four hours, though I usually do this step the night before. There's something satisfying about knowing your treats are quietly becoming perfect while you sleep.
The Chocolate Alchemy
This is where the magic happens, and where I get to channel my inner chocolate artist. You can melt your chocolate using either a double boiler (my preferred method) or the microwave—both work beautifully.
For the double boiler method, fill a saucepan with about an inch of water and bring it to a gentle simmer. Place your chopped chocolate and coconut oil in a glass bowl that fits snugly over the pan, making sure the bottom doesn't touch the water. Stir frequently with a clean, dry spatula as it melts—there's something almost meditative about watching chocolate transform from solid to liquid silk.
If you're using the microwave, combine your chocolate and coconut oil in a microwave-safe bowl. Heat for 60 seconds, then stir well. Continue heating in 20-second intervals, stirring between each one. Once it's about 80% melted, remove it and let the residual heat finish the job. This prevents overheating, which can make your chocolate seize up (trust me, I learned this lesson the hard way!).
The Grand Finale: Dipping and Decorating
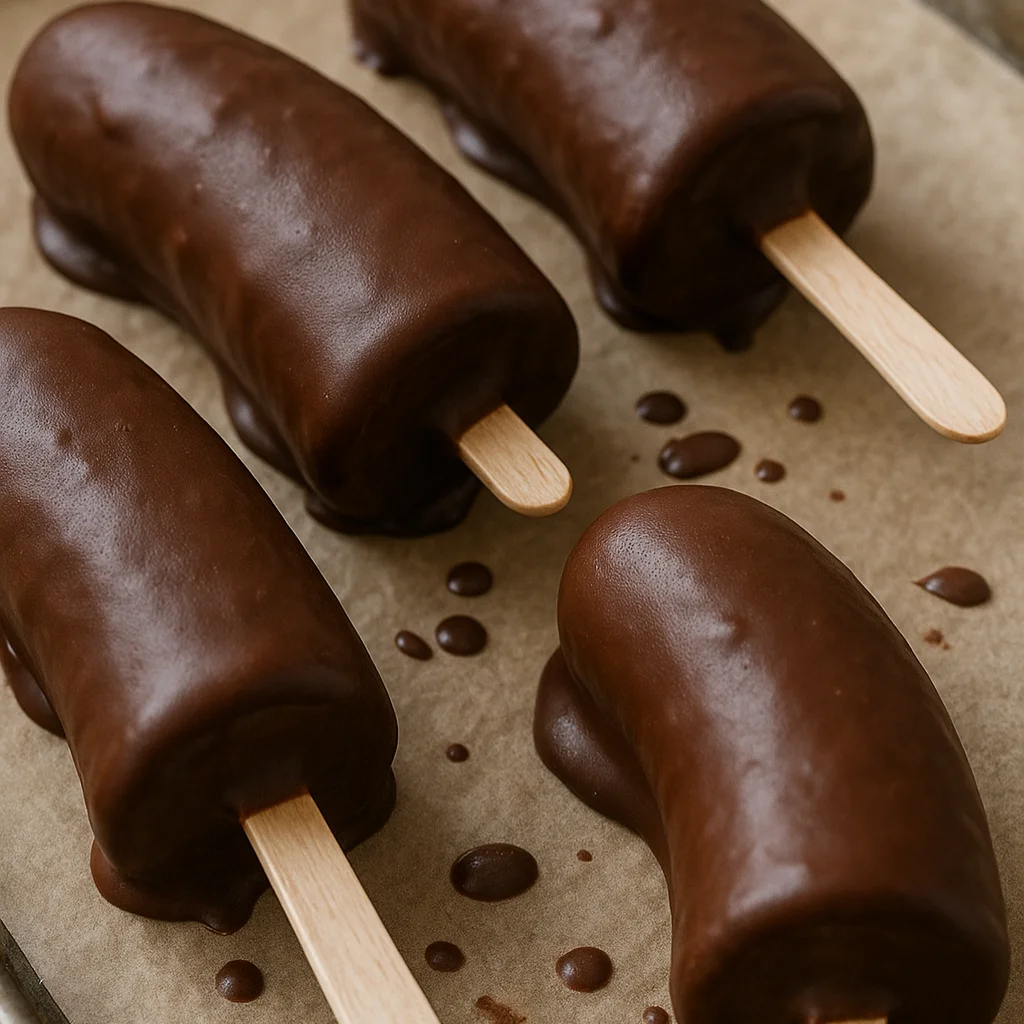
Here's where things get beautifully messy and incredibly fun. Remove your frozen bananas from the freezer once your chocolate is perfectly melted. Working quickly but calmly, hold each banana over the bowl and use a large spoon to pour the chocolate over every surface.
I recommend pouring rather than dunking—it keeps your melted chocolate at the right temperature longer. Hold each pop upside down for a few seconds to let excess chocolate drip off, then place it back on your parchment-lined tray.
If you're adding toppings (and oh, the possibilities!), now's your moment. The chocolate hardens quickly against the frozen banana, so you need to move fast. It's like decorating cookies, but with more urgency and arguably more fun.
Creative Variations That Will Blow Your Mind
This is where my American spirit of experimentation really shines. The basic recipe is perfect, but why stop there? Here are some combinations that have become absolute favorites in my workshops:
The Tuscan Dream
Roll your chocolate-covered banana in chopped toasted hazelnuts and a sprinkle of flaky sea salt. It tastes like a sophisticated Nutella experience and always reminds me of gelato from my childhood.
The American Classic
Crushed peanuts and a drizzle of melted peanut butter over the chocolate. It's like a frozen Snickers bar, but infinitely better for you.
The Tropical Escape
Shredded coconut and chopped dried pineapple. Close your eyes and you're on a beach somewhere warm, even in the middle of winter.
The Kid's Birthday Party Special
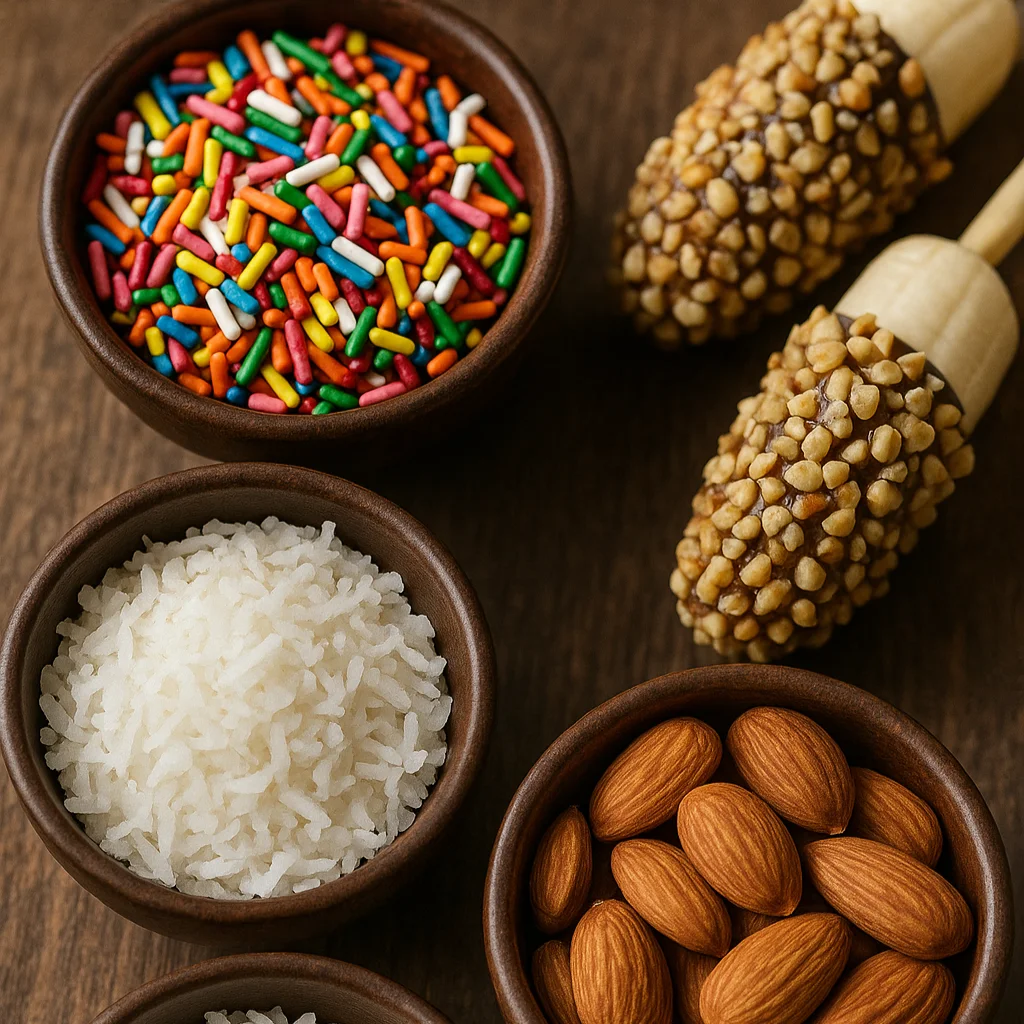
Here's where things get really fun. For children's parties, I like to set up a "banana pop decorating station" with various toppings in small bowls: colorful sprinkles, mini chocolate chips, crushed cookies, even freeze-dried strawberries. Let the kids go wild—the messier, the better!
Pro Tips That Make All the Difference
After making literally hundreds of these pops (no exaggeration—my workshop students are obsessed!), I've learned a few tricks that separate good banana pops from absolutely incredible ones.
First, timing is everything with the toppings. The moment that chocolate hits the frozen banana, it starts to set. You've got maybe 10-15 seconds to get your toppings on there. I like to have everything prepped and within arm's reach before I start dipping.
Second, if you're making a large batch for a party, work in small batches of 3-4 pops at a time. This keeps your chocolate at the perfect temperature and prevents that rushed, frantic feeling that can take the joy out of cooking.
Third, don't be afraid to double-dip! If your first coating seems a bit thin, let it set for a minute, then dip again. The result is an incredibly luxurious, thick chocolate shell that's absolutely divine.
Making These Pops Party-Perfect
I've served these at everything from elegant dinner parties to chaotic children's birthdays, and they're always a hit. For adult gatherings, I like to present them on a marble platter with small bowls of sophisticated toppings like crushed pistachios, espresso powder, or even a small dish of good olive oil with flaky salt for an unexpected Italian twist.
For kids' parties, presentation is half the fun. I use tall glasses filled with colorful candies or beans to hold the pops upright, creating an edible bouquet that doubles as party decoration. The kids love picking their favorite combinations, and parents love that they're not pumping their children full of artificial everything.
Pro party tip: make twice as many as you think you need. Seriously. I've never, ever had leftovers of these at a gathering. Adults who claim they "don't really like sweets" will quietly grab seconds when they think no one's looking.
The Science of Why These Work So Well
There's actual food science magic happening here, and understanding it makes the recipe even more satisfying. When bananas freeze, their cell walls break down slightly, creating that creamy, almost custard-like texture. The natural sugars become more concentrated, which is why frozen bananas taste sweeter than fresh ones.
The coconut oil in the chocolate serves multiple purposes. It lowers the melting point slightly, making the chocolate easier to work with, and creates that satisfying snap when you bite through it. It also gives the coating a beautiful glossy finish that looks professionally made.
The contrast between the cold, creamy banana and the crisp chocolate shell creates what food scientists call "textural interest"—basically, your brain gets excited by the variety of sensations, making the treat more satisfying than it would be if everything was the same texture.
Troubleshooting: When Things Don't Go as Planned
Let's be honest—not every batch is perfect, and that's completely okay! I've had my share of chocolate disasters and banana mishaps. Here's how to fix the most common issues:
If your chocolate is too thick: Add a tiny bit more coconut oil, one teaspoon at a time, until it reaches the right consistency. It should flow smoothly off a spoon.
If your chocolate seizes up: This usually happens if water gets into the chocolate. Unfortunately, there's no fixing seized chocolate, but you can prevent it by making sure all your utensils are completely dry.
If your bananas are getting icy: This usually means they were either too ripe when you froze them, or they've been in the freezer too long without coating. The chocolate coating actually helps preserve that creamy texture.
If your toppings won't stick: Work faster! The chocolate sets quickly on the frozen banana. Have all your toppings ready to go before you start dipping.
Storage and Make-Ahead Magic
One of the things I love most about these pops is how wonderfully they keep. Once the chocolate is completely set (about 10 minutes after dipping), you can store them in a freezer-safe container or bag for up to two months. Though honestly, they've never lasted more than a week in my house!
For parties, I like to make them 2-3 days in advance. They're actually better after sitting in the freezer for a day—the flavors meld beautifully, and the texture becomes even more perfect.
If you're gifting them (which people absolutely love, by the way), wrap each pop individually in small cellophane bags tied with ribbon. They look incredibly professional and thoughtful.
Frozen Banana Pops – The Best Healthy & Fun Treat for 2025
Course: SnackCuisine: AmericanDifficulty: Easy12
pops15
minutes4
hours140
kcalPeel bananas and insert popsicle sticks, freeze for 4+ hours · Melt high-quality vegan chocolate with coconut oil using microwave or double boiler · Dip frozen bananas in melted chocolate, add toppings immediately · Store in freezer for up to 2 months
Ingredients
6 ripe bananas (yellow with brown spots, but firm)
8 oz high-quality vegan chocolate, chopped
1½ tbsp refined coconut oil
Optional toppings: chopped nuts, shredded coconut, granola, cacao nibs, flaky salt
Directions
- Prep & Freeze: Line baking sheet with parchment paper. Peel bananas, cut in half, insert popsicle sticks into cut side. Place on baking sheet and freeze 4+ hours.
- Melt Chocolate: Combine chocolate and coconut oil. Microwave: Heat 60 seconds, stir, then 20-second intervals until 80% melted. Double boiler: Simmer water in pan, place bowl on top, stir until 80% melted. Remove and stir until smooth.
- Dip & Decorate: Remove bananas from freezer. Hold each over chocolate bowl, pour chocolate over all sides with large spoon. Let excess drip off. Add toppings immediately while chocolate is wet.
- Serve: Enjoy immediately or store in freezer up to 2 months in freezer-safe container.
Notes
- The quality of your chocolate makes an enormous difference in the final result. Invest in good chocolate—you'll taste the difference, and your pops will look more professional.
- If you're making these for a party, consider setting up a DIY topping station. Guests love customizing their own pops, and it becomes an interactive part of the entertainment.
- These pops are naturally vegan and gluten-free, making them perfect for guests with dietary restrictions. Just double-check that your chocolate and any toppings align with specific dietary needs.
- For an extra special touch, try using different shaped molds or cookie cutters to create themed banana pops for holidays or special occasions.
Why Your Family Will Thank You
In a world of complicated recipes and endless ingredient lists, there's something deeply satisfying about creating something this delicious with just three simple components. Every time I make these, I'm reminded of why I fell in love with cooking in the first place—it's not about impressing anyone or following complicated techniques. It's about bringing joy to people you care about.
These pops represent everything I love about the fusion of my Italian heritage with American creativity. They're simple like nonna's recipes, but playful and adaptable in that wonderful American way. They bring families together in the kitchen, create lasting memories, and prove that the best things in life really are often the simplest.
So go ahead, grab some bananas and good chocolate, and create a little magic in your kitchen. Whether it's a Tuesday afternoon treat for your kids, a sophisticated ending to a dinner party, or just something special for yourself after a long day, these pops deliver pure happiness in every bite.
And when you see that look of pure delight on someone's face—the same look I saw on little Sofia's—you'll understand exactly what nonna meant about cooking with amore. Because that's what these simple banana pops really are: love, frozen and covered in chocolate.
Your Turn to Create Magic
I'd love to hear about your banana pop adventures! What toppings did you try? Did you create any flavor combinations that surprised you? Tag me on social media with your creations—there's nothing that makes me happier than seeing families create delicious memories together in their own kitchens.
Remember, cooking isn't about perfection. It's about joy, experimentation, and sharing something delicious with the people you love. So embrace the messiness, laugh at the mistakes, and celebrate the simple magic of transforming three humble ingredients into something absolutely extraordinary.---
Don’t miss our viral no bake tiramisu and frozen Greek yogurt recipe for even more freezer-friendly desserts!
For more recipes follow us on Facebook and Pinterest.