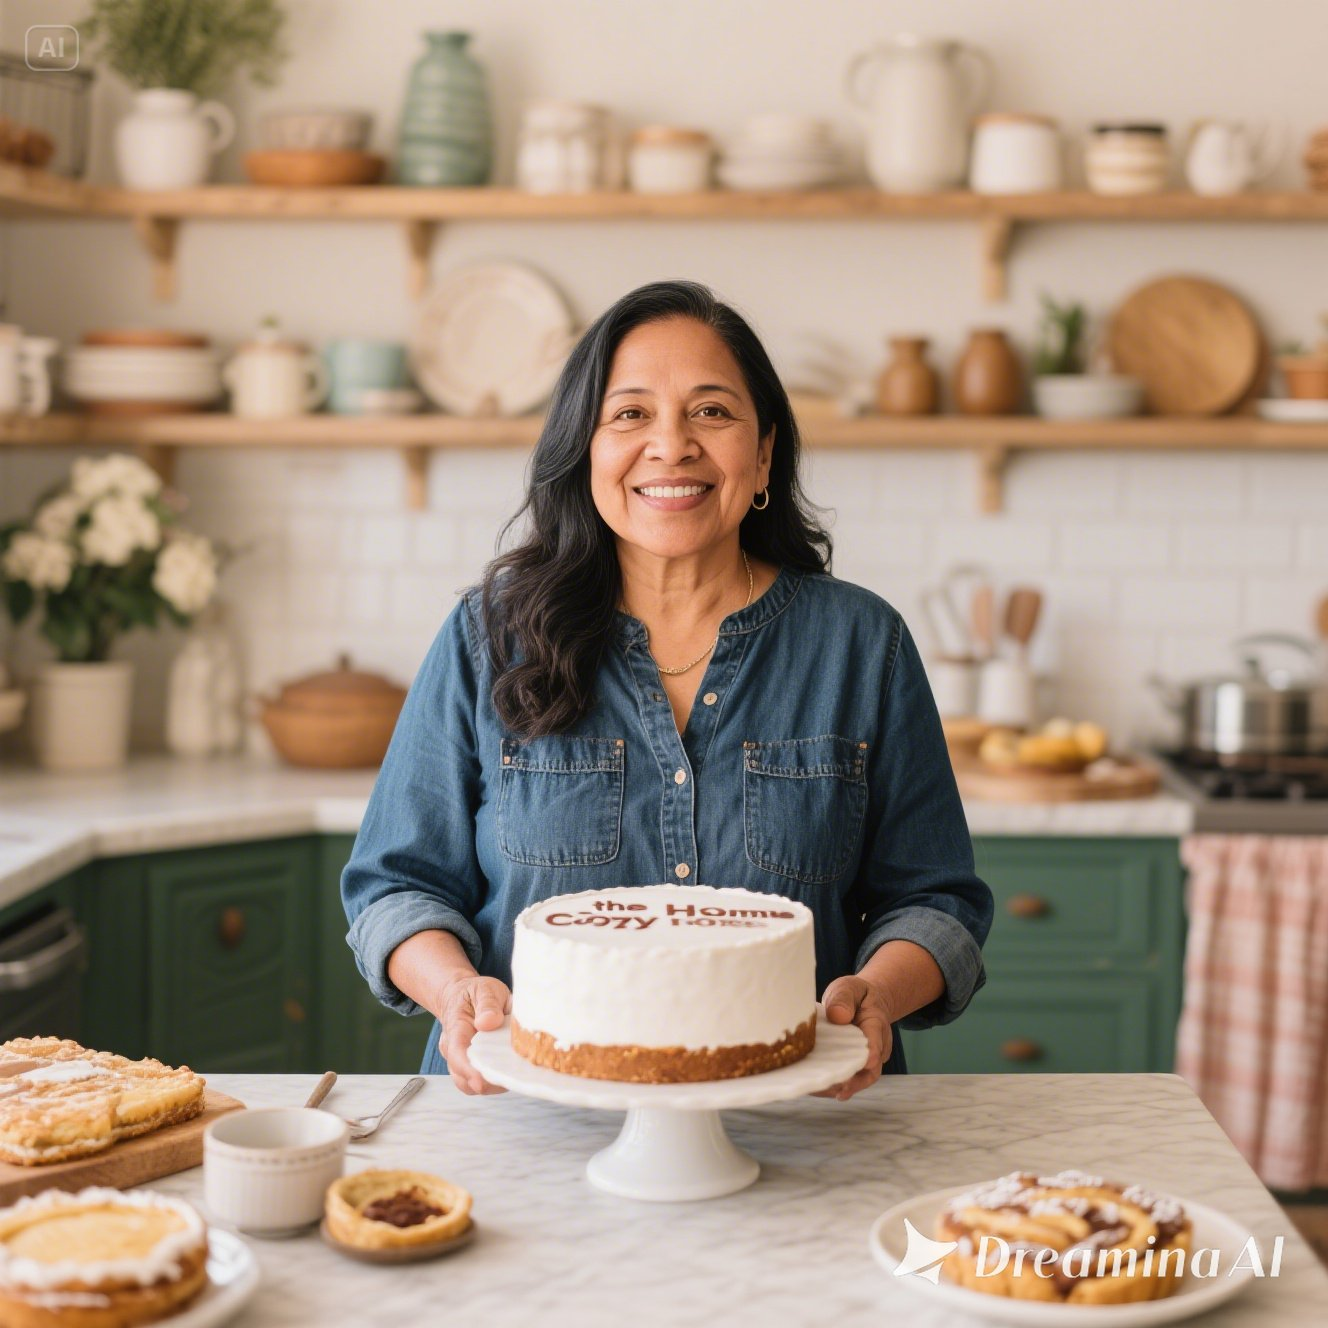
No Bake Chocolate Desserts: Easy Recipes That Don’t Need an Oven
Let me tell you something about no bake chocolate desserts—they saved my sanity more times than I can count. When Sofia was little and I was juggling work, caring for my mother, and trying to keep our little family fed, the last thing I wanted to do on a hot Texas evening was turn on the oven. That’s when I learned what my abuela had known all along: some of the best desserts don’t need heat at all.
I remember the first time I tried making no-bake cookies. I was twenty-two and thought I knew everything. I actually put them in the oven because I didn’t understand what “no-bake” meant. My abuela laughed so hard she had tears in her eyes. “Mija,” she said, “sometimes the best cooking happens when you keep the oven off.” She was right, as always.
These days, no-bake chocolate desserts are my secret weapon. They’re perfect for busy weeknights, summer gatherings when you don’t want to heat up the kitchen, or those moments when you need something sweet but don’t have the energy for complicated baking. And the best part? You don’t need fancy equipment or expensive ingredients. If I can make these with the same mixing bowl I’ve had for fifteen years, trust me, you can too.
Table of Contents
Why No Bake Chocolate Desserts Are Perfect for Every Kitchen
There’s something magical about desserts that come together without an oven. When Sofia brings friends over after school, I can whip up a batch of chocolate treats in the time it would take to preheat the oven. My neighbor Mrs. Johnson always asks how I do it, and I tell her the same thing every time: it’s not about fancy techniques or special skills. It’s about knowing a few good recipes and having confidence in the process.
The practical benefits are real. During the summer months here in Austin, running the oven can make your kitchen feel like a sauna. Your electric bill will thank you for keeping that oven off. Plus, when you’re working with a tight budget like I often am, no-bake desserts are incredibly economical. Most of them use pantry staples you probably already have—chocolate, butter, sugar, oats, peanut butter. No need for special cake pans or expensive baking equipment.
But beyond the practical reasons, there’s something deeply satisfying about making desserts this way. It reminds me of helping my abuela in her kitchen, watching her transform simple ingredients into something wonderful without ever touching an oven dial. She’d melt chocolate on the stovetop, stir in whatever she had on hand, and create magic. That’s the tradition I’m passing down to Sofia now.
For beginners, these recipes are forgiving. You can’t overbake them because there’s no baking involved. You won’t end up with a dry cake or burned edges. The most common mistake is not chilling them long enough, but even that’s an easy fix—just give them more time in the refrigerator. I’ve learned this through plenty of trial and error, and I’m here to share those lessons so you don’t have to make the same mistakes I did.
Essential Ingredients for No Bake Chocolate Treats
Walk into my kitchen, and you’ll find the same ingredients my abuela kept in hers. I shop at our local Mexican market where prices are reasonable and quality is excellent, but honestly, you can find everything you need at any regular grocery store. The secret isn’t expensive chocolate from fancy shops—it’s knowing how to work with what you have.
Chocolate is obviously the star. I keep both cocoa powder and chocolate chips in my pantry at all times. For cocoa powder, any unsweetened variety works beautifully. My abuela used whatever was on sale, and her desserts were legendary. Chocolate chips are perfect for melting—semi-sweet is my go-to because it’s not too bitter and not too sweet. Sometimes I’ll grab a chocolate bar and chop it up myself, especially if I find a good deal. The key is making sure it’s real chocolate, not chocolate-flavored coating.
Butter and coconut oil serve as your binding agents. I usually use regular butter because it’s what I always have on hand, but coconut oil works wonderfully if you’re cooking for someone who can’t have dairy. Sofia’s best friend is lactose intolerant, so I’ve gotten good at making dairy-free versions. Both create that smooth, creamy texture that makes no-bake desserts so irresistible.
Sweeteners give you options. I typically use regular granulated sugar, but honey, maple syrup, and even agave nectar can work depending on the recipe. My mother is watching her sugar intake these days, so I’ve experimented with alternatives. The liquid sweeteners add moisture, which can be a good thing in no-bake recipes. Just remember they’ll also add their own flavor—honey tastes like honey, maple syrup tastes like maple. Sometimes that’s exactly what you want.
Base ingredients provide structure. This is where no-bake desserts get creative. Graham crackers crushed into crumbs make incredible crusts. Oats give you that chewy texture everyone loves. Nuts add richness and crunch—I buy them in bulk and store them in the freezer so they’re always fresh. Cookies, whether store-bought or leftover homemade ones, can be crushed and transformed into something entirely new. Sofia and I have made some of our best desserts by using up odds and ends from the pantry.
Don’t forget the flavor enhancers. Vanilla extract is non-negotiable in my kitchen—it makes everything taste better. A pinch of salt balances the sweetness and makes the chocolate flavor deeper. Peanut butter shows up in so many of my no-bake recipes because it adds protein, creaminess, and that classic combination with chocolate that nobody can resist. I buy the big jar from the warehouse store because we go through it quickly.
The beauty of these ingredients is their versatility. Most of them serve multiple purposes in your kitchen. That jar of peanut butter? It’s for sandwiches, smoothies, and desserts. Those graham crackers? Snacks and dessert crusts. You’re not buying single-use specialty items that sit in your pantry unused. Everything earns its place.
The Basic Techniques You Need to Know
Here’s what I wish someone had told me when I first started making no-bake desserts: the techniques are actually simpler than traditional baking, but they still matter. You can’t just throw everything together and hope for the best. Well, you can—I’ve done it—but you’ll get better results if you understand a few fundamental principles.
Melting chocolate properly is your first skill. I do this on the stovetop in a small pot over low heat. The key word is low. If you rush it with high heat, your chocolate will seize up and turn grainy. Stir it constantly and be patient. Sometimes I use a double boiler if I’m feeling fancy, but honestly, a regular pot works fine if you keep the heat gentle. You want the chocolate to melt smoothly and evenly. When it starts to look shiny and liquid, you’re there.
Sofia learned this lesson the hard way when she tried to make chocolate treats for her school project. She cranked up the heat because she was in a hurry, and the chocolate turned into a lumpy mess. We had to start over, but now she knows—patience pays off. “Low and slow, Mom,” she reminds me now, and I smile every time.
Mixing ingredients in the right order matters. Usually, you’ll melt your chocolate and butter together first, then add your sweeteners, then your dry ingredients. This isn’t arbitrary. The fat from the chocolate and butter coats everything else, helping ingredients combine smoothly. If you add cold ingredients to hot chocolate, you might get clumps. Let things cool slightly if you’re adding temperature-sensitive ingredients like peanut butter.
Temperature control is crucial even without an oven. Room temperature ingredients mix better than cold ones. I take my butter out of the refrigerator about thirty minutes before I start cooking. If I forget, I cut it into small pieces so it softens faster. The exception is when you’re making something that needs to set quickly—then you might want some ingredients cold. It depends on the recipe, but understanding temperature will save you from many failed batches.
The refrigerator is your oven. This is what sets no-bake desserts apart. Where traditional desserts transform in the heat of an oven, these transform in the cold of your refrigerator. Most no-bake chocolate desserts need at least two to three hours to set properly, though overnight is often better. I know it’s tempting to cut that time short—believe me, I’ve tried—but patience here makes the difference between desserts that hold together and desserts that fall apart when you try to cut them.
Pressing and shaping requires a gentle hand. When you’re making something like no-bake bars or a crust, press firmly enough that everything holds together, but not so hard that you compress all the air out. I use the bottom of a measuring cup or my hands. If the mixture is sticky, wet your hands or the measuring cup slightly. This little trick has saved me so much frustration over the years.
My abuela always said cooking is about understanding, not just following instructions. Once you understand why you’re doing something, you can adapt and improvise. That’s when cooking becomes truly yours.
Classic No Bake Chocolate Cookies
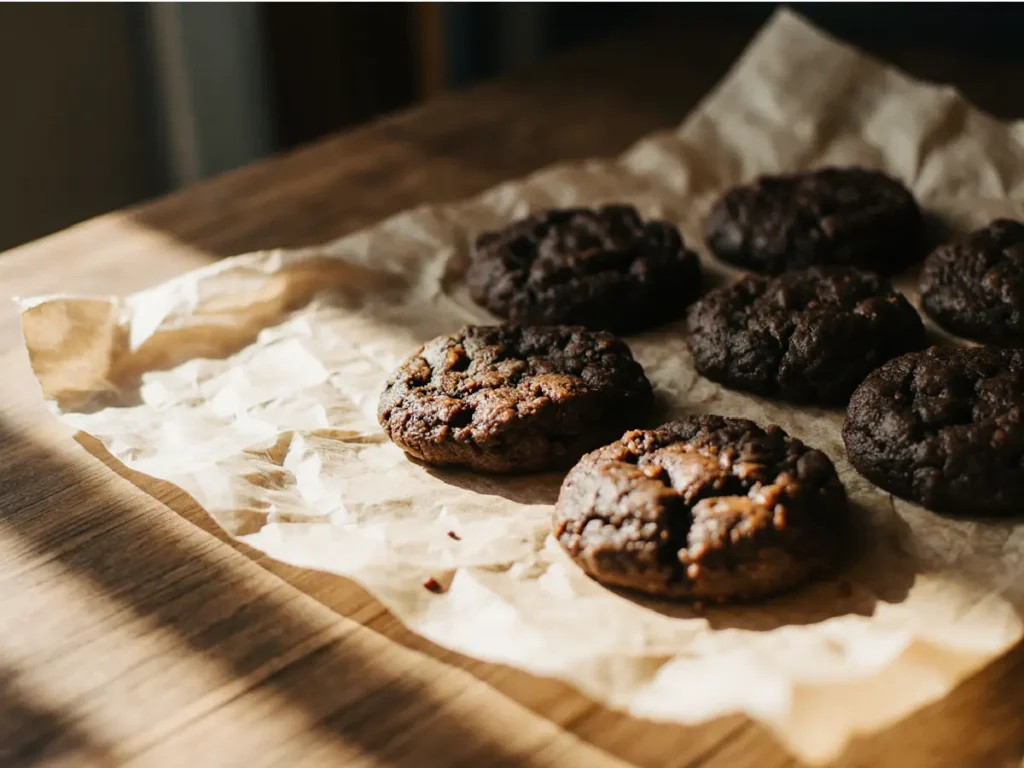
These are the desserts that started it all for me. After my initial disaster of trying to bake no-bake cookies, I finally learned to make them properly, and they’ve been a staple ever since. Sofia calls them “quick cookies” because we can make them on a Tuesday evening when she suddenly remembers she needs treats for a school event the next day.
The classic version is beautifully simple. You bring sugar, butter, milk, and cocoa powder to a boil on the stovetop, let it bubble for a minute, then remove it from heat and stir in oats, peanut butter, and vanilla. Drop spoonfuls onto wax paper, let them cool, and you’re done. The whole process takes maybe twenty minutes from start to finish, and half of that is just waiting for them to set.
I’ve made these cookies hundreds of times, and I’ve learned all the little tricks. The boiling step is crucial—you need a full rolling boil for about one minute. Too short and they won’t set. Too long and they’ll be crumbly instead of chewy. I set a timer now because I learned this lesson through many failed batches. When Sofia was younger, she’d stand on a chair next to me, watching the timer count down like it was the most exciting thing in the world.
The texture should be chewy and slightly fudgy. If your cookies turn out crumbly, you didn’t boil the mixture long enough. If they’re too soft and won’t set, you might have added too much liquid or not used enough oats. I keep a mental note of the consistency before I drop them onto the wax paper—it should look thick and glossy, like a thick brownie batter.
Flavor variations are endless. Sometimes I add a handful of chocolate chips to the hot mixture and let them melt in. Other times I’ll throw in some shredded coconut or chopped nuts. My mother loves when I add a pinch of cinnamon and a tiny bit of cayenne pepper—it gives them a Mexican hot chocolate flavor that reminds her of her childhood. Sofia prefers the classic version, but she’s starting to experiment too. Last month she added dried cherries, and they were surprisingly delicious.
Storage is easy. I keep these in an airtight container at room temperature, and they last about a week. Though in our house, they rarely make it past three days. Mrs. Johnson always asks for the recipe, and every time I share it, she tells me she can’t believe something so simple tastes so good. That’s the magic of these cookies—they’re accessible to everyone.
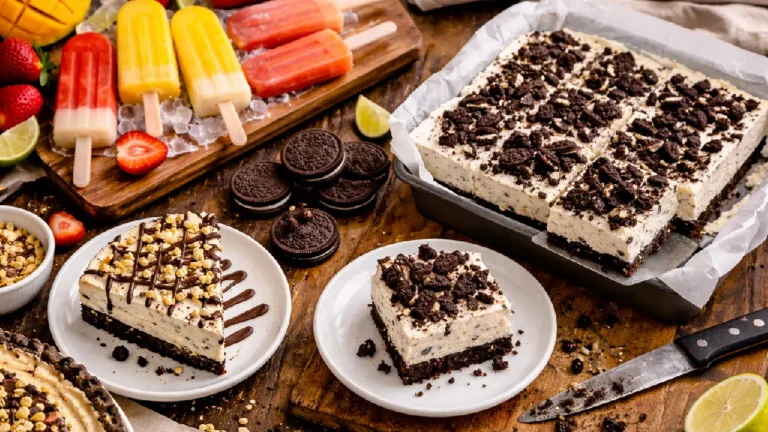
No Bake Chocolate Cheesecake
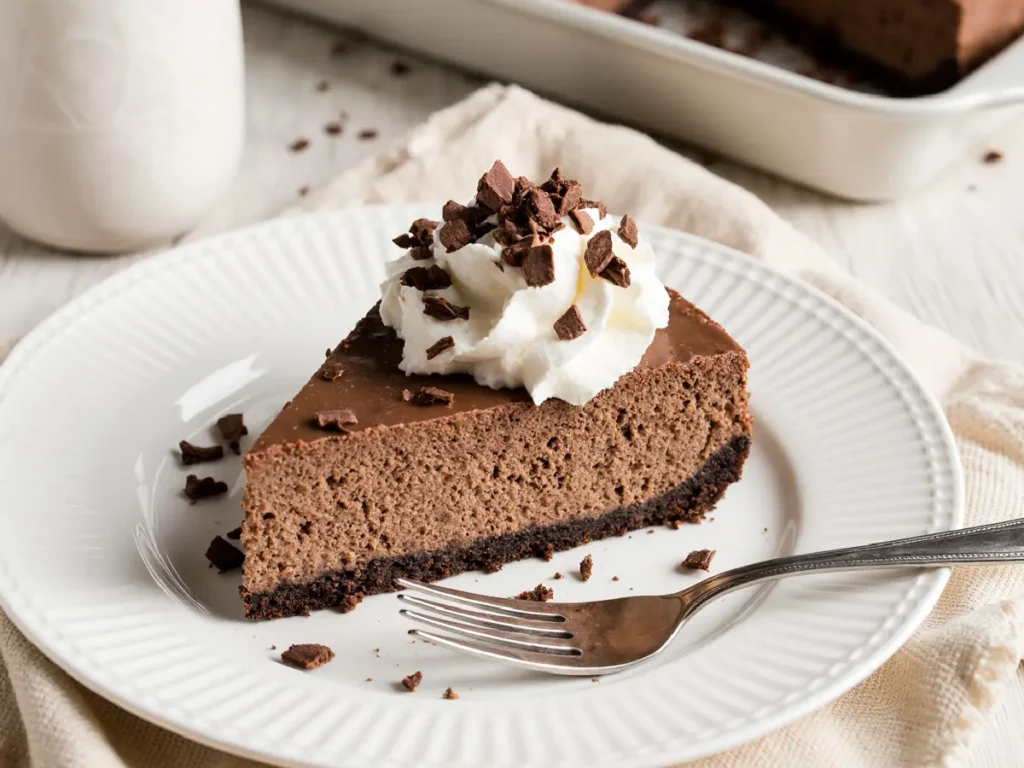
This dessert feels fancy, but I promise you it’s not complicated. The first time I made it, I was hosting a small gathering and wanted something impressive without spending hours in the kitchen. When my guests asked where I bought it, I couldn’t help but smile. “Made it myself this afternoon,” I told them, “and the oven never came on.”
The crust is your foundation. I crush graham crackers in a plastic bag with a rolling pin—no need for a food processor, though you can use one if you have it. Mix those crumbs with melted butter and a little sugar, press it into the bottom of a springform pan, and chill it while you make the filling. Sometimes I use chocolate graham crackers or even Oreos with the filling scraped out. Both work beautifully.
Sofia loves helping with this part. She puts the graham crackers in the bag, and I let her roll them while I work on other things. It’s become our rhythm—she crushes, I melt, we press together. These are the moments I’ll remember when she’s grown and gone, the simple acts of making something together.
The filling is where chocolate takes center stage. Cream cheese should be at room temperature—this is important. Cold cream cheese will give you lumps, and nobody wants lumpy cheesecake. I beat it until it’s smooth and fluffy, then add melted chocolate that’s cooled slightly, some powdered sugar, vanilla, and a bit of heavy cream. The mixture should be silky and rich. Sometimes I fold in some whipped cream at the end to make it even lighter.
Melting the chocolate for the filling requires patience. I use the same low-and-slow method I described earlier. Once it’s melted, I let it cool for about ten minutes before adding it to the cream cheese. If it’s too hot, it can make the cream cheese too soft. If it’s too cool, it might seize up. Room temperature is your goal—warm enough to mix smoothly, cool enough not to cause problems.
Chilling time is essential. This needs at least four hours in the refrigerator, but overnight is better. I usually make it the day before I need it. The cheesecake needs time for all those ingredients to meld together and for the filling to set properly. I know waiting is hard—the smell of chocolate fills your kitchen and tests your willpower—but trust me on this one.
Toppings let you personalize it. Sometimes I keep it simple with a dusting of cocoa powder. Other times I’ll add fresh berries, a drizzle of chocolate sauce, or some whipped cream. My mother likes when I add a layer of cajeta (Mexican caramel) on top before serving. Sofia’s favorite version has crushed Oreos sprinkled over the top. The base recipe is the same; the toppings make it new each time.
This dessert has gotten me through so many occasions—birthdays, holidays, casual dinners with friends. It looks like you spent hours on it, but we both know better. That’s our secret.
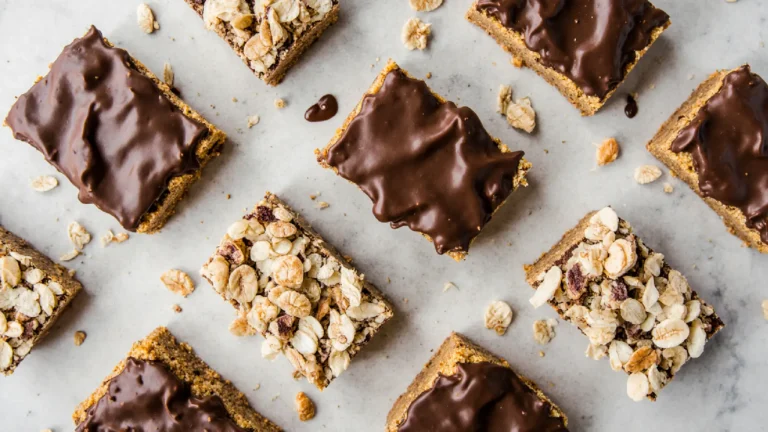
Chocolate Peanut Butter Bars
If I could only make one no-bake dessert for the rest of my life, it might be these bars. They combine chocolate and peanut butter in the most satisfying way, they’re easy enough for Sofia to make on her own now, and they travel well, which makes them perfect for potlucks and school events.
The base layer is pure peanut butter goodness. Mix together peanut butter, melted butter, powdered sugar, and graham cracker crumbs. The mixture should be thick and almost cookie-dough-like. Press it firmly into a parchment-lined pan—I use a 9×13 inch pan, the same one I use for everything else. The parchment paper is important because it lets you lift the whole thing out later for easy cutting.
I learned about the parchment paper trick after years of struggling to cut neat bars and ending up with messy pieces. Sometimes the simplest tips make the biggest difference. Now I line every pan with parchment, and my bars look almost professional. Almost.
The chocolate topping is straightforward. Melt chocolate chips with a bit of butter until smooth. Pour it over the peanut butter layer and spread it evenly. I use a spatula, and I work quickly because the chocolate starts to set as it cools. Some people add a little coconut oil to the chocolate to keep it softer, but I like the slight snap of pure chocolate when it sets.
Setting time matters. These need at least two hours in the refrigerator before you cut them. I usually make them in the evening and let them chill overnight. In the morning, I lift them out using the parchment paper, set them on a cutting board, and use a sharp knife to cut neat squares. If the chocolate cracks when you cut it, let the bars sit at room temperature for about ten minutes to soften slightly.
The flavor balance is everything. If your bars taste too sweet, you might have used too much powdered sugar in the base. If they’re not sweet enough, add a bit more. I’ve adjusted this recipe so many times over the years, tweaking it based on what peanut butter I’m using and how sweet I want them. Some peanut butters are saltier than others, and that affects the final result.
Variations keep things interesting. Sometimes I add a layer of crushed pretzels to the peanut butter base for a salty crunch. Other times I’ll sprinkle sea salt on top of the chocolate layer before it sets. Sofia likes when I swirl some of the peanut butter mixture into the chocolate layer to create a marbled effect—it looks fancy and tastes exactly the same, but she thinks it’s special.
These bars freeze beautifully too. I’ll make a double batch and freeze half. When someone drops by unexpectedly or we need a quick dessert, I pull them out of the freezer. They thaw in about thirty minutes, or you can eat them partially frozen for a different texture that’s almost like chocolate peanut butter ice cream bars.
Chocolate Truffles for Special Occasions
Truffles sound intimidating, don’t they? I thought so too until my abuela showed me how simple they really are. “Mija,” she told me, “truffles are just ganache rolled into balls. Don’t let anyone tell you they’re complicated.” She was right. These have become my go-to gift for neighbors, teachers, and friends. They look expensive and thoughtful, but they cost just a few dollars to make.
Ganache is the base of all truffles. Heat heavy cream until it’s just about to boil, then pour it over chopped chocolate. Let it sit for a minute, then stir until it’s smooth and glossy. That’s ganache. The ratio is important—usually equal parts chocolate and cream by weight, though you can adjust based on how firm you want your truffles. More chocolate makes them firmer; more cream makes them softer and more melt-in-your-mouth.
I remember making ganache for the first time and thinking I’d done something wrong because it looked separated and oily. But I kept stirring, and suddenly it came together into this beautiful, silky mixture. That moment taught me to trust the process, to not give up when things don’t look right immediately.
Chilling is crucial. Pour your ganache into a shallow pan and refrigerate it for a few hours until it’s firm enough to scoop. I usually make it in the morning and come back to it in the afternoon. When it’s ready, use a spoon or a small cookie scoop to portion out the ganache, then roll each portion between your palms into a ball. Your hands will get messy and chocolatey—this is part of the fun. Sofia and I sometimes have competitions to see who can roll the roundest truffle.
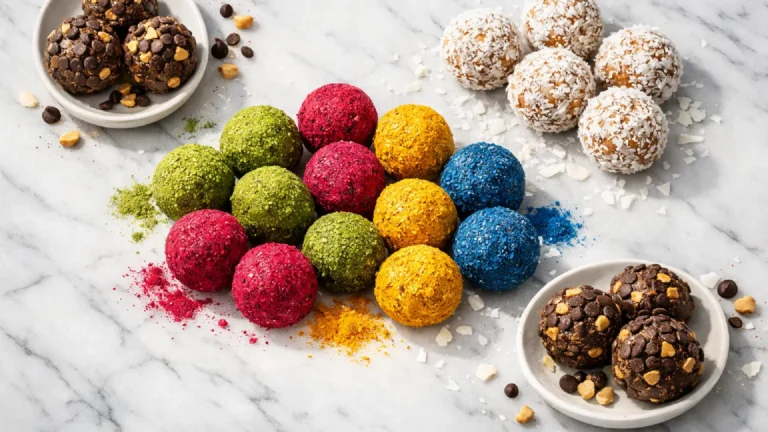
Coatings make truffles special. You can roll them in cocoa powder, which is my favorite because it’s simple and elegant. Or try crushed nuts, shredded coconut, sprinkles, or even more melted chocolate. I’ve done them all. For holidays, I’ll match the coating to the occasion—red and green sprinkles for Christmas, pink coconut for Valentine’s Day. My neighbor Mrs. Johnson says the coconut-covered ones remind her of fancy chocolates from expensive shops.
Flavor variations are limited only by your imagination. I add a splash of vanilla to almost all my truffles, but you can add other extracts too. Peppermint is lovely around the holidays. A bit of coffee or espresso powder deepens the chocolate flavor. Sometimes I’ll add a pinch of sea salt or even a small amount of chili powder for a grown-up version. These little variations make each batch unique.
Storage and gifting. Truffles keep well in the refrigerator for up to two weeks in an airtight container. For gifting, I place them in small paper cups in a nice box—you can find affordable boxes at craft stores. They look professional and heartfelt at the same time. Teachers especially appreciate them at the end of the year. It’s a gift that says you took time to make something special, which matters more than how much money you spent.
Making truffles has taught me that sometimes the simplest things, done with care and attention, become the most meaningful. These chocolate balls represent hours of tradition, moments with my daughter, and connections with my community. That’s worth so much more than any store-bought gift.
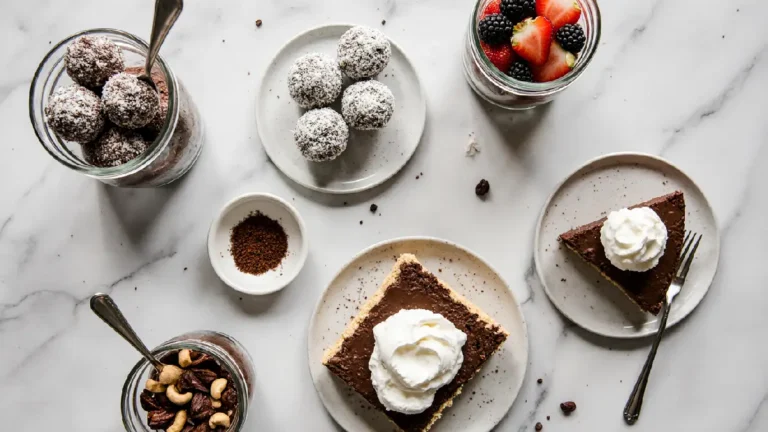
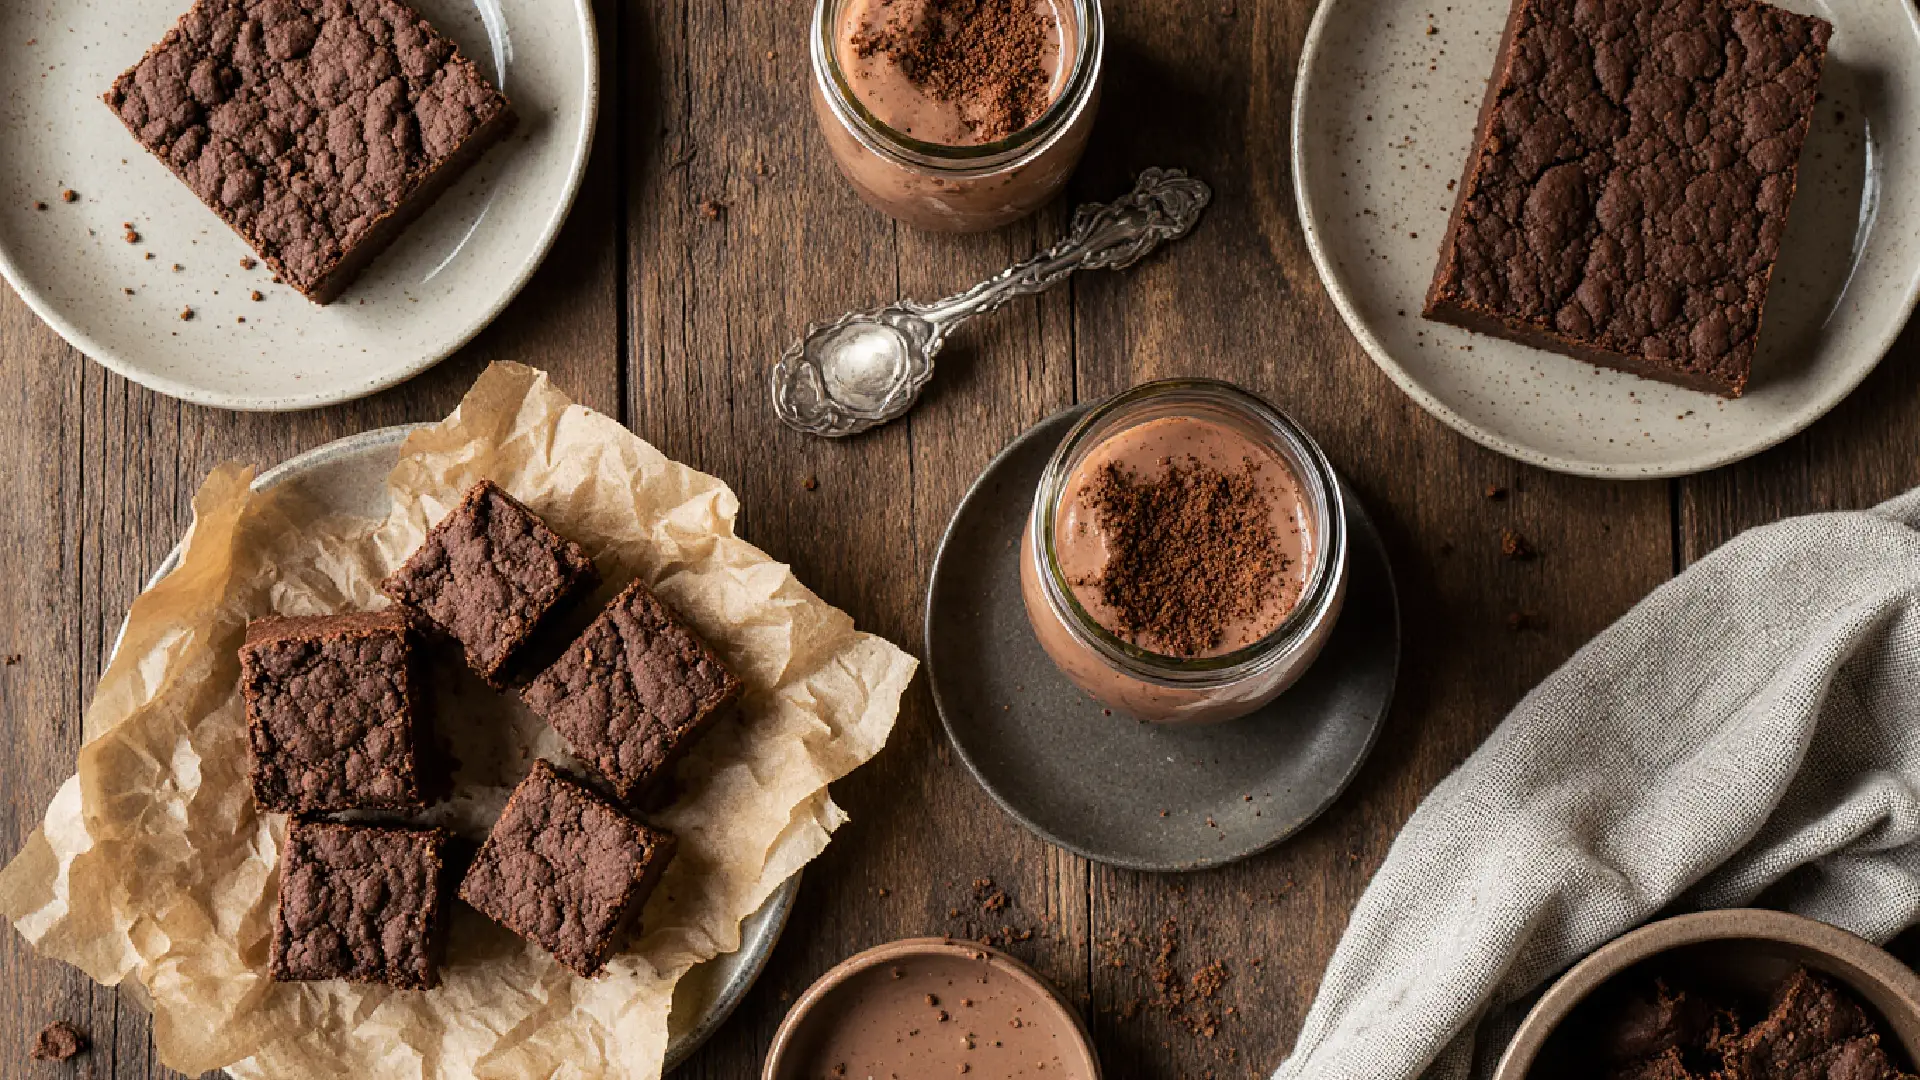
No Bake Chocolate Dessert Cups
These individual desserts are perfect for portion control and for making ahead when you’re hosting. I discovered them when I was trying to figure out how to serve dessert to a crowd without a lot of fuss. Individual cups mean no cutting, no serving utensils, just grab and enjoy.
The beauty is in the layers. Start with a cookie or graham cracker crust pressed into the bottom of small cups or mason jars. Add a layer of chocolate mousse or chocolate cream cheese mixture. Top with whipped cream and maybe some chocolate shavings or a cherry. Each person gets their own perfect dessert, and you don’t have to worry about cutting neat slices or making sure everyone gets an equal portion.
I use clear plastic cups from the dollar store when I’m feeding a crowd, or small mason jars when I want something reusable and prettier. Sofia likes the mason jars because she can take them to school for lunch desserts. I’ll make a batch on Sunday, and she’ll have homemade dessert ready to grab all week.
The mousse filling is lighter than you’d think. Melt chocolate and let it cool slightly. Whip heavy cream until it’s fluffy. Fold the two together gently, adding a bit of powdered sugar and vanilla. The result is airy and rich at the same time. Some people add gelatin to make it more stable, but I’ve never found it necessary. The cream holds up well for several days in the refrigerator.
Assembly is quick once your components are ready. I set up an assembly line—cups, crust mixture, filling, toppings. Sofia and I can make a dozen dessert cups in about twenty minutes once everything is prepared. It’s efficient and kind of fun. We talk while we work, catching up on her day while we layer chocolate and cream.
Customization options are endless. Some people like a crushed Oreo layer in the middle. Others want fresh fruit between layers. I’ve done versions with peanut butter, with caramel, with mint. The structure stays the same, but the flavors change. This makes them perfect for accommodating different preferences when you’re hosting—make half with nuts and half without, or some with mint and some plain.
Presentation matters. Even though these are simple, they look impressive when you pay attention to the final touches. A dollop of whipped cream, a dusting of cocoa, a few chocolate curls on top—these little details make people feel special. When my mother’s friends come over for cards, I serve these, and they always comment on how fancy they look. I just smile and think about how easy they actually were.
These cups have saved me during busy weeks when I wanted homemade dessert without the time commitment. They prove that you can have something beautiful and delicious without spending hours in the kitchen. That’s a lesson worth learning.
No Bake Chocolate Pie
Pie without the oven? Absolutely. This is one of those desserts that surprises people because it tastes exactly like what you’d expect from a chocolate pie, but you never have to worry about a soggy bottom crust or whether your filling set properly in the oven. Everything happens in your refrigerator, and everything turns out perfectly.
The crust options give you flexibility. The classic approach is a graham cracker crust—crushed crackers mixed with melted butter and sugar, pressed into a pie pan. But I’ve also used crushed chocolate cookies, vanilla wafers, or even pretzels for a salty-sweet version. The method is always the same: crush, mix with butter, press, and chill.
My favorite crust variation uses Oreos because they add another layer of chocolate flavor. I don’t even remove the filling—I just crush the whole cookie. It makes the crust a bit sweeter, but in a chocolate pie, that’s not a problem. Sofia helped me discover this shortcut when she was eating Oreos and I was making a crust. She asked why I was scraping out the filling, and I realized I didn’t have a good reason. Now we don’t.
The filling is rich and creamy. There are several approaches. The simplest is chocolate pudding—either homemade or from a box—chilled in the crust. More elaborate versions use chocolate cream cheese filling or chocolate custard. I usually go with a mixture of cream cheese, melted chocolate, powdered sugar, and whipped cream. It’s rich enough to feel indulgent but not so heavy that you can’t finish a slice.
Technique for the filling matters. Make sure your cream cheese is completely softened before you start. Beat it until it’s fluffy, then add the cooled melted chocolate gradually. If you add hot chocolate to cold cream cheese, you’ll get lumps. If your cream cheese is too cold, you’ll get lumps. Everything should be roughly the same temperature—slightly warm or room temperature.
Chilling transforms the pie. Pour your filling into the chilled crust and refrigerate for at least four hours. The pie needs time to set up properly. When it’s ready, the filling should be firm enough to slice cleanly but soft enough to be creamy on your tongue. This is one of those desserts that’s actually better the next day after all the flavors have had time to meld.
Toppings complete the experience. I always top chocolate pie with whipped cream—either homemade or from a can, I’m not picky. Some chocolate shavings or curls add visual interest. Sometimes I’ll add sliced strawberries because chocolate and strawberries are a match made in heaven. My mother likes when I drizzle caramel sauce over the top. Each topping changes the pie slightly, keeping it interesting even though we make it often.
This pie has been the star of so many family gatherings. It’s easy enough for a weeknight but impressive enough for holidays. I’ve made it for Sofia’s birthday parties, for neighborhood potlucks, for casual dinners with friends. It never disappoints, and it always disappears completely. That’s how I know a recipe is a keeper.
Tips for Perfect Results Every Time
After years of making no-bake desserts, I’ve learned what separates good results from great ones. These aren’t rules you have to follow exactly, but they’re lessons that have saved me from disappointment and helped me create desserts I’m proud to share.
Temperature is everything, even without an oven. Cold ingredients don’t mix well. Room temperature ingredients blend smoothly and create better textures. I take butter and cream cheese out of the refrigerator about thirty minutes before I need them. If I forget, I’ll cut them into small pieces to help them soften faster. This one simple habit has improved my desserts more than any other change I’ve made.
Quality ingredients make a difference, but you don’t need expensive ones. Use real chocolate, not chocolate-flavored coating. Use real butter, not margarine. Use real vanilla extract, not imitation. Beyond that, store brands work just fine. I’ve made beautiful desserts with the cheapest chocolate chips from the warehouse store. The key is using actual chocolate, not using the fanciest chocolate.
Measurements matter more than you might think. I used to eyeball everything, and sometimes it worked out fine. Other times, not so much. Now I measure, especially for recipes I’m making for the first time. Once I know how a recipe works, I’ll get more casual with measurements. But that initial precision helps me understand what the right consistency should look like.
Don’t skip the chilling time. I know it’s tempting to cut it short, especially when you’re excited to try what you made. But that time in the refrigerator isn’t optional—it’s when your dessert transforms from a mixture into something set and sliceable. If a recipe says four hours, give it four hours. Better yet, give it overnight. You’ll be happier with the results.
Taste as you go when you can. Obviously you can’t taste raw eggs if your recipe has them, but for no-bake desserts, you often can taste as you make them. Is it sweet enough? Does it need more vanilla? A pinch more salt? Tasting helps you adjust before you chill everything and it’s too late. My abuela always tasted, always adjusted. “Trust your tongue,” she’d say.
Use parchment paper for easy removal. Line your pans with parchment paper, leaving some overhang on the sides. When your dessert is set, you can lift the whole thing out by the parchment and cut neat pieces on a cutting board. This trick has saved me so much frustration. No more digging bars out of pans and ending up with mangled pieces.
Keep your refrigerator and freezer organized. There’s nothing worse than making a perfect dessert and then having nowhere to put it to chill. I learned this the hard way when I made three desserts for a party and realized my refrigerator was packed with leftovers and grocery items. Now I plan ahead and make sure I have space before I start cooking.
Store desserts properly. Most no-bake chocolate desserts should be stored in airtight containers in the refrigerator. Some can be frozen for longer storage. When freezing, I wrap items in plastic wrap first, then put them in a freezer bag or container. This double protection prevents freezer burn and keeps flavors fresh. Label everything with the date—I think I’ll remember what’s what, but I never do.
Don’t be afraid to make substitutions when needed. Ran out of graham crackers? Use vanilla wafers. Don’t have heavy cream? Try half-and-half or even whole milk in some recipes. Out of butter? Coconut oil works in many cases. The more you cook, the more you’ll learn what you can substitute and what you can’t. I’ve made some of my best discoveries by accident when I had to substitute an ingredient.
Clean up as you go. This isn’t about the dessert itself, but it makes the whole process more enjoyable. I rinse bowls and measuring cups while chocolate is melting or while things are chilling. Sofia and I have a rule: whoever doesn’t cook does the final cleanup, but we both tidy as we work. This means when the dessert is done, the kitchen isn’t a disaster zone.
These tips come from real experience—from mistakes I’ve made, problems I’ve solved, and small victories I’ve celebrated. They’re the difference between feeling stressed and feeling confident when you’re making no-bake desserts.
Common Mistakes and How to Fix Them
Let me share the mistakes I’ve made so you don’t have to. I’ve had desserts that wouldn’t set, chocolate that seized, and bars that crumbled when I tried to cut them. Each failure taught me something, and now I can usually tell what went wrong and how to prevent it next time.
Desserts that won’t set are frustrating. Usually this means you didn’t cook the mixture long enough if there’s a stovetop step, or you didn’t use enough binding ingredients. For no-bake cookies, the most common cause is not letting the mixture boil for a full minute. It needs that time for the sugar to reach the right temperature. Set a timer. Don’t trust yourself to estimate—I learned this after too many soft, never-setting batches.
If your dessert still won’t set after the recommended chilling time, give it longer. Sometimes recipes underestimate how long things take. Or move it to the freezer for an hour to speed up the process. This works especially well for things like chocolate pie or cheesecake.
Seized chocolate looks grainy and clumpy instead of smooth. This happens when chocolate gets too hot, or when even a tiny bit of water gets into it. Steam from a double boiler can cause this. A drop of water from a wet spoon can cause this. Prevention is easier than fixing it. Keep all equipment dry, use low heat, and stir constantly. If your chocolate does seize, sometimes you can save it by stirring in a small amount of neutral oil or shortening, but honestly, it’s often easier to start over with fresh chocolate.
Bars and cookies that crumble when you cut them are disappointing. This usually means not enough binding ingredients or not enough chilling time. If you’re making bars, make sure you’ve pressed the base layer firmly. If you’re making no-bake cookies, make sure you boiled the mixture long enough. When cutting bars, use a sharp knife and wipe it clean between cuts. If things are still crumbling, let them sit at room temperature for a few minutes to soften slightly, or chill them longer if they seem too soft.
Desserts that are too sweet happen sometimes. Different people have different sweetness preferences, and recipes aren’t always perfectly calibrated. If something tastes too sweet, you can often balance it with salt, vanilla, or even a small amount of instant coffee or espresso powder. These flavors don’t make the dessert taste like salt or coffee, but they enhance the chocolate and reduce the perception of excessive sweetness. Next time you make the recipe, reduce the sugar slightly and see if you like it better.
Desserts that are too bitter or not sweet enough need adjustment. This might mean your chocolate was more bitter than the recipe expected, or you measured incorrectly. You can sometimes fix this by adding a powdered sugar dusting on top, or by serving it with whipped cream or ice cream. For next time, consider using milk chocolate instead of dark chocolate, or adding a bit more sugar to the recipe.
Messy layers happen when things aren’t properly chilled between steps. If you’re making something with multiple layers, make sure each layer is set before adding the next one. I learned this when making dessert cups and the layers all blended together into a messy blob. Now I chill each layer for at least thirty minutes before adding the next. It takes longer, but the final result is so much better.
Difficulty spreading chocolate happens when it starts setting too quickly. Work quickly when spreading melted chocolate over a base layer, and make sure your base layer isn’t ice cold. If the base is too cold, the chocolate will start to set immediately when it touches the surface, making it hard to spread evenly. Let your base layer sit at room temperature for a few minutes before adding melted chocolate on top.
Flavor problems can usually be prevented by tasting. If your no-bake cookies taste off, it might be old oats or rancid nuts. Check your pantry ingredients before using them. Smell them—if they don’t smell fresh, they won’t taste fresh. I learned this when I made cookies with oats that had been sitting in my pantry for too long. They tasted stale and weird, and I couldn’t figure out why until I realized the oats were the problem.
The good news is that most mistakes with no-bake desserts are fixable or at least preventable next time. And even when things don’t turn out perfect, they usually still taste pretty good. Sofia reminds me of this whenever I’m disappointed with a batch. “It’s still chocolate, Mom,” she says. She’s right.
Storing and Serving No Bake Chocolate Desserts
How you store and serve your desserts matters almost as much as how you make them. I’ve learned this through experience—through desserts that didn’t keep as well as they should have, and through figuring out the best ways to serve them so they taste their absolute best.
Most no-bake chocolate desserts need refrigeration. They contain ingredients like butter, cream cheese, or heavy cream that need to stay cold. I store them in airtight containers or cover them well with plastic wrap. Air is the enemy of freshness—it dries things out and can cause off flavors. When I make bars, I cut them and store the pieces in a container with parchment paper between layers so they don’t stick together.
Freezing works for many no-bake desserts. Bars, cookies, and truffles freeze beautifully. I wrap them individually or in portions, put them in freezer bags, and label them with the date. They’ll keep for up to three months in the freezer. When I want one, I just pull it out and let it thaw at room temperature for about thirty minutes. Sofia takes frozen treats in her lunch sometimes—they thaw by lunchtime and taste freshly made.
Room temperature serving is often best. While these desserts need to be stored cold, many of them taste better when served at room temperature or slightly chilled rather than ice cold. Cold chocolate doesn’t have as much flavor as room temperature chocolate. I take things out of the refrigerator about twenty minutes before serving. This is especially true for cheesecakes and pies—they slice better and taste richer when they’re not ice cold.
Presentation elevates simple desserts. Even a basic no-bake cookie looks special when you arrange it nicely on a pretty plate. I use my grandmother’s serving plates for desserts, even casual ones. A dusting of powdered sugar or cocoa, a small mint leaf, a few berries on the side—these little touches take seconds but make people feel like you’ve made something special for them. Because you have.
Portion sizes matter for rich desserts. Chocolate desserts are rich, and a little goes a long way. I cut bars smaller than I think I should. I make truffles bite-sized. People can always have seconds, but starting with reasonable portions means people don’t feel overwhelmed or overly full. Plus, smaller portions mean your dessert goes further when you’re feeding a crowd.
Serving tools make life easier. For bars and squares, I use a sharp knife and wipe it clean between cuts. For cheesecakes and pies, I dip my knife in hot water, wipe it dry, then make the cut. The warm knife slides through cold desserts much more easily. For scooping cookies or truffles onto serving plates, I use a small spatula or even just my clean hands.
Timing your desserts to be ready when needed takes practice. Most no-bake desserts benefit from overnight chilling, so I make them the day before. But you don’t want to make them too far in advance—freshness matters. Three days ahead is usually my maximum for most desserts. Truffles can be made further in advance. Cookies should be made closer to when you’ll serve them. I keep a mental calendar of what dessert I’m making for what occasion and when I need to make it.
Transporting desserts to potlucks or parties requires planning. I use containers with tight lids that won’t leak or open in my car. For desserts that need to stay very cold, I pack them in a cooler with ice packs. I learned this after showing up to a summer potluck with melted chocolate disasters. Now I plan for the weather and the transportation time. Better safe than sorry.
Leftovers can be just as good as fresh. Most no-bake chocolate desserts keep well for several days in the refrigerator. Sofia and I often enjoy leftover desserts for afternoon snacks. Sometimes I think they taste even better the second day after all the flavors have had more time to blend. Don’t assume leftovers are inferior—they’re often just as delicious.
These aren’t complicated storage and serving techniques, but they make a difference in how your desserts turn out and how much people enjoy them. It’s about respecting the food you’ve made and presenting it in a way that honors the time and care you put into creating it.
Making No Bake Desserts with Kids
Some of my best memories in the kitchen are with Sofia. When she was little, she’d stand on a chair next to me, her hands covered in chocolate, her face serious with concentration. Now she’s a teenager and she can make most of these desserts on her own. But we still cook together when we can. These moments matter.
No-bake desserts are perfect for kids because there’s no hot oven. The biggest danger in traditional baking—the oven—isn’t a factor here. Yes, you’re melting chocolate on the stovetop, but that’s supervised and controlled. Kids can do almost everything else themselves. They can crush graham crackers, measure ingredients, stir mixtures, roll truffles, press crusts into pans. These are all safe activities that build confidence and skills.
Start simple with no-bake cookies. This was Sofia’s first independent dessert. She was nine, and I supervised while she measured ingredients and stirred the pot. I handled the hot parts, but she did most of the work. When they were done and we tasted them, her pride was visible. “I made these,” she told everyone who would listen. That feeling of accomplishment is so important.
Let kids make creative decisions. Should we add nuts to these bars? Which coating should we use for the truffles? Do we want chocolate chips or peanut butter in our cookies? These small choices give kids ownership of the dessert. They’re learning that cooking isn’t just following instructions—it’s also about personal preference and creativity. Sofia’s marshmallow-studded chocolate squares weren’t in any recipe book, but they were hers, and they were delicious.
Expect mess and embrace it. Kids will spill flour. They’ll get chocolate on their clothes and in their hair. The counter will need cleaning. This is part of the process. I keep a damp towel nearby for quick cleanups, and we both wear aprons. But I don’t stress about perfect tidiness while we’re working. We clean up together at the end, and that’s good enough.
Use cooking as teaching time. We talk about measurements—what’s a cup, what’s a tablespoon, why accuracy matters. We talk about following steps in order and why certain things happen. When chocolate melts, we discuss how heat changes things. When desserts set in the refrigerator, we talk about temperature. These informal lessons stick with kids more than formal teaching sometimes does.
Be patient with mistakes. Sofia has made plenty of errors over the years. She’s forgotten ingredients, added too much of something, mixed things in the wrong order. Each time, we’ve talked about what went wrong and how to fix it or prevent it next time. These mistakes are valuable learning experiences. I try to stay calm and encouraging even when I’m frustrated about a wasted batch of ingredients.
Build up to more complex recipes. Start with simple cookies, then move to bars, then to layered desserts, then to truffles and pies. Each success builds confidence for the next challenge. Sofia can now make any of the desserts in this article on her own. But we started simple years ago and worked our way up gradually.
Make it a regular activity, not a special occasion thing. We make desserts together almost every week. Sometimes it’s for a specific purpose—a school event, a neighbor’s birthday, a family gathering. Other times we just make them because we want something sweet. The regularity makes cooking feel normal and comfortable, not stressful or pressured.
Let kids share what they’ve made. Sofia takes desserts to school, gives them to neighbors, brings them to her friends’ houses. Sharing what she’s made reinforces that cooking is about caring for others, not just feeding yourself. The compliments and appreciation she receives motivate her to keep learning and improving.
Cooking with Sofia has taught her practical skills, but more importantly, it’s given us time together. In a few years, she’ll be off to college or starting her own life. These kitchen memories will be what I hold onto. That’s worth more than any perfectly executed dessert.
Budget-Friendly Tips for No Bake Desserts
Let’s talk honestly about money. I’m a single mom, and there have been times when our budget was tight. But I never wanted Sofia to feel like we couldn’t have nice things or special desserts. That’s when I learned that no-bake chocolate desserts are not just easy and delicious—they’re also economical if you know how to shop and plan.
Buy ingredients when they’re on sale. Chocolate chips, cocoa powder, butter—these all go on sale regularly. When they do, I stock up. My pantry always has extra chocolate chips because I grab them when they’re half price. These ingredients don’t go bad quickly, so buying ahead makes sense. I’ve cut my dessert costs in half just by being patient and shopping strategically.
Store brands work just as well as name brands. I’ve done blind taste tests with Sofia using store-brand chocolate chips versus name-brand ones. Neither of us could consistently tell the difference in the finished desserts. The same goes for cocoa powder, vanilla extract (the real kind, not imitation), and most other baking ingredients. The money you save adds up significantly over time.
Make your own graham cracker crumbs instead of buying them pre-crushed. A box of graham crackers costs less than a bag of crumbs, and crushing them yourself takes about two minutes. Put them in a plastic bag and roll over them with a rolling pin, or pulse them in a food processor if you have one. You’re paying for convenience when you buy pre-crushed, and that convenience isn’t worth the extra money.
Use what you have before buying new ingredients. Got half a box of vanilla wafers? Use those instead of graham crackers. Have some peanuts instead of the walnuts a recipe calls for? Substitute them. Most no-bake dessert recipes are flexible. I rarely buy a special ingredient for a recipe unless it’s truly essential. This approach has saved me money and reduced food waste.
Make larger batches and freeze portions. It costs almost the same to make a double batch as a single batch, but you get twice the dessert. I’ll make extra bars or cookies and freeze half. Then when we want dessert, I pull some from the freezer instead of buying treats at the store. This strategy has probably saved me hundreds of dollars over the years.
Shop at discount stores and warehouse stores. I buy butter, cream cheese, and chocolate in bulk from warehouse stores when I can. The unit price is much lower. If you don’t have room to store bulk ingredients or don’t have membership to warehouse stores, split purchases with a friend or neighbor. We’ve done this, and it works well.
Make desserts instead of buying them. A box of no-bake cookies from the store costs about what it costs to make two or three batches at home. Homemade chocolate truffles cost a fraction of what fancy boxed chocolates cost. When you calculate the actual cost of homemade versus purchased, homemade wins every time. Plus, it tastes better and means more because you made it yourself.
Use affordable chocolate strategically. You don’t need expensive chocolate for most no-bake desserts. Regular chocolate chips work beautifully. Save the fancy chocolate for recipes where chocolate is the only flavor and quality really shows through. For recipes with lots of other ingredients—like no-bake cookies with oats and peanut butter—basic chocolate is perfectly fine.
Reduce waste by using everything. If you have leftover whipped cream, freeze it in dollops to top desserts later. If you have extra graham cracker crumbs, store them for the next crust. If your desserts don’t turn out perfectly, crumble them and use them as topping for ice cream or layer them in dessert cups. I’ve learned to waste nothing.
Plan desserts around what’s already in your pantry. Instead of choosing a recipe and then shopping for it, look at what you have and choose a recipe based on that. This approach means you’re using up ingredients you already own rather than constantly buying new things. It’s a mindset shift that saves money.
These tips come from real life, from times when money was tight and desserts still mattered. You don’t need a big budget to make delicious no-bake chocolate desserts. You just need to be thoughtful and strategic about how you shop and what you make.
Adapting Recipes for Dietary Restrictions
Life has taught me to be flexible. Sofia’s best friend can’t have dairy. My mother is watching her sugar intake. My neighbor is allergic to nuts. When you care about people, you learn to adapt your cooking so everyone can enjoy it. No-bake chocolate desserts are actually easier to adapt than many baked goods.
Dairy-free versions are surprisingly simple. Instead of butter, use coconut oil—it solidifies just like butter when chilled. Instead of cream cheese, use dairy-free cream cheese (several brands make good ones). Instead of heavy cream, use coconut cream from a can—just chill the can overnight, open it, and use the thick cream that’s separated from the liquid. I’ve made dairy-free versions of almost every recipe in this article, and they turn out beautifully.
Sofia’s friend Emma can’t have dairy, so I’ve gotten good at making desserts she can enjoy. The dairy-free chocolate truffles I make with coconut cream taste so good that everyone eats them, not just Emma. Sometimes adaptations lead to discoveries that become new favorites.
Sugar-free or reduced-sugar options exist. This is trickier than dairy-free, but it’s possible. You can use sugar substitutes like erythritol or monk fruit sweetener in most recipes. The proportions might need adjustment because these sweeteners have different properties than sugar. For my mother, I make versions with reduced sugar, using dark chocolate which is naturally less sweet, and relying on vanilla and other flavors to add interest without adding sweetness.
Nut-free versions just require substitution. Instead of peanut butter, use sunflower seed butter—it tastes similar and has a similar texture. Instead of crushed nuts for coating, use coconut, crushed pretzels, or more graham cracker crumbs. Most recipes don’t actually require nuts; they’re just a nice addition. Leaving them out or substituting them is usually straightforward.
Gluten-free adaptations focus on the crust and base ingredients. Most chocolate fillings are naturally gluten-free. The issue is graham crackers and cookies used for crusts. Gluten-free graham crackers exist, as do gluten-free cookies. They cost a bit more, but they work exactly the same way. For no-bake cookies with oats, use certified gluten-free oats—regular oats are often processed with wheat and can contain gluten.
Vegan versions combine dairy-free and egg-free. Since most no-bake chocolate desserts don’t use eggs anyway, this is mainly about replacing dairy. Use the same coconut oil and coconut cream substitutions I mentioned for dairy-free. Make sure your chocolate is dairy-free—dark chocolate often is, but check the label. I’ve made vegan versions of chocolate pie, truffles, and bars that even my non-vegan friends loved.
The key is understanding what each ingredient does. Butter adds fat and helps things bind—coconut oil does the same. Cream cheese adds tanginess and creaminess—dairy-free cream cheese mimics this. Sugar sweetens and helps with texture—sugar substitutes can mostly do the same if you adjust amounts. Once you understand function, substitution becomes logical rather than guesswork.
Be honest with people about substitutions. I always tell people when I’ve made a recipe with alternative ingredients. Some people want to know for health reasons. Others are curious. I never try to pass off an adapted recipe as the original. That feels dishonest, and people appreciate transparency.
Taste test and adjust. The first time you make an adapted recipe, it might need tweaking. Maybe it needs more sweetener or more salt to balance flavors. Make notes so you remember what worked and what didn’t. My recipe notebook is full of scribbled adjustments and substitution notes. It’s not pretty, but it’s useful.
Adapting recipes is an act of love. It says “I want you to be included, and I’m willing to put in the effort to make that happen.” That matters to people. Emma’s mom has told me multiple times how much it means that her daughter doesn’t have to sit out when we’re serving dessert. That’s worth every substitution I’ve learned to make.
🍫 Ingredient Substitution Calculator
Find the perfect substitute for your no-bake chocolate dessert ingredients
Your Substitution
Creating Your Own No Bake Chocolate Dessert Recipes
Once you’ve made enough no-bake desserts, you start to see the patterns. Most of them follow similar structures with different variations. Understanding these patterns means you can create your own recipes, combining elements you love and avoiding things you don’t. This is when cooking becomes truly creative.
Every no-bake dessert has a few basic components. There’s usually a base or crust, a chocolate element, a binding element (like butter or cream cheese), sweetener, and flavorings. If you understand these components, you can mix and match them to create new desserts. Want a mint chocolate bar? Take the base from the peanut butter bars, add mint extract to the chocolate layer, and you’re done.
Start by modifying recipes you already know. This is less intimidating than creating something from scratch. Take the no-bake cookies and add different mix-ins—coconut, dried fruit, different nuts. Take the chocolate pie and try a different crust. These small changes help you understand what works and what doesn’t. Sofia started doing this last year, and some of her modifications have become family favorites.
Pay attention to ratios and proportions. Most no-bake cookies use roughly the same ratio of wet to dry ingredients—enough liquid to bind the oats but not so much that they’re soggy. Most crusts use about one-third cup of melted butter per cup and a half of crumbs. These ratios give you a starting point when you’re experimenting. If something seems too dry, add more liquid. Too wet? Add more dry ingredients.
Think about texture combinations. Creamy with crunchy is almost always good. Smooth with chewy works well. This is why peanut butter bars have a creamy base and a smooth chocolate top—the textures contrast nicely. When creating your own dessert, think about whether you want all one texture or a contrast between layers.
Don’t be afraid to borrow from other cuisines. Some of my best creations came from thinking “what if I added this Mexican ingredient to this American dessert?” Cajeta in chocolate pie was one. Cinnamon and cayenne in chocolate truffles was another. Sofia made chocolate bars with crushed plantain chips once—weird concept, but surprisingly good. Be open to unexpected combinations.
Write down what you do. I can’t tell you how many times I’ve made something delicious and then couldn’t remember exactly what I did. Now I keep notes, even rough ones, when I’m experimenting. Jot down ingredients and approximate amounts. You can refine it later, but you need something to work from.
Accept that not everything will work. I’ve made plenty of experimental desserts that were okay but not great, and a few that were genuinely bad. Sofia and I laughed about the time I tried to make chocolate cookies with black beans because I’d read that worked in brownies. It did not work in no-bake cookies. But that’s okay. Failures teach you things, and you can always order pizza if dessert is inedible.
Share your creations and get feedback. My neighbors and friends are my taste testers. I’ll bring over a new creation and ask honestly what they think. Most people are too polite to say if something is bad, but you can usually tell from their reaction if it’s truly good or just okay. Sofia is brutally honest, which is actually helpful. “It’s fine, Mom, but I like the regular version better” tells me more than “it’s great!”
Remember that simpler is often better. When you’re excited about creating, it’s tempting to throw everything in—chocolate and peanut butter and caramel and pretzels and marshmallows. Sometimes that works, but often it’s just too much. The best desserts usually have a few flavors that complement each other, not a dozen things competing for attention.
Creating your own recipes is one of the most satisfying parts of cooking. It means you’ve gone beyond following instructions to understanding principles. You’re not just a cook anymore—you’re a creator. That’s something to be proud of.
Special Occasion No Bake Chocolate Desserts
Some occasions call for something a little more special. Birthdays, holidays, anniversaries—these moments deserve desserts that feel festive and celebratory. The beautiful thing is that no-bake doesn’t mean casual. You can make stunning, impressive desserts without ever turning on the oven.
For birthdays, individual dessert cups feel personal. I make chocolate mousse cups with layers of chocolate, cream, and cookie crumbs, then top each one with a candle. Sofia loves this because each person gets their own birthday moment. You can customize them too—some with extra chocolate, some with fruit, some with caramel. Everyone’s happy.
For holidays, match your dessert to the theme. Christmas gets peppermint chocolate truffles coated in crushed candy canes. Easter gets chocolate coconut nests with candy eggs on top. Valentine’s Day gets heart-shaped chocolate peanut butter bars (I use a cookie cutter on the set bars). These little touches make desserts feel special and planned, even though they’re no more difficult than the everyday versions.
For potlucks and gatherings, go with bars or squares. They travel well, serve a crowd, and don’t require plates and forks if you cut them small enough. I make triple batches of peanut butter bars for church gatherings. They disappear within minutes, and people always ask for the recipe. Bars are the unsung heroes of community events.
For romantic occasions, focus on presentation. Chocolate truffles arranged on a nice plate with a ribbon. Chocolate pie with fresh strawberries and whipped cream served by candlelight. It’s the same desserts you make all the time, but the presentation and setting make them feel romantic and special. I’ve learned that context matters almost as much as the dessert itself.
For thank-you gifts, truffles are perfect. I make a batch, arrange them in a small box with tissue paper, and tie it with a ribbon. Teachers, neighbors, friends who’ve helped us—these little gifts say thank you in a meaningful way. They cost just a few dollars but feel like much more because they’re homemade and thoughtful.
For busy times, desserts that can be made ahead are lifesavers. When Sofia had her quinceanera, I made dozens of dessert cups two days before and stored them in the refrigerator. Day-of, I just pulled them out and arranged them on the dessert table. No last-minute stress, and they looked beautiful. Planning ahead turns complicated events into manageable ones.
For comfort during difficult times, familiar favorites matter most. When my mother was sick, I made her favorite chocolate pie. When Sofia was heartbroken over her first breakup, we made chocolate cookies together. Food can’t solve problems, but it can provide comfort and normalcy when everything feels uncertain. These moments remind me why I learned to cook in the first place.
Special occasions are about the people, not just the food. But the right dessert, made with care and served with love, becomes part of the memory. Years later, people remember not just the event but also the chocolate dessert they enjoyed. That’s powerful.
❓ Frequently Asked Questions
Common questions about making no-bake desserts answered
What desserts can you make without baking?
You can make so many delicious desserts without ever turning on your oven! No-bake chocolate cookies are probably the most popular—they come together on the stovetop in minutes and set in the refrigerator.
Cheesecakes are another fantastic option. With a graham cracker crust pressed into a pan and a creamy chocolate filling, you can create an elegant dessert that rivals any baked version. I’ve served these at family gatherings and guests always ask if I got them from a bakery.
Other popular no-bake desserts include:
- Chocolate peanut butter bars (my family’s favorite)
- Truffles that look fancy but are surprisingly easy
- Layered dessert cups with chocolate mousse
- Chocolate pies with various fillings
- Energy balls and bites
- Icebox cakes made with cookies and cream
The key is that these desserts set in the refrigerator or freezer instead of baking in the oven. They use binding ingredients like butter, cream cheese, chocolate, and peanut butter that firm up when chilled.
What sweet treats can I make without an oven?
Without an oven, you have endless possibilities! My daughter Sofia and I make chocolate truffles that we give as gifts—they’re just ganache rolled into balls and coated with cocoa, nuts, or coconut. They look impressive but only take about thirty minutes of actual work.
Puddings and mousses are wonderful no-oven treats. Chocolate mousse feels luxurious but it’s just melted chocolate folded into whipped cream. You can serve it in individual cups or layer it in a larger dish.
Some of my go-to no-oven sweet treats:
- No-bake cookies with chocolate, oats, and peanut butter
- Chocolate bark with nuts and dried fruit
- Rice crispy treats (the chocolate version)
- Chocolate-covered strawberries or pretzels
- Fudge that sets in the refrigerator
- Chocolate-dipped anything (cookies, graham crackers, fruit)
Many of these recipes use your stovetop for melting chocolate or bringing ingredients to a boil, then let everything set in the refrigerator. It’s a different process than baking but equally rewarding.
What dessert can I make in 5 minutes?
When I say 5 minutes, I mean active prep time—some desserts still need chilling time afterward, but the actual work is lightning fast. Here are my true 5-minute desserts:
Chocolate Mug Cake: Mix cocoa powder, flour, sugar, milk, oil, and vanilla in a mug. Microwave for 90 seconds. Done. Not technically “no-bake” since you’re using a microwave, but no oven needed!
Chocolate-Covered Strawberries: Melt chocolate chips in the microwave (about 1 minute), dip clean strawberries, set them on parchment paper. That’s it. They’re ready to eat as soon as the chocolate sets, which takes about 10 minutes in the refrigerator.
Chocolate Banana “Nice Cream”: Blend frozen banana slices with cocoa powder. Seriously, that’s the whole recipe. It takes 2 minutes and tastes like chocolate ice cream.
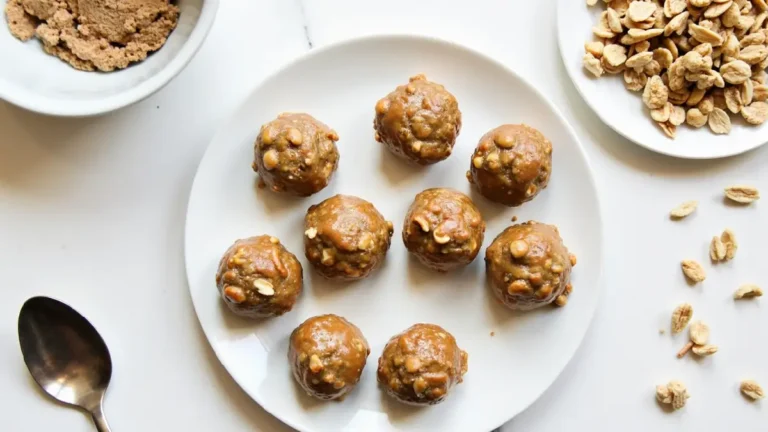
Chocolate Peanut Butter Energy Balls: Mix peanut butter, honey, cocoa powder, and oats with your hands. Roll into balls. Total time: about 5 minutes. They taste like cookie dough.
My neighbor Mrs. Johnson loves these quick recipes because she can decide she wants dessert at 7 PM and have it ready by 7:05. The key is keeping simple ingredients on hand so you’re always ready.
What desserts are stovetop only?
Stovetop-only desserts are perfect for summer when you don’t want to heat up your kitchen with the oven. These are desserts that require cooking on the stove but never use the oven:
Classic No-Bake Cookies: You boil sugar, butter, milk, and cocoa on the stovetop for exactly one minute, then stir in oats and peanut butter. Drop them on wax paper and let them set. The stovetop step is crucial—it’s what makes them hold together.
Homemade Pudding: Mix milk, sugar, cocoa, and cornstarch in a pot and cook while stirring until it thickens. Pour into dishes and chill. Much better than the boxed kind, and it only takes about 10 minutes on the stove.
Stovetop desserts I make regularly:
- Chocolate fudge (boil sugar and cream, add chocolate, pour and chill)
- Caramel sauce (for topping no-bake desserts)
- Chocolate ganache (heat cream, pour over chocolate)
- Rice pudding with chocolate (stovetop classic)
- Stovetop custards and flans
The great thing about stovetop desserts is that you have more control than with an oven. You can see exactly what’s happening and adjust as needed. I learned to make most of these watching my abuela, who rarely used the oven but made incredible desserts on her old stovetop.
Bringing It All Together
We’ve covered a lot of ground together—from basic cookies to elegant pies, from techniques to troubleshooting, from budget tips to dietary adaptations. If you’re feeling overwhelmed, don’t be. Start simple. Pick one recipe that sounds good to you and try it. Then try another. Build your confidence gradually, just like I did.
My journey with no-bake chocolate desserts started with a disaster—those no-bake cookies I tried to bake. But I kept going. I learned from my abuela, I practiced, I made mistakes, and I figured things out. Now these desserts are part of our family traditions. They’re how we celebrate, how we comfort each other, how we show love.
You don’t need a fancy kitchen or expensive equipment. You don’t need culinary training or natural talent. You just need a willingness to try, patience with yourself when things don’t work perfectly, and the understanding that food is about more than just eating. It’s about connection, memory, and care.
Sofia is sixteen now, and she’ll leave for college in a couple of years. But I know she’ll take these recipes with her. She’ll make chocolate cookies in her dorm room or apartment, and she’ll think of our kitchen, of standing next to me on that chair when she was little, of all the afternoons we spent creating something sweet together. That’s what I’m really teaching her—not just how to make desserts, but how to create moments that matter.
So whether you’re making no-bake cookies on a busy Tuesday or preparing an elegant chocolate pie for a special dinner, remember that you’re doing more than making dessert. You’re creating experiences, building memories, and sharing something made with your own hands. That’s the real magic of these recipes—not just that they’re delicious and easy, but that they bring people together.
Start today. Pick a recipe. Gather your ingredients. Let your kitchen fill with the smell of chocolate. And enjoy the process as much as the result. Because the journey, as my abuela always said, is just as important as the destination.
And trust me on this one—some of the best desserts you’ll ever eat don’t need an oven at all. They just need a little time, some simple ingredients, and someone willing to make them with love. That someone can be you.
For more recipes follow us on Facebook and Pinterest.
Did you try it?
There are no reviews yet. Be the first one to write one.