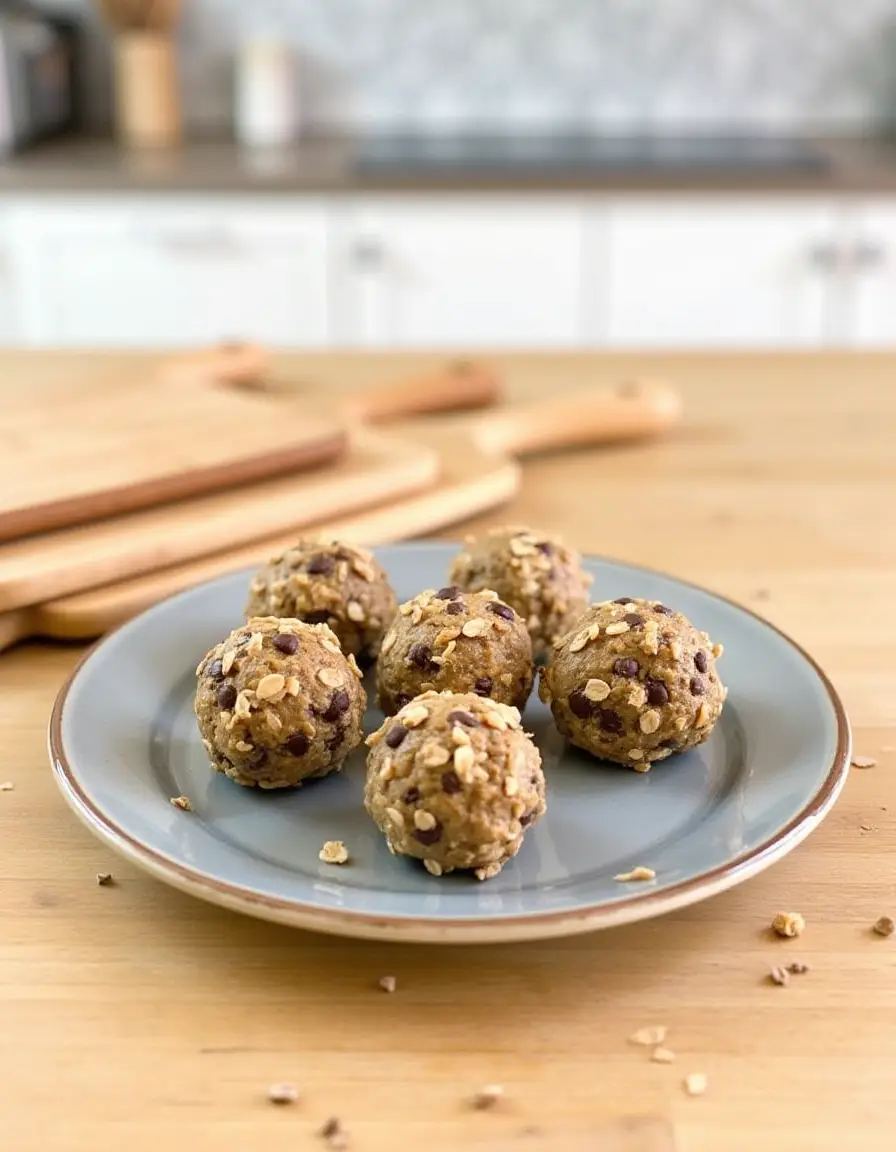
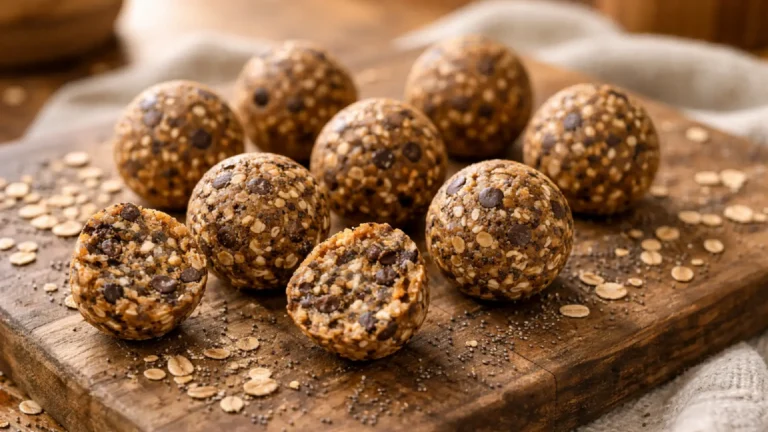
The Perfect No-Bake Peanut Butter Oatmeal Balls: A Recipe That Finally Makes Sense
Let me tell you about the time I completely misunderstood what “no-bake” meant—I was twenty-two and thought I knew everything. My abuela had passed down this beautiful collection of recipes, but somehow the concept of making something sweet without turning on the oven seemed impossible to my stubborn young mind. Fast forward twenty years, three kitchen disasters, and one very patient teenage daughter later, and I’ve finally cracked the code on no-bake treats that actually work.
These No-bake peanut butter oatmeal balls aren’t just another Pinterest fail waiting to happen, mi amor. They’re the real deal—the kind of recipe that saves your sanity on busy weeknights and makes you look like a kitchen genius when Sofia’s friends come over asking for “more of those amazing cookie things.”
What You’ll Learn Today (The Good Stuff):
- Why four simple ingredients create magic when you know the secret ratios
- The texture trick that separates perfect balls from crumbly disasters
- Cultural variations that’ll make your abuela proud (even if she’s not Mexican like mine)
- Make-ahead strategies for busy mamás who meal prep like champions
- Kid-friendly customizations that turn picky eaters into willing helpers
Why These Actually Work (Unlike My First Attempt)
Trust me on this one—I’ve made every possible mistake with no-bake recipes. The mixture too wet, too dry, won’t stick together, falls apart in your hands. It’s enough to make you want to stick to boxed cookies forever. But here’s what I learned after years of trial and plenty of error: success comes down to understanding your ingredients, not just following measurements blindly.
My abuela always said, “Mija, cooking is about feeling, not just measuring.” She was talking about her tamales at the time, but the wisdom applies perfectly here. These peanut butter oatmeal balls work because each ingredient has a job, and when you understand what they’re doing, you can adjust like a pro.
“The first time I made these, Sofia was about twelve and going through her ‘I only eat beige food’ phase. She watched me mixing everything together and declared it looked gross. Two hours later, I caught her sneaking her fourth ball from the fridge. Sometimes the best victories are the quiet ones.”
The Magic Four: Ingredients That Never Let You Down

What You Need (Probably Already in Your Pantry):
- 1 heaping cup rolled oats – The foundation that holds everything together
- 1/2 cup smooth peanut butter – The star that brings richness and protein
- 1/4 cup mini dark chocolate chips – Because life’s too short for sad snacks
- 1/3 cup maple syrup or honey – The gentle sweetness that binds it all
Optional Boosters (For When You’re Feeling Fancy):
- 2-3 tablespoons nut milk – If your mixture needs help coming together
- 1 tablespoon chia seeds or ground flax – Extra nutrition that doesn’t change the taste
- Pinch of sea salt – Trust me, it makes everything better
🥜 Recipe Scaling Calculator
Adjust Maria’s Peanut Butter Oatmeal Balls for any crowd size
📋 Scaled Ingredients:
The Real Talk About Ingredients (What They Don’t Tell You)
About those oats: Please, please use rolled oats, not quick oats or steel-cut. I learned this the hard way when I grabbed the wrong container and ended up with something that looked like chunky peanut butter soup. Rolled oats give you that perfect chewy texture that makes these feel like actual cookies, not health food pretending to be dessert.
Peanut butter secrets: The type matters more than you think. I use the drippy, natural kind from our local Mexican market—you know, the one where you have to stir the oil back in? It creates the perfect consistency. If you’re using the thick, commercial stuff from a jar, warm it up for 15-20 seconds in the microwave with your honey or maple syrup. Game changer.
Chocolate chip wisdom: Mini chips distribute better than regular ones, but honestly? Use whatever makes you happy. Sofia prefers the regular-sized ones because she says they create “surprise bites of chocolate.” Who am I to argue with that logic?
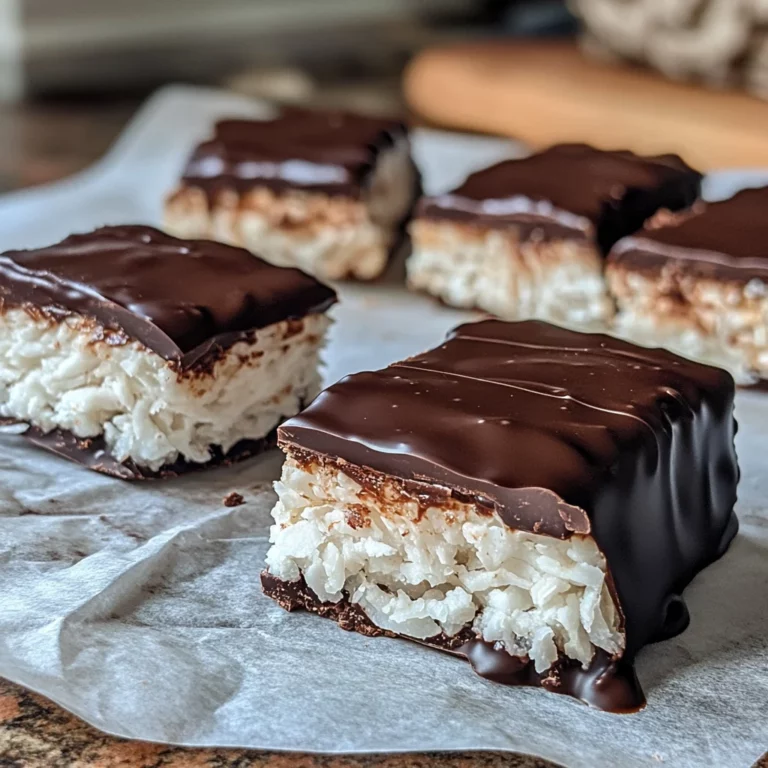
Looking for inspiration? Try our Coconut candy bars—another easy no-bake treat for clean snacking.
The Method That Actually Works (Step by Step)
Maria’s Foolproof Technique:
Step 1: In your favorite mixing bowl (mine’s the same ceramic one my mother gave me fifteen years ago), combine your oats with any seeds you’re adding. This ensures even distribution—no one wants all the chia seeds in one sad ball.
Step 2: Here’s where the magic happens. Mix your peanut butter and sweetener first, before adding anything else. Work it together until it’s smooth and glossy. If it seems thick, don’t panic—just warm it slightly. You want it to look like dulce de leche, smooth enough to coat a spoon.
Step 3: Pour this gorgeous mixture over your oats and fold everything together. I use a wooden spoon (one of abuela’s, naturally) and work it like I’m folding masa for empanadas—gentle but thorough. The mixture should hold together when you squeeze it but not be wet or sticky.
Step 4: Add your chocolate chips last. This prevents them from breaking up during mixing, which can turn your beautiful balls into chocolate-streaked messes. Trust me, I’ve been there.
Step 5: Cover and chill for 20 minutes. I know you want to skip this step, but don’t. This rest time lets the oats absorb some moisture and makes rolling so much easier.
Step 6: Wet your hands (seriously, don’t skip this), and roll into balls about the size of large walnuts. I use a small cookie scoop because it keeps everything uniform, but your hands work perfectly fine.
Step 7: Freeze for 20 minutes to set, then transfer to the fridge. They’ll keep for two weeks, though they’ve never lasted that long in our house.
When Things Go Wrong (And How to Fix Them)
Let’s be honest—sometimes recipes just don’t cooperate, no matter how carefully you follow directions. Here’s what I’ve learned from my various kitchen adventures:
If your mixture is too crumbly: Add nut milk one tablespoon at a time. I prefer almond milk, but whatever you have works. The key is going slowly—you can always add more, but you can’t take it back.
If it’s too wet and won’t hold shape: Add more oats, a quarter cup at a time. This happened to me once when I used extra-drippy peanut butter. No shame in adjusting—that’s what separates good cooks from recipe robots.
If they’re falling apart after chilling: Your peanut butter might not have been sticky enough to begin with. Next time, warm it more thoroughly with your sweetener. For this batch, try pressing them into a pan and cutting into squares instead—same taste, different shape.
Cultural Twists That Make My Heart Happy
This is where I get to share some of the variations that connect these simple treats to the flavors I grew up loving. My abuela would probably laugh at the idea of adding Mexican touches to peanut butter balls, but food evolution is beautiful, ¿no?
Horchata-inspired version: Add a teaspoon of cinnamon and a quarter teaspoon of vanilla extract. Roll the finished balls in a mixture of cinnamon and coconut sugar. Sofia says these taste like “horchata cookies,” which is exactly what I was going for.
Chocolate mexicano variation: Replace regular chocolate chips with chopped dark chocolate mixed with a pinch of cayenne and cinnamon. The heat sneaks up on you in the most delicious way.
Tropical twist: Swap chocolate chips for unsweetened coconut flakes and add lime zest. These remind me of summers in Guadalajara, eating coconut paletas from the street vendors.
Cafecito version: Add a tablespoon of finely ground coffee (I use our leftover grounds from morning café con leche) and replace chocolate chips with chopped chocolate-covered espresso beans. Perfect with afternoon coffee.
The Meal Prep Magic (Because We’re All Busy)
Here’s what makes these absolutely perfect for busy families: they freeze beautifully, travel well, and can be made three different ways depending on your energy level.
Sunday batch cooking: I make a double batch every other Sunday, rolling half into balls and pressing the other half into a parchment-lined pan. The pan version gets cut into squares—same recipe, less rolling work. Both go in the freezer in labeled containers.
Grab-and-go strategy: I keep a small container in the fridge with five or six balls for the week. They’re perfect for Sofia’s after-school snacks or when I need something sweet with my morning coffee.
Emergency treat solution: The frozen ones defrost in about 15 minutes at room temperature, which means unexpected guests or sudden sweet cravings are never a problem. My neighbor Mrs. Johnson has learned to time her visits for when these are coming out of the freezer.
Getting Kids Involved (Without Losing Your Mind)
Sofia has been my kitchen assistant since she was tall enough to reach the counter standing on a stool. These balls are perfect for getting kids involved because there’s no heat, no sharp knives, and mistakes are easily fixed.
Age-appropriate jobs: Little ones can add ingredients to the bowl and help with mixing (expect some mess, embrace the joy). Older kids can handle the rolling and definitely the taste-testing quality control.
Customization fun: Let each kid customize a portion of the batch. Sofia likes to add extra chocolate chips to hers, while her friend Maya prefers dried cranberries. Making half-batches with different add-ins keeps everyone happy.
Teaching moments: These are perfect for talking about healthy ingredients, measurements, and the difference between refined and natural sugars. Plus, kids who help make their snacks are more likely to eat them willingly.
Troubleshooting Like a Pro (Hard-Won Wisdom)
After making these approximately a million times, I’ve encountered every possible issue. Here’s my troubleshooting guide for when things don’t go perfectly:
Problem: Balls won’t stay round and keep flattening
Solution: Chill longer before rolling, and make sure your hands are damp but not dripping wet.
Problem: They taste too healthy (Sofia’s complaint)
Solution: Add a tablespoon of vanilla extract and increase chocolate chips slightly. The vanilla makes everything taste more dessert-like.
Problem: Texture is gritty instead of smooth
Solution: Your oats might be too coarse, or you didn’t mix the peanut butter and sweetener thoroughly enough first.
Problem: They’re too sweet or not sweet enough
Solution: Adjust with a pinch of salt (reduces sweetness perception) or a tablespoon more sweetener. Taste as you go—there are no raw eggs to worry about.
Beyond the Basic Recipe (When You’re Ready to Experiment)
Once you’ve mastered the basic version, the world opens up. I’ve been experimenting with variations for years, and some have become family favorites that Sofia requests by name.
Protein power version: Add a scoop of vanilla protein powder and increase the liquid slightly. These become legitimate post-workout snacks that actually taste good.
Seasonal variations: Pumpkin spice version with a tablespoon of pumpkin puree and warming spices for fall. Peppermint version with crushed candy canes for winter holidays. The base recipe is so forgiving that most additions work.
Nut-free adaptations: Sunflower seed butter or tahini work beautifully for kids with allergies. The tahini version has an almost halva-like quality that’s absolutely divine.
Fancy presentation: Roll finished balls in shredded coconut, crushed nuts, or cocoa powder for special occasions. They look like they came from an expensive bakery.
The Real Benefits (Why I Keep Making These)
Beyond the obvious deliciousness, these little treats have become a staple in our house for practical reasons that matter to real families.
Genuinely nutritious: Unlike most sweet snacks, these actually provide sustained energy. The oats give you fiber, peanut butter adds protein and healthy fats, and the natural sweeteners don’t cause the same sugar crash as refined options.
Budget-friendly: A batch costs maybe three dollars to make and provides 12-15 snacks. Compare that to buying individual energy bars or granola bites at the store.
Allergy-adaptable: Swap the peanut butter for any nut or seed butter, use different mix-ins, adjust sweeteners. They work for most dietary restrictions with simple substitutions.
Time-efficient: Ten minutes of active work, plus chilling time. Perfect for Sunday meal prep or emergency treat situations.
Storage and Serving Suggestions (Practical Stuff)

Here’s what I’ve learned about keeping these fresh and delicious:
Refrigerator storage: In an airtight container, they stay perfect for up to two weeks. I line the container with parchment paper to prevent sticking and keep a small piece of parchment between layers if I’m stacking them.
Freezer storage: They freeze beautifully for up to two months. I portion them into small containers or bags—perfect for grabbing exactly what I need without defrosting the entire batch.
Serving ideas: Beyond just eating them as snacks, I’ve served them chopped over yogurt, crumbled into oatmeal, and even used them as “cookie dough” for homemade ice cream. Sofia likes them with a glass of cold milk, just like regular cookies.
Why This Recipe Matters (The Heart Stuff)
In our fast-paced world, there’s something deeply satisfying about making treats that are both simple and nourishing. These balls represent everything I love about cooking—they’re approachable for beginners, customizable for different tastes, and create moments of connection in the kitchen.
Every time I make these, I think about my abuela’s hands shaping masa, creating something beautiful from simple ingredients. She never made peanut butter oatmeal balls, but she understood the principle: good food made with love feeds more than just hunger.
Sofia rolls her eyes when I get sentimental about food, but she also asks for these specifically when she’s stressed about school or missing friends. Food is memory, comfort, and connection all rolled into one perfect bite.
The Perfect No-Bake Peanut Butter Oatmeal Balls: A Recipe That Finally Makes Sense
Course: SnackCuisine: AmericanDifficulty: Easy12
servings10
minutes167
kcalWhip up these no-bake peanut butter oatmeal balls with just four pantry staples: oats, peanut butter, chocolate chips, and maple syrup.
Ingredients
- What You Need (Probably Already in Your Pantry):
1 heaping cup rolled oats – The foundation that holds everything together
1/2 cup smooth peanut butter – The star that brings richness and protein
1/4 cup mini dark chocolate chips – Because life’s too short for sad snacks
1/3 cup maple syrup or honey – The gentle sweetness that binds it all
- Optional Boosters (For When You’re Feeling Fancy):
2-3 tablespoons nut milk – If your mixture needs help coming together
1 tablespoon chia seeds or ground flax – Extra nutrition that doesn’t change the taste
Pinch of sea salt – Trust me, it makes everything better
Directions
- In your favorite mixing bowl (mine’s the same ceramic one my mother gave me fifteen years ago), combine your oats with any seeds you’re adding. This ensures even distribution—no one wants all the chia seeds in one sad ball.
- Here’s where the magic happens. Mix your peanut butter and sweetener first, before adding anything else. Work it together until it’s smooth and glossy. If it seems thick, don’t panic—just warm it slightly. You want it to look like dulce de leche, smooth enough to coat a spoon.
- Pour this gorgeous mixture over your oats and fold everything together. I use a wooden spoon (one of abuela’s, naturally) and work it like I’m folding masa for empanadas—gentle but thorough. The mixture should hold together when you squeeze it but not be wet or sticky.
- Add your chocolate chips last. This prevents them from breaking up during mixing, which can turn your beautiful balls into chocolate-streaked messes. Trust me, I’ve been there.
- Cover and chill for 20 minutes. I know you want to skip this step, but don’t. This rest time lets the oats absorb some moisture and makes rolling so much easier.
- Wet your hands (seriously, don’t skip this), and roll into balls about the size of large walnuts. I use a small cookie scoop because it keeps everything uniform, but your hands work perfectly fine.
- Freeze for 20 minutes to set, then transfer to the fridge. They’ll keep for two weeks, though they’ve never lasted that long in our house.
Notes
- Peanut Butter Temperature Matters: If your peanut butter has been in the fridge or feels thick, warm it with the maple syrup for 15-20 seconds in the microwave. This creates the perfect binding consistency—I learned this after too many crumbly disasters in my early days.
- Oats Are Not All Equal: Please use rolled oats, not quick oats or steel-cut. I made this mistake once and ended up with something Sofia described as “chunky peanut butter soup.” Rolled oats give you that perfect chewy texture that makes these feel like real cookies.
- Don’t Skip the Chill Time: That 20-minute rest in the fridge isn’t just a suggestion—it’s what separates success from sticky-hand frustration. The oats need time to absorb moisture, and your future self will thank you when rolling these becomes effortless instead of messy.
- Wet Hands = Perfect Balls: Always dampen your hands before rolling. This simple trick prevents sticking and creates smooth, professional-looking results. It’s the difference between looking like a kitchen pro and looking like you wrestled with cookie dough (and lost).
Frequently Asked Questions
The magic four ingredients that make these power bites work every single time are: rolled oats, smooth peanut butter, mini chocolate chips, and maple syrup (or honey). That’s it, mi amor!
My abuela always said the best recipes have the fewest ingredients, and she was absolutely right. These four work together like a perfectly choreographed dance—the oats provide structure and fiber, peanut butter brings protein and richness, chocolate chips add that touch of indulgence we all need, and maple syrup binds everything with natural sweetness.
I’ve been making these for years, and what I love most is that you probably already have everything in your pantry right now. No special trips to fancy stores or expensive superfood powders—just honest, wholesome ingredients that create something truly special.
Here’s my foolproof method that actually works (learned through plenty of trial and error, trust me):
First, mix your peanut butter and maple syrup until smooth—this is crucial for preventing crumbly disasters. Then, fold in your oats gently, like you’re incorporating air into whipped cream. Add chocolate chips last to prevent breaking them. Chill the mixture for 20 minutes (don’t skip this!), then roll with damp hands into walnut-sized balls.
The secret that took me years to figure out? It’s all about the order of operations and temperature. When I first started making these, I’d dump everything together and wonder why they wouldn’t hold their shape. Now Sofia says I make them “like a scientist,” but really, I just learned to pay attention to what the ingredients need.
If your mixture seems too dry, add nut milk one tablespoon at a time. Too wet? More oats. The beauty of this recipe is that it’s forgiving once you understand the basics.
Let me give you the honest answer, not the marketing version: Yes, these are genuinely healthy, but like everything in life, it depends on how you look at them and how many you eat!
These little powerhouses provide real nutrition—protein from peanut butter, fiber from oats, and natural energy from maple syrup without the crash you get from refined sugars. Sofia takes them in her lunch box, and I feel good knowing she’s getting sustained energy, not just empty calories.
Here’s what makes them legitimately nutritious: they’re made with whole food ingredients, provide about 5 grams of protein per ball, contain healthy fats that help you feel satisfied, and give you steady energy rather than a sugar spike and crash. Compare that to most packaged snacks, and these win hands down.
That said, they’re still treats—delicious, satisfying treats that happen to be made with wholesome ingredients. I tell Sofia they’re “healthy cookies,” and we both understand that means they’re better than store-bought options but still something to enjoy mindfully, not eat by the handful (though I won’t judge if you do).
If you want to make the absolute simplest version possible, you can create these with just three core ingredients: peanut butter, oats, and maple syrup. No dairy butter needed—the peanut butter provides all the richness and binding power you need!
This minimal version is what I make when Sofia’s friends come over and I realize I’m out of chocolate chips. The ratios stay the same: 1/2 cup peanut butter, 1 cup oats, and 1/3 cup maple syrup. They taste like peanut butter cookie dough and disappear just as fast as the chocolate chip version.
I actually prefer the three-ingredient version sometimes—it lets the peanut butter flavor really shine through, and it’s perfect for kids with chocolate sensitivities or when you want something that feels more like “health food” and less like “dessert disguised as health food.”
The technique is exactly the same: mix peanut butter and maple syrup first, fold in oats, chill, and roll. Sometimes the simplest versions are the most satisfying—my abuela would definitely approve of this no-fuss approach to sweet treats.
Ready to Start Your Own Tradition?
These peanut butter oatmeal balls aren’t just another recipe to add to your collection—they’re the beginning of your own kitchen confidence story. Every time you make them, you’ll learn something new about how ingredients work together, how to adjust for your family’s preferences, and how satisfying it is to create something delicious from scratch.
Start with the basic recipe, then make it your own. Add the spices that make your heart happy, include your kids in the process, and don’t worry about making them perfectly round. The imperfect ones taste just as good, and the memories you create making them are worth more than any Pinterest-perfect photo.
My neighbor Mrs. Johnson always asks for the recipe, and I always tell her the secret ingredient is making them with someone you love. But between you and me, the real secret is just getting started. These balls will teach you everything you need to know about the magic of no-bake treats.
What’s your favorite no-bake memory? I’d love to hear about your kitchen adventures in the comments below—did you customize the recipe? Did your kids help? Did you make any delicious mistakes along the way? Let’s share our stories and learn from each other.
This recipe was lovingly adapted from a collection of family-tested treats, with my own cultural touches and hard-won kitchen wisdom added along the way. May it bring as much joy to your kitchen as it has to mine.