No Bake Protein Cookies: The Best Easy & Healthy Snack You Can Make
Picture this: It’s 6:47 AM, Emma’s frantically searching for her science project, Jake can’t find his left shoe (again), and I’m standing in the kitchen realizing I forgot to pack snacks for their after-school activities. Sound familiar? Last month, in a moment of pure desperation, I grabbed a bag of store-bought cookies and immediately felt that familiar pang of mom guilt. That’s when I knew I needed a game-changer.
Enter these no-bake protein cookies – the snack that’s rescued my sanity and actually makes me excited about what I’m sending with my kids. After seventeen rounds of testing (yes, I counted because I’m that kind of kitchen nerd), I’ve created what Emma calls “science cookies” and Jake calls “the good ones.” More importantly, they’re the cookies that let me say yes without the guilt.
Key Takeaways: Why These Cookies Work for Busy Parents
- No oven required – Make them while the coffee’s brewing, no heating up the kitchen
- 4 grams of protein per cookie – Actual fuel for growing bodies, not just sugar crashes
- 25-minute total time – From start to lunchbox in less than half an hour
- Only 3 grams of sugar – Compared to 18 grams in traditional no-bake cookies
- Week-long storage – Make once, snack all week (or freeze for longer)
The Disaster That Changed Everything
Let me tell you about the kitchen disaster that started this whole journey. It was Jake’s seventh birthday party, and I was feeling pretty confident about my no-bake cookie game. I’d made them a dozen times before – how hard could it be? Well, apparently harder than I thought when you’re distracted by decorating and trying to manage eight seven-year-olds.
I rushed through the cooking process, didn’t let the mixture get hot enough, and definitely didn’t stir long enough. The result? Cookie soup. Literally. The mixture never set, and I had fifteen kids eating what was essentially chocolate oat pudding with spoons. They thought it was hilarious. I was mortified.
That disaster taught me something crucial about no-bake cookies: they’re all about understanding the science. You can’t just throw ingredients together and hope for the best. There’s actual chemistry happening, and if you mess with the ratios or skip steps, you’re going to end up serving dessert soup at your kid’s birthday party.
From my pastry chef days, I knew that precision matters, but somehow I’d gotten lazy with home baking. That birthday party failure sent me back to the drawing board with a renewed respect for measurements, temperatures, and timing. It also started my quest for a no-bake cookie that was actually worth making – and worth eating.
Looking for inspiration? Try our frozen Greek yogurt recipe too!
Why Traditional No-Bake Cookies Aren’t Cutting It Anymore
Here’s the uncomfortable truth about traditional no-bake cookies: they’re basically candy masquerading as a snack. When I broke down the nutrition facts, I was shocked. We’re talking 18 grams of sugar per cookie, zero protein, and a whole lot of refined ingredients that send kids (and adults) on an energy roller coaster.
As a mom of two active kids, I was watching this play out in real time. Emma would come home from school, demolish three store-bought cookies, get a burst of manic energy, then crash hard by dinnertime. Jake would ask for “just one more” and somehow end up eating half the container, then complain his stomach hurt.
I realized I needed something that would actually sustain them through homework time, soccer practice, and the general chaos of after-school life. Something with real nutrition that they’d actually want to eat. Something that wouldn’t make me feel like I was sabotaging their health every time I said yes to “Can I have a cookie?”
That’s when I started thinking about protein cookies differently. What if, instead of trying to make candy healthier, I approached this like building a protein bar that happened to be shaped like a cookie? What if I could create something that gave them lasting energy instead of a sugar spike and crash?
The Science Behind What Actually Works
After batch number three (which crumbled apart the moment you touched it), I went back to my food science basics. Here’s what I discovered about making no-bake cookies that actually hold together and provide real nutrition:
Protein powder isn’t just for flavor – it’s actually acting as a binding agent, similar to how flour works in traditional baking. When you combine it with the heated liquid mixture, it creates structure. This is why the type of protein powder matters. Plant-based proteins tend to work better here because they don’t get as gritty when heated.
The heating process is crucial – you’re not just warming ingredients, you’re creating an emulsion. When you heat the peanut butter with the liquid, you’re breaking down the fat molecules and allowing them to coat the oats evenly. Skip this step or don’t heat it enough, and your cookies will fall apart.
Oat selection makes a difference – old-fashioned oats have more structure than quick oats. They maintain their texture and provide that satisfying chew. I’m obsessed with Bob’s Red Mill oats because they’re consistently sized and if you need gluten-free options, they’ve got you covered.
The banana science – mashed banana isn’t just replacing sugar, it’s providing natural pectin, which helps with binding. It also adds moisture and natural sweetness without the blood sugar spike you get from refined sugar. The key is using properly ripe bananas – soft with brown spots. Under-ripe bananas don’t mash well and add an unpleasant starchy flavor.
No-Bake Protein Cookies Recipe

Ingredients:
- 2 cups old-fashioned rolled oats
- 1 scoop (21 grams) vanilla or chocolate protein powder
- ½ cup creamy natural peanut butter (the drippy kind)
- ½ cup almond milk
- 1 mashed banana or ¼ cup maple syrup
- 2 tablespoons cocoa powder
- ½ teaspoon vanilla
- ⅛ teaspoon sea salt
Scale This Recipe
Need more (or fewer) cookies? Use this tool to scale the ingredients:
Scaled Ingredients:
- • 2 cups old-fashioned rolled oats
- • 1 scoop (21g) vanilla or chocolate protein powder
- • ½ cup creamy natural peanut butter
- • ½ cup almond milk
- • 1 mashed banana or ¼ cup maple syrup
- • 2 tablespoons cocoa powder
- • ½ teaspoon vanilla
- • ⅛ teaspoon sea salt
Estimated total cookies:
Instructions:
- Prepare the dry mixture: In a medium mixing bowl, combine oats and protein powder, stirring until there’s a nice dusting of protein powder over all the oats. This coating step is crucial for even distribution.
- Create the binding mixture: In a saucepan, combine almond milk, peanut butter, mashed banana (or maple syrup), cocoa powder, and sea salt. Cook over medium-low heat, stirring constantly until the cocoa powder completely dissolves and the mixture thickens slightly. This usually takes 3-4 minutes. You’ll know it’s ready when it coats the back of a spoon.
- Add vanilla and combine: Remove the saucepan from heat and immediately stir in vanilla. Pour this warm mixture over your oat and protein powder combination. Mix thoroughly until every single oat is coated and the mixture looks glossy.
- Chill for structure: Place the bowl in the refrigerator for 10 minutes. This step isn’t optional – it allows the mixture to cool and thicken, making it much easier to shape into cookies that will hold their form.
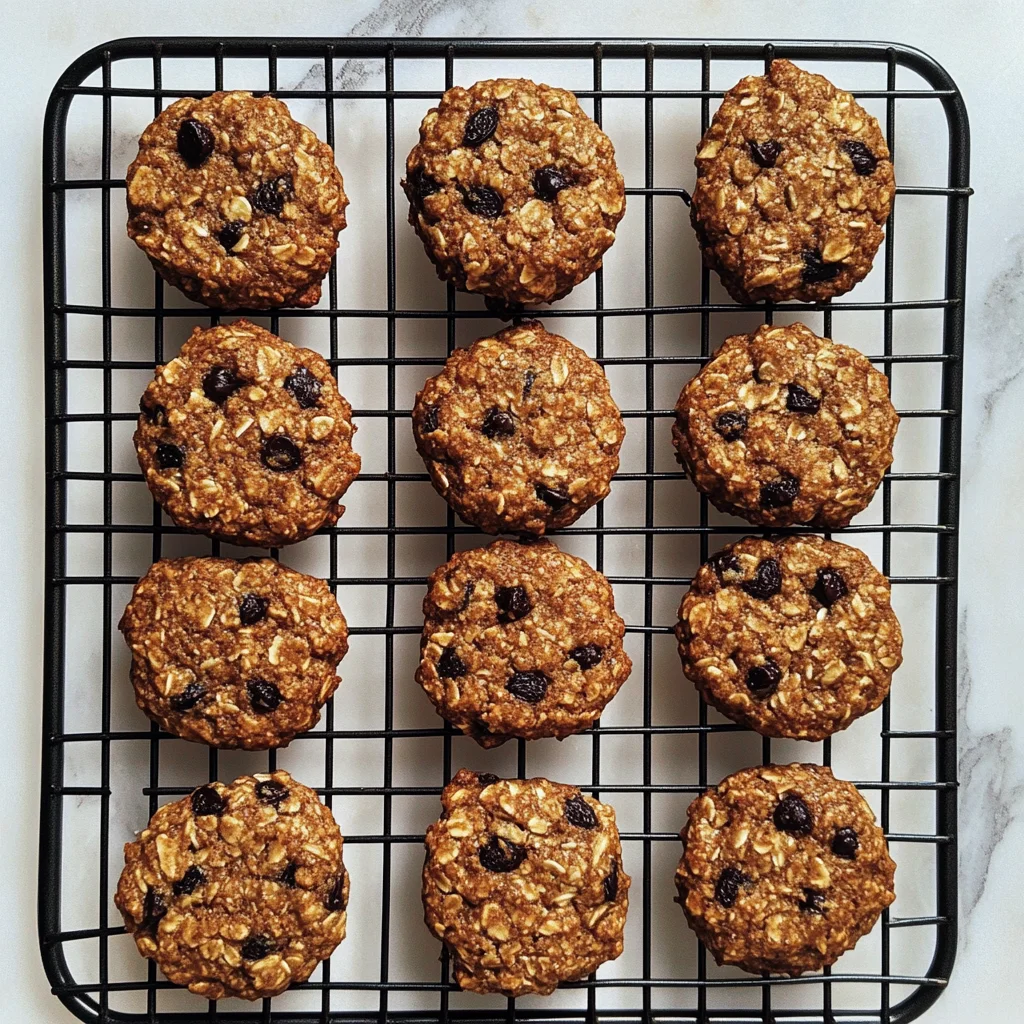
- Shape and set: Drop spoonfuls of the chilled mixture onto a parchment-lined baking sheet. Use your hands to shape them into round cookies. They’re ready to eat immediately, or you can chill them further for firmer cookies.
The Real-Life Testing Stories (AKA My Kitchen Education)
Let me walk you through some of the disasters that led to the winning formula, because honestly, the failures taught me more than the successes.
Batch #7: The Almond Flour Experiment – I thought I was being clever, substituting some of the oats with almond flour to boost the protein even more. The result? Cookies that crumbled the moment you looked at them sideways. Emma picked up one piece and said, “Mom, I think your science experiment needs more science.” That’s when I learned that oats provide crucial structure that you can’t just replace with flour.
Batch #12: The Under-Ripe Banana Disaster – I used a barely-yellow banana thinking it would be less sweet and more “healthy.” Wrong on all counts. The cookies had a weird starchy taste and didn’t bind properly. Jake took one bite and diplomatically said, “Maybe this one needs more taste-testing time.” Lesson learned: ripe bananas aren’t just about sweetness, they’re about chemistry.
Batch #15: The Protein Powder Experiment – I decided to try a chocolate peanut butter flavored protein powder, thinking more flavor would be better. The result was overwhelmingly artificial-tasting and so sweet that even my sugar-loving kids wrinkled their noses. Sometimes simple vanilla or chocolate is the way to go.
The breakthrough came when I stopped trying to be innovative and started trusting the process. Properly ripe banana, accurately measured protein powder (using my digital scale, because volume measurements are unreliable), and that crucial cooking step where you stir until the cocoa completely dissolves. No shortcuts, no substitutions just because.
The Substitutions That Actually Work (And the Ones That Don’t)
After all that testing, I can tell you exactly what works and what will send you back to the drawing board:
Peanut butter alternatives: Almond butter works beautifully and adds a slightly different flavor profile. Sunflower seed butter is fantastic for nut-free households and gives the cookies a subtle earthy taste. Cashew butter makes them incredibly creamy. What doesn’t work? Anything too thick or dry. You need that creamy, drippy consistency for proper distribution.
The banana question: Maple syrup works as a substitute, but you might need to add an extra tablespoon of oats if the mixture seems too wet. Honey gets too sticky when chilled and can make the texture weird. Agave works in a pinch but doesn’t add the binding properties that banana provides.
Milk alternatives: Any non-dairy milk works here. Oat milk adds a subtle sweetness and creamy texture. Coconut milk makes them richer but can add a coconut flavor that not everyone loves. Soy milk works but can sometimes curdle when heated if you’re not careful. Almond milk remains my go-to for clean flavor.
Protein powder reality check: Stick with vanilla or plain chocolate. I’ve tried berry flavors (too artificial), peanut butter flavor (too overwhelming), and even unflavored (surprisingly chalky). Plant-based proteins tend to work better than whey in this application because they don’t get as grainy when heated.
How These Became Our Back-to-School Secret Weapon
The real test came during the first week of school when everything was chaos. Emma had soccer practice until 6 PM, Jake had a science club meeting that ran late, and I was juggling work calls while trying to manage pickup schedules. Instead of hitting the vending machine or grabbing processed snacks from the pantry, I handed them each a container of these cookies.
The difference was immediately obvious. They came home energized but not wired, satisfied but not sluggish. Emma actually said, “These are better than the cookies at school,” which is high praise from a nine-year-old. Jake, who usually crashes hard after sugary snacks, was still alert enough to tackle his homework without the usual battle.
That’s when I realized we’d found our solution. These aren’t just cookies – they’re peace of mind in a grab-and-go package. They’re the answer to “Mom, I’m hungry” that doesn’t make me cringe. They’re proof that you can give your kids something they genuinely love that’s actually good for them.
My Sunday prep routine has become sacred: I make a double batch every weekend while the kids are occupied with screen time. It takes maybe 45 minutes total, and suddenly I have grab-and-go snacks that actually make me feel good about what they’re eating. I portion them into small containers for easy lunchbox packing, and honestly, they’re often gone before the week is up.
Storage Solutions for Real Life
Let’s talk practical storage, because what’s the point of making amazing cookies if they go bad before you can eat them? These cookies live in an airtight container in my fridge and stay perfect for a full week. The texture actually improves after the first day as the flavors meld together.
For longer storage, they freeze beautifully for up to three months. I sometimes make a triple batch and freeze extras in freezer bags, separating layers with parchment paper. Pro tip from my pastry days: let them thaw for about 10 minutes before eating. They’re perfect at that slightly-chilled-but-not-frozen temperature – firm enough to hold their shape but soft enough to bite into easily.
I’ve also discovered they’re perfect for meal prep. I make them on Sunday, portion them into grab-and-go containers, and boom – snacks for the entire week. Emma takes them to school, Jake brings them to soccer practice, and I’ve been known to stash one in my purse for those moments when hunger strikes and the only options are overpriced coffee shop pastries.
The Nutrition That Actually Matters
Let’s break down why these cookies work nutritionally, because the numbers tell an important story. Each cookie has 4 grams of protein, 2 grams of fiber, and only 3 grams of sugar. Compare that to a typical store-bought cookie with zero protein, minimal fiber, and 15-18 grams of sugar, and you can see why these actually sustain energy instead of creating crashes.
The protein comes from both the protein powder and the peanut butter, creating a complete amino acid profile that helps with muscle recovery after sports and keeps kids satisfied longer. The fiber from the oats helps with digestion and provides steady energy release. The healthy fats from the peanut butter support brain function and help with nutrient absorption.
But here’s what I love most about the nutrition profile: it’s real food. No artificial preservatives, no high fructose corn syrup, no ingredients I can’t pronounce. Just wholesome ingredients working together to create something that tastes indulgent but actually nourishes growing bodies.
Why This Recipe Has Become My Non-Negotiable
In my twelve years of food blogging, I’ve tested thousands of recipes. Some are good, some are great, and a very few become absolutely essential. These cookies fall into that essential category – they’ve fundamentally changed how our family approaches snacking.
They’ve solved the perpetual problem of “there’s nothing good to eat” because there’s always a container of these in the fridge. They’ve eliminated the guilt I used to feel about after-school snacks because I know these are actually helping my kids, not just satisfying their sweet tooth. They’ve simplified my meal planning because I have one less thing to worry about.
But mostly, they’ve reminded me that good nutrition doesn’t have to be complicated or taste like cardboard. Sometimes the best solutions are the simplest ones – real ingredients, proper technique, and a little bit of kitchen science.
No Bake Protein Cookies: The Best Easy & Healthy Snack You Can Make
Course: SnackCuisine: AmericanDifficulty: Easy4
servings15
minutes9
minutes96
kcal25
minutesCraving a healthy treat? These no-bake protein cookies are made with just eight simple ingredients, completely free of butter, white sugar, and oil. They’re also vegan and gluten-free!
Ingredients
2 cups old-fashioned rolled oats
1 scoop (21 grams) vanilla or chocolate protein powder
½ cup creamy natural peanut butter (the drippy kind)
½ cup almond milk
1 mashed banana or ¼ cup maple syrup
2 tablespoons cocoa powder
½ teaspoon vanilla
⅛ teaspoon sea salt
Directions
- Prepare the dry mixture: In a medium mixing bowl, combine oats and protein powder, stirring until there’s a nice dusting of protein powder over all the oats. This coating step is crucial for even distribution.
- Create the binding mixture: In a saucepan, combine almond milk, peanut butter, mashed banana (or maple syrup), cocoa powder, and sea salt. Cook over medium-low heat, stirring constantly until the cocoa powder completely dissolves and the mixture thickens slightly. This usually takes 3-4 minutes. You’ll know it’s ready when it coats the back of a spoon.
- Add vanilla and combine: Remove the saucepan from heat and immediately stir in vanilla. Pour this warm mixture over your oat and protein powder combination. Mix thoroughly until every single oat is coated and the mixture looks glossy.
- Chill for structure: Place the bowl in the refrigerator for 10 minutes. This step isn’t optional – it allows the mixture to cool and thicken, making it much easier to shape into cookies that will hold their form.
- Shape and set: Drop spoonfuls of the chilled mixture onto a parchment-lined baking sheet. Use your hands to shape them into round cookies. They’re ready to eat immediately, or you can chill them further for firmer cookies.
Notes
- Use a digital scale for protein powder measurement – it makes a difference in consistency and the 21-gram measurement is more accurate than volume
- The 10-minute chill time isn’t optional if you want cookies that hold their shape properly
- Natural peanut butter should be drippy, not thick – this affects the final texture and binding
- These cookies actually taste better the next day after flavors have melded together
Common Questions About Protein Cookies
Your Back-to-School Game Changer
If you’re tired of feeling guilty about snack choices, if you’re looking for something that actually sustains your kids instead of sending them on a sugar roller coaster, this is your answer. Make a batch this weekend. See how it changes your week. Watch how your kids respond to having sustained energy instead of sugar crashes.
I’d love to hear how these work in your household – and if your kids come up with their own nickname for them like mine did. Drop a comment below and let me know what variations you try. After all, the best recipes are the ones we make our own, and I’m always curious to see how other families adapt these to their needs.
The back-to-school season is hectic enough without worrying about whether you’re setting your kids up for success or sugar crashes. These cookies? They’re definitely the former. Make them your secret weapon this school year.
Don’t miss our viral no bake tiramisu and frozen Greek yogurt recipe for even more freezer-friendly desserts!
For more recipes follow us on Facebook and Pinterest.