Oreo No Bake Dessert – The Best 2025 Creamy No-Bake Recipe
There I was, standing in my first American supermarket in Portland, completely overwhelmed by aisles that seemed to stretch for miles. Coming from my little Tuscan village where our market fit in one piazza, this was like stepping into another universe. But then I spotted them—those iconic black and white cookies called Oreos—and my curiosity got the better of me.
I’ll never forget my neighbor Sarah’s face when she discovered I’d never tried an Oreo. “Zara,” she gasped, “we need to fix this immediately!” The next thing I knew, she was at my door with a family-sized package and the most intriguing recipe I’d ever seen. No baking? Layers of cream and chocolate? It sounded too good to be true, yet somehow perfectly American in its bold simplicity.
What You’ll Discover in This Recipe:
- A foolproof no-bake dessert that’s perfect for hot summer days or when you want to avoid turning on the oven
- Italian-inspired variations that add sophisticated flavors to this American classic
- Make-ahead tips that turn this into the perfect entertaining dessert
- Cultural fusion techniques that honor both traditions while creating something entirely new
- Professional secrets for achieving the perfect texture in every layer
The Magic of American “No Bake” Culture
In Italy, we have our own version of easy desserts—think tiramisu or panna cotta—but the American concept of “no bake” was entirely foreign to me. Where we might spend hours tempering chocolate or carefully folding mascarpone, here was a dessert that embraced convenience without sacrificing indulgence. Honestly, it felt revolutionary.
What struck me most about this Oreo dessert wasn’t just its simplicity, but how it brought people together. During my first American summer, I watched Sarah make this for every barbecue, potluck, and family gathering. It became her signature, and now, years later, it’s become one of mine too—with a few Italian touches, naturally.
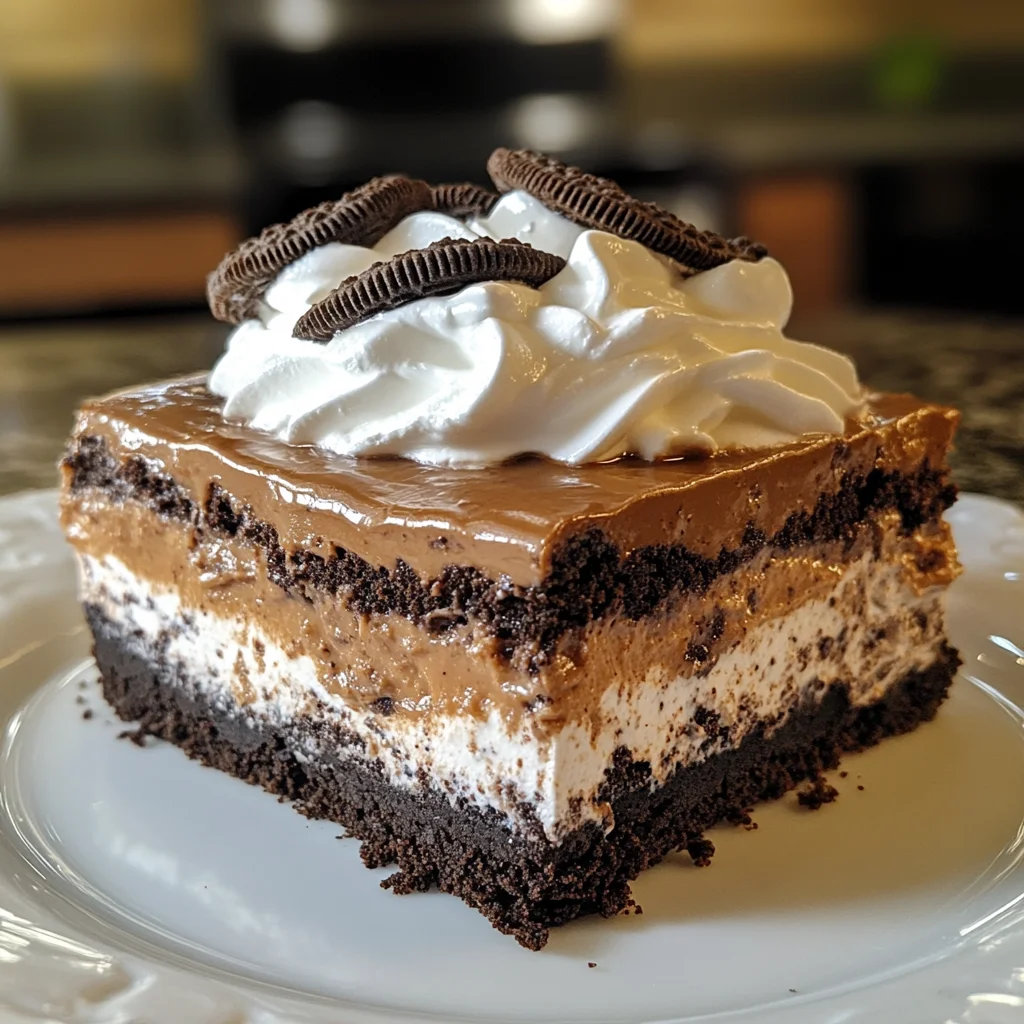
Understanding the Layers: A Symphony in Four Parts
Think of this dessert like building a beautiful piece of architecture. Each layer has its purpose, its texture, its moment to shine. The Oreo crust provides that satisfying crunch—reminiscent of the way we use amaretti in our Italian desserts. The cream cheese layer brings richness that reminds me of mascarpone-based desserts from home. The chocolate pudding? Pure American comfort. And that final cloud of whipped cream? It’s like the perfect ending to a well-composed meal.
But here’s what I learned through trial and error: temperature is everything. Each layer needs its moment to set properly, and patience—something we Italians understand well—makes all the difference between a good dessert and an unforgettable one.
And if you’re into more unique no-bake options, don’t miss our Coconut Candy Bars—another reader favorite.
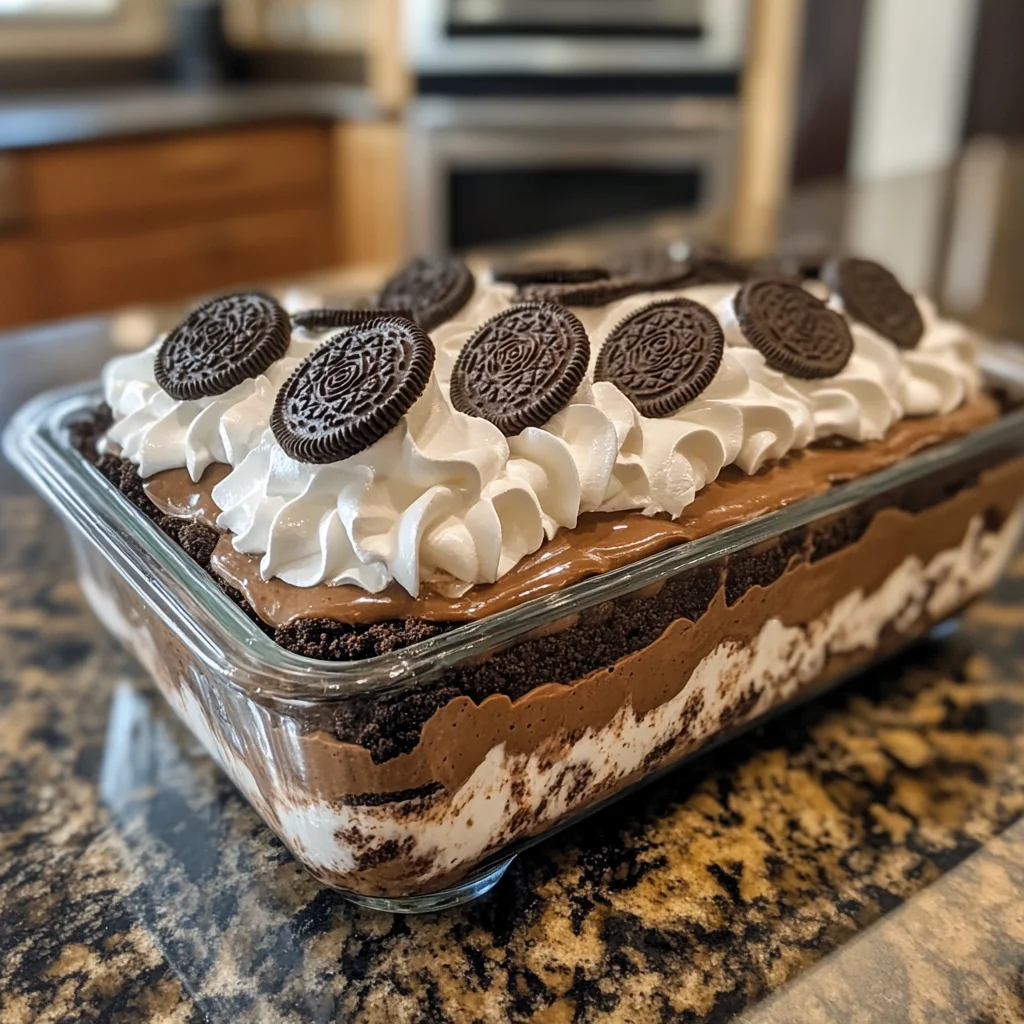
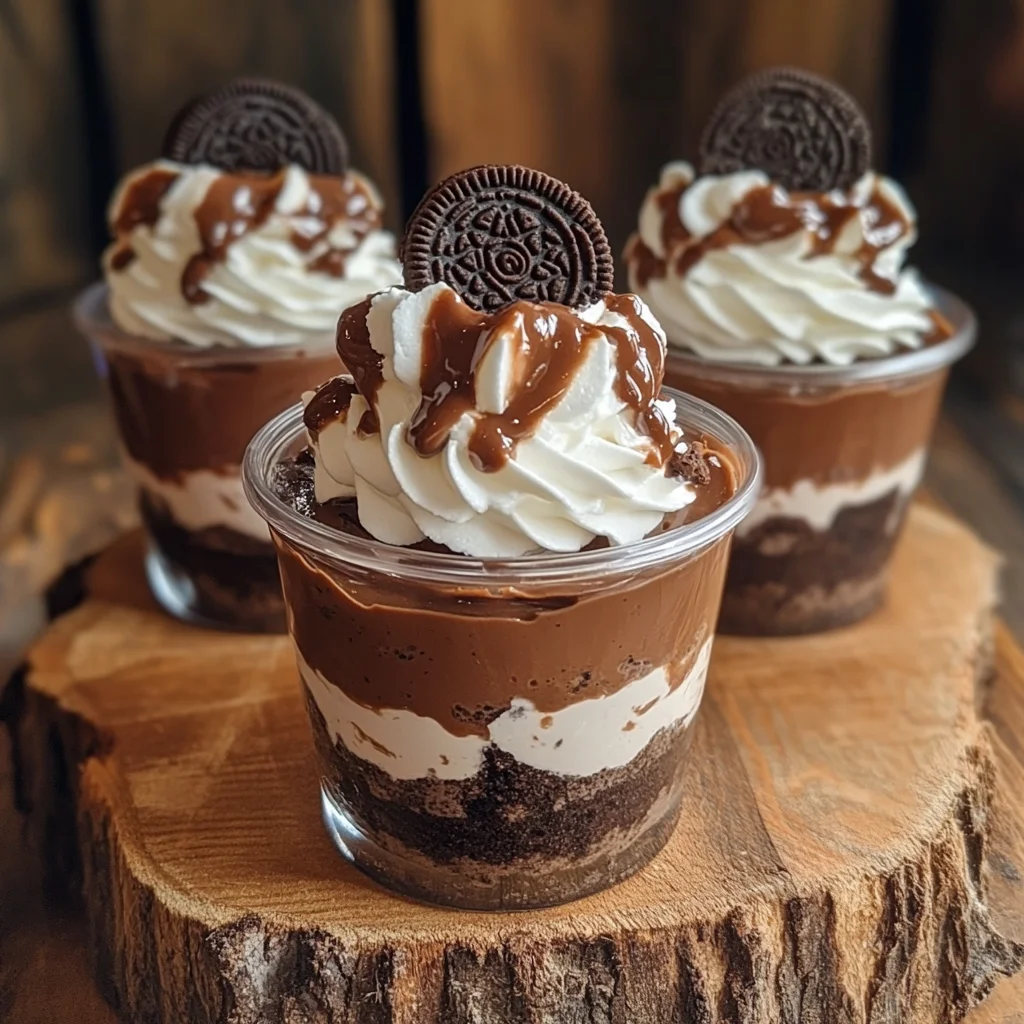
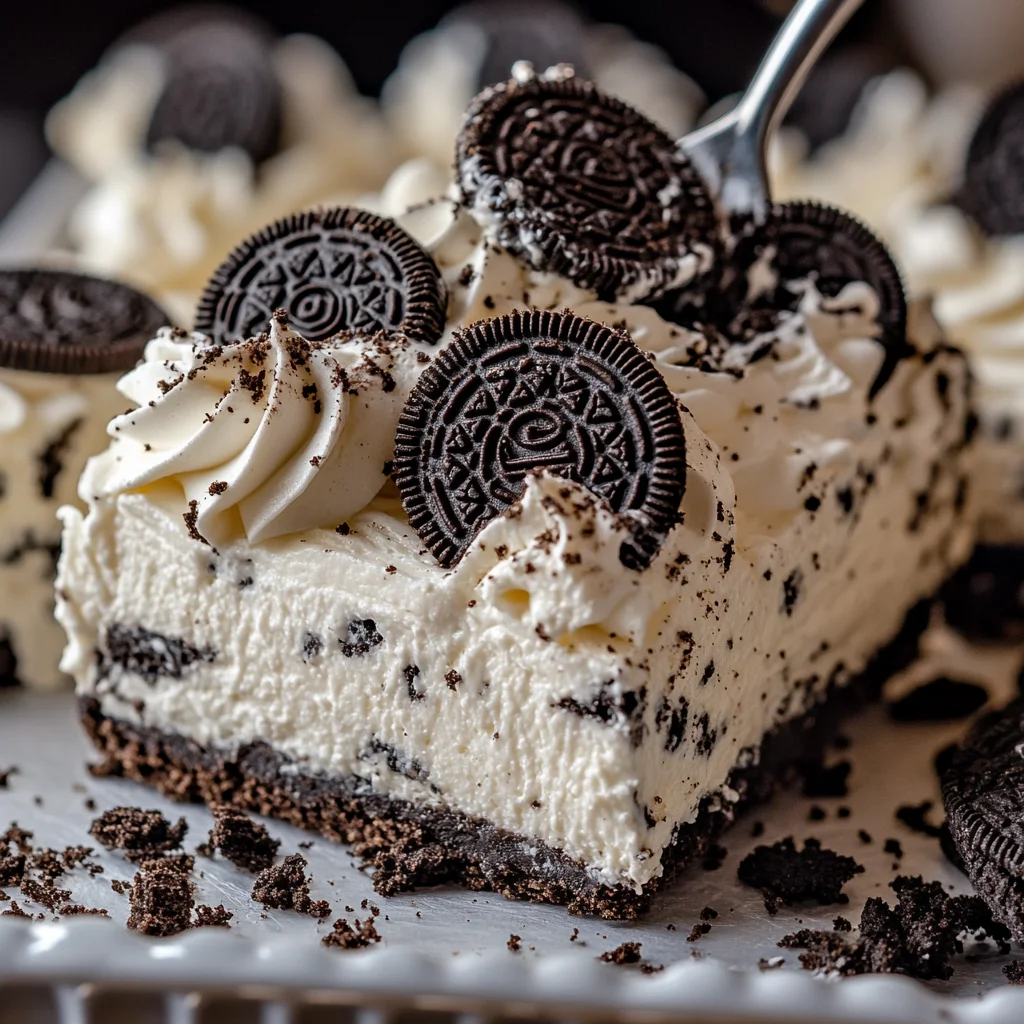
Zara’s Italian-American No Bake Oreo Dessert
Serves 16 generous portions | Prep time: 30 minutes | Chilling time: 4+ hours
For the Crust (La Base):
- 32 Oreo cookies (about 3 cups when crushed)
- 6 tablespoons unsalted European-style butter, melted
- My addition: 1 tablespoon amaretto liqueur (optional, but magical)
For the Cream Layer (Il Cuore):
- 8 ounces cream cheese, softened to perfect room temperature
- 1 cup powdered sugar
- 1 cup whipped topping (or my homemade whipped cream—recipe below)
- My twist: Zest of 1 small lemon and 1 teaspoon vanilla extract
For the Chocolate Layer (Il Sogno):
- 2 (3.4 oz) boxes instant chocolate pudding mix
- 3 cups cold whole milk (don’t compromise here—use the good stuff)
- 10-12 Oreos, roughly chopped
- My enhancement: 2 tablespoons strong espresso, cooled
For the Top Layer (La Corona):
- Remaining whipped topping from the 8-oz container
- Extra crushed Oreos for garnish
- My finishing touch: Dark chocolate shavings and a light dusting of cocoa powder
🍴 Recipe Scaling Calculator
Adjust the serving size and see ingredient amounts update automatically
Scaled Ingredients Preview:
Instructions (Passo dopo Passo):
- Prepare your workspace: This is something my nonna always taught me—success begins with organization. Have all your ingredients at room temperature (except the milk), and prepare a 13x9 inch pan with a light coating of butter.
- Create the crust: Place the Oreos in a food processor and pulse until you have fine crumbs (but not powder—we want some texture). If you don't have a processor, the traditional zip-lock bag and rolling pin method works beautifully. Mix the crumbs with melted butter and that splash of amaretto if you're using it. Press firmly into your prepared pan—I use the bottom of a measuring cup to ensure evenness. Refrigerate for at least 30 minutes.
- Master the cream layer: Here's where technique matters. Beat the cream cheese with an electric mixer until it's completely smooth—no lumps allowed. Gradually add the powdered sugar, then the lemon zest and vanilla. Fold in the whipped topping gently, preserving that airy texture. Spread evenly over the chilled crust and return to the refrigerator.
- Perfect the pudding: In a medium bowl, whisk the pudding mix with cold milk until it just begins to thicken—about 2 minutes. Here's my secret: add that cooled espresso now. It doesn't make it taste like coffee, but it deepens the chocolate flavor remarkably. Fold in the chopped Oreos, then spread over the cream layer. Back to the fridge it goes.
- Finish with finesse: Spread the remaining whipped topping as your final layer. Now comes the fun part—garnish with crushed Oreos, those dark chocolate shavings, and just a whisper of cocoa powder. Refrigerate for at least 2 hours, but preferably overnight.
Zara's Italian Variations (Because We Can't Help Ourselves)
Tiramisu-Inspired Version: Replace half the Oreos with ladyfinger cookies, add 2 tablespoons of strong espresso to the cream layer, and dust the top with cocoa powder instead of cookie crumbs. It's like tiramisu's fun American cousin.
Limoncello Dreams: Add 2 tablespoons of limoncello to the cream layer and incorporate lemon zest throughout. Top with candied lemon peel. This version always transports me back to summer evenings in Tuscany.
Ricotta Romana: Replace half the cream cheese with high-quality ricotta, add a touch of orange zest, and fold in mini chocolate chips. It's lighter yet somehow more indulgent.
Nutella Amore: Swirl 3 tablespoons of warmed Nutella into the pudding layer and garnish with toasted hazelnuts. This version has converted even my most traditional Italian relatives.
The Art of Timing and Temperature
Let me share something I learned the hard way: this dessert is like a fine wine—it improves with time. The flavors need to marry, the layers need to settle, and that beautiful melding that happens overnight transforms it from good to extraordinary. I always make this at least 24 hours before I plan to serve it.
Temperature is equally crucial. Your cream cheese must be genuinely room temperature—not cold, not warm, but perfectly soft. Your milk should be cold from the refrigerator. These small details make the difference between professional results and just okay ones.
When Cultures Collide Beautifully
You know what I love most about this dessert? It represents everything I've learned about fusion cooking. It's not about abandoning your roots—it's about letting them grow in new soil. This recipe honors the American tradition of accessible, crowd-pleasing desserts while incorporating the Italian appreciation for quality ingredients and careful technique.
Every time I serve this, I think about that first day Sarah introduced me to Oreos. What started as cultural curiosity has become a bridge between my two worlds. The laughter around the table, the satisfied sighs after that first bite, the requests for the recipe—food really is the universal language of love.
Serving and Storing Like a Pro
Here's what years of making this dessert have taught me: presentation matters, but so does practicality. I cut this into generous squares—Americans aren't shy about their dessert portions, and neither should you be. A thin, sharp knife dipped in warm water between cuts gives you clean edges that look professionally made.
For storage, cover tightly with plastic wrap directly touching the surface to prevent that film from forming. It keeps beautifully for up to three days, though in my experience, it never lasts that long. The flavors actually improve after the first day, so don't feel pressured to serve it immediately.
Using Greek Yogurt and Coconut Milk
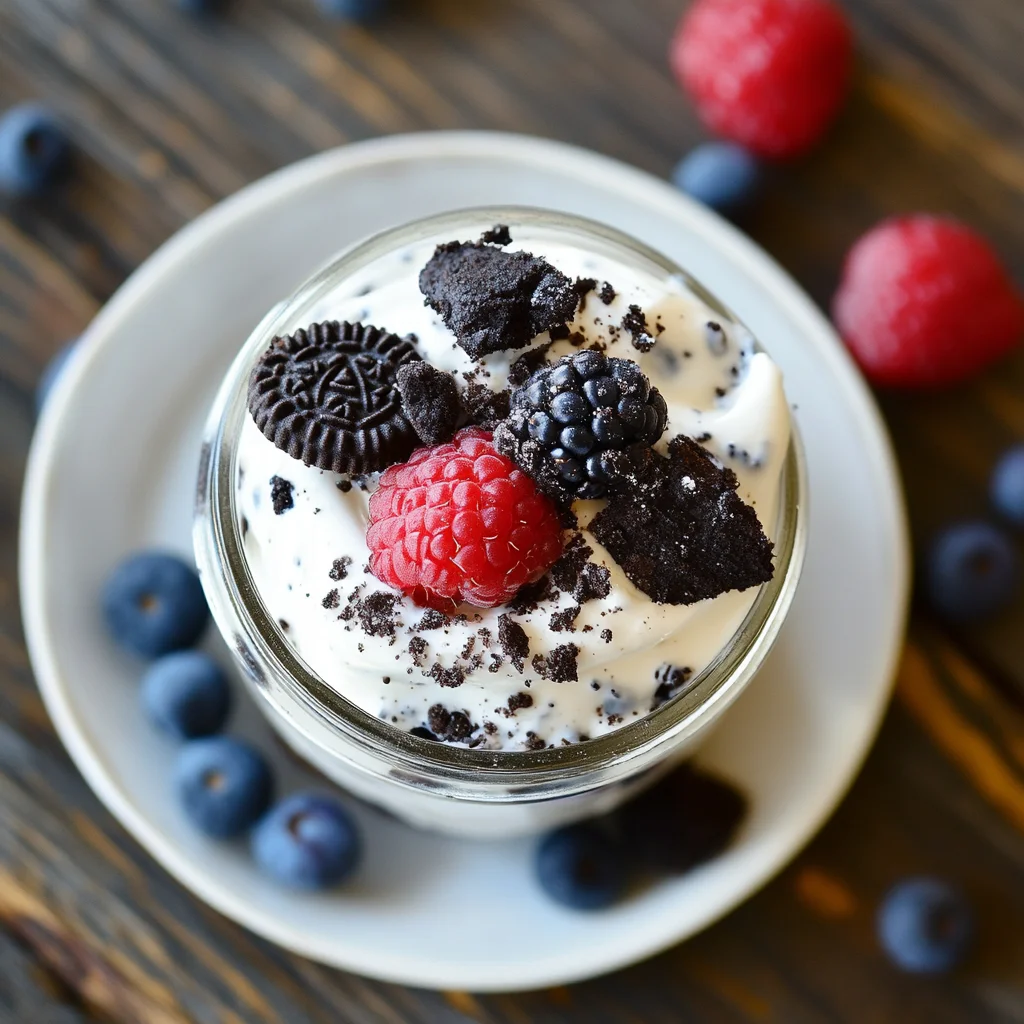
You don’t have to sacrifice flavor to make a lighter version of your favorite oreo no bake dessert. Swapping out a few traditional ingredients with wholesome alternatives can reduce calories, saturated fats, and added sugars—while still delivering rich, indulgent taste.
Oreo No Bake Dessert – The Best 2025 Creamy No-Bake Recipe
Course: dessert16
portions30
minutes4
hours380
kcalCraving a decadent dessert without the oven? This Oreo No-Bake Dessert is a showstopper, featuring an Oreo crust, creamy filling, chocolate pudding, and a topping of Cool Whip and crushed Oreos.
Ingredients
- For the Crust (La Base):
32 Oreo cookies (about 3 cups when crushed)
6 tablespoons unsalted European-style butter, melted
My addition: 1 tablespoon amaretto liqueur (optional, but magical)
- For the Cream Layer (Il Cuore):
8 ounces cream cheese, softened to perfect room temperature
1 cup powdered sugar
1 cup whipped topping (or my homemade whipped cream—recipe below)
My twist: Zest of 1 small lemon and 1 teaspoon vanilla extract
- For the Chocolate Layer (Il Sogno):
2 (3.4 oz) boxes instant chocolate pudding mix
3 cups cold whole milk (don’t compromise here—use the good stuff)
10-12 Oreos, roughly chopped
My enhancement: 2 tablespoons strong espresso, cooled
- For the Top Layer (La Corona):
Remaining whipped topping from the 8-oz container
Extra crushed Oreos for garnish
My finishing touch: Dark chocolate shavings and a light dusting of cocoa powder
Directions
- Prepare your workspace: This is something my nonna always taught me—success begins with organization. Have all your ingredients at room temperature (except the milk), and prepare a 13x9 inch pan with a light coating of butter.
- Create the crust: Place the Oreos in a food processor and pulse until you have fine crumbs (but not powder—we want some texture). If you don't have a processor, the traditional zip-lock bag and rolling pin method works beautifully. Mix the crumbs with melted butter and that splash of amaretto if you're using it. Press firmly into your prepared pan—I use the bottom of a measuring cup to ensure evenness. Refrigerate for at least 30 minutes.
- Master the cream layer: Here's where technique matters. Beat the cream cheese with an electric mixer until it's completely smooth—no lumps allowed. Gradually add the powdered sugar, then the lemon zest and vanilla. Fold in the whipped topping gently, preserving that airy texture. Spread evenly over the chilled crust and return to the refrigerator.
- Perfect the pudding: In a medium bowl, whisk the pudding mix with cold milk until it just begins to thicken—about 2 minutes. Here's my secret: add that cooled espresso now. It doesn't make it taste like coffee, but it deepens the chocolate flavor remarkably. Fold in the chopped Oreos, then spread over the cream layer. Back to the fridge it goes.
- Finish with finesse: Spread the remaining whipped topping as your final layer. Now comes the fun part—garnish with crushed Oreos, those dark chocolate shavings, and just a whisper of cocoa powder. Refrigerate for at least 2 hours, but preferably overnight.
Notes
- If you're making your own whipped cream (which I highly recommend), whip it to soft peaks only. Over-whipped cream will make your layers dense instead of light and dreamy.
- The espresso addition isn't about making it coffee-flavored—it's about enhancing the chocolate. Trust me on this one; it makes all the difference without being detectable.
- When crushing Oreos, aim for a mixture of fine crumbs and small chunks. This gives your crust character and your dessert textural interest that keeps every bite exciting.
- This dessert is incredibly forgiving. If your layers aren't perfectly even or if things look a bit rustic, embrace it. Some of the most delicious food isn't perfect—it's made with love.
❓ Frequently Asked Questions
Absolutely! In fact, this dessert tastes even better when made 24 hours in advance. The layers have time to meld together, and the flavors become more balanced. You can safely make it up to 2 days ahead and store it covered in the refrigerator.
Yes! Zara actually prefers homemade whipped cream. Whip 2 cups of heavy cream with 3 tablespoons of powdered sugar and 1 teaspoon vanilla until soft peaks form. Be careful not to over-whip, as it can make the layers dense instead of light and airy.
Make sure you're using cold milk and whisking vigorously for at least 2 minutes. The pudding should start to thicken before you add the chopped Oreos. If it's still thin, let it sit for an additional 2-3 minutes before spreading it over the cream layer.
Certainly! Try vanilla sandwich cookies with vanilla pudding for a lighter version, or chocolate graham crackers for a s'mores twist. Zara suggests trying Italian amaretti cookies for a sophisticated almond flavor, but you'll need to adjust the sweetness accordingly.
Use a thin, sharp knife dipped in warm water between each cut. Wipe the blade clean with a damp towel after each slice. This prevents the layers from sticking to the knife and gives you those beautiful, clean edges that look professionally made.
Quality ingredients and restraint! Use real vanilla extract, fresh lemon zest, and high-quality liqueurs like amaretto or limoncello. The key is adding just enough to enhance the flavors without overwhelming the classic base. Start with smaller amounts and taste as you go.
Your Turn to Create Magic
So here's my challenge to you: make this dessert, but make it yours. Maybe you'll try one of my Italian variations, or perhaps you'll create something entirely new. Food is meant to be a conversation, not a monologue, and I'd love to hear how you make this recipe your own.
Share your creations with me on social media—tag me so I can see your beautiful work and maybe learn something new from you. After all, the best recipes are the ones that bring people together and inspire them to create their own delicious memories.
Whether you're making this for a summer barbecue, a holiday gathering, or just because Tuesday deserves something special, remember that you're not just making dessert—you're creating moments of joy, one spoonful at a time.
Buona fortuna in cucina, and remember—cooking with amore makes everything taste better.
— Zara Saffron
Looking for inspiration? Try our No Bake Brownies for another chocolate-loaded winner without the oven.
For more recipes follow us on Facebook and Pinterest.