Vegan Avocado Chocolate Mousse – The Best 2025 Healthy No-Bake Dessert
Let me tell you about the time I completely misjudged a recipe. Sofia was fourteen then, going through her “I’m basically vegetarian now, Mom” phase, and I was desperately trying to find desserts that would make her happy without breaking our grocery budget. A friend mentioned avocado chocolate mousse, and honestly? I thought she’d lost her mind.
“Mija,” I said, “avocados belong in guacamole, not dessert.”
But trust me on this one—sometimes the most surprising combinations create the most beautiful memories. This vegan avocado chocolate mousse became Sofia’s favorite dessert, and now at sixteen, she makes it herself when friends come over. My abuela always said the best recipes are the ones that surprise you, and this one definitely did that.
The first time I made it, I was skeptical right up until that first spoonful. Creamy, rich, chocolatey—everything you want in a mousse, but somehow it felt lighter. No guilt, no heavy feeling afterward, just pure satisfaction. And the best part? You probably have most of these ingredients already, because I refuse to write recipes that require a treasure hunt through specialty stores.
Don’t miss our creamy no-bake twist with this Oreo dessert recipe
What Makes This Avocado Chocolate Mousse Special?
My neighbor Mrs. Johnson always asks what makes this mousse different from the traditional kind her mother used to make. The truth is, it’s all about working smarter, not harder. Traditional chocolate mousse needs heavy cream, eggs, and a lot of technique. This version? You literally throw everything in a blender and let the machine do the work.
The avocado does something magical here—it gives you that silky, rich texture without any of the dairy. When Sofia first told her friends what was in it, they didn’t believe her. “This tastes too good to have vegetables in it,” her friend Maya said. That’s when I knew we had a winner.
Here’s what avocados bring to the party:
- Natural creaminess that makes your blender do all the hard work
- Healthy fats that actually make you feel satisfied, not stuffed
- A mild flavor that completely disappears behind the chocolate
- Nutrients that make this dessert something you can feel good about serving
My abuela would have loved this—she was always finding ways to sneak good-for-you ingredients into treats that tasted like pure indulgence.
Looking for inspiration? Try our Frozen Banana Peanut Butter Bites—another easy no-bake treat for clean snacking.
Why I Started Making This Mousse (And Why You Should Too)
I’ll be honest—I started making this because it was cheaper than buying fancy desserts, and Sofia was going through her “everything has to be healthy” phase. But it became a regular in our house because it just works. When you’re juggling work, teenagers, and taking care of an elderly parent, you need recipes that don’t stress you out.
This mousse checks every box:
- Budget-friendly: Two avocados, some cocoa powder, and pantry staples
- Quick: Ten minutes from start to finish, no baking required
- Make-ahead friendly: Actually tastes better after chilling
- Crowd-pleaser: Works for vegans, lactose-intolerant folks, and chocolate lovers
Plus, it’s packed with the kind of nutrition that makes you feel like you’re taking care of your family. Heart-healthy fats, fiber, potassium—this isn’t just dessert, it’s fuel that happens to taste amazing.
Discover great ideas like our Coconut Candy Bars – The Best 2025 Homemade + Store-Bought Guide for another feel-good sweet treat.
Simple Ingredients That Pack a Punch
You don’t need to hunt down expensive specialty items for this recipe. I shop at the same Mexican market I’ve been going to for years, and everything’s available at any regular grocery store. Here’s what you need:
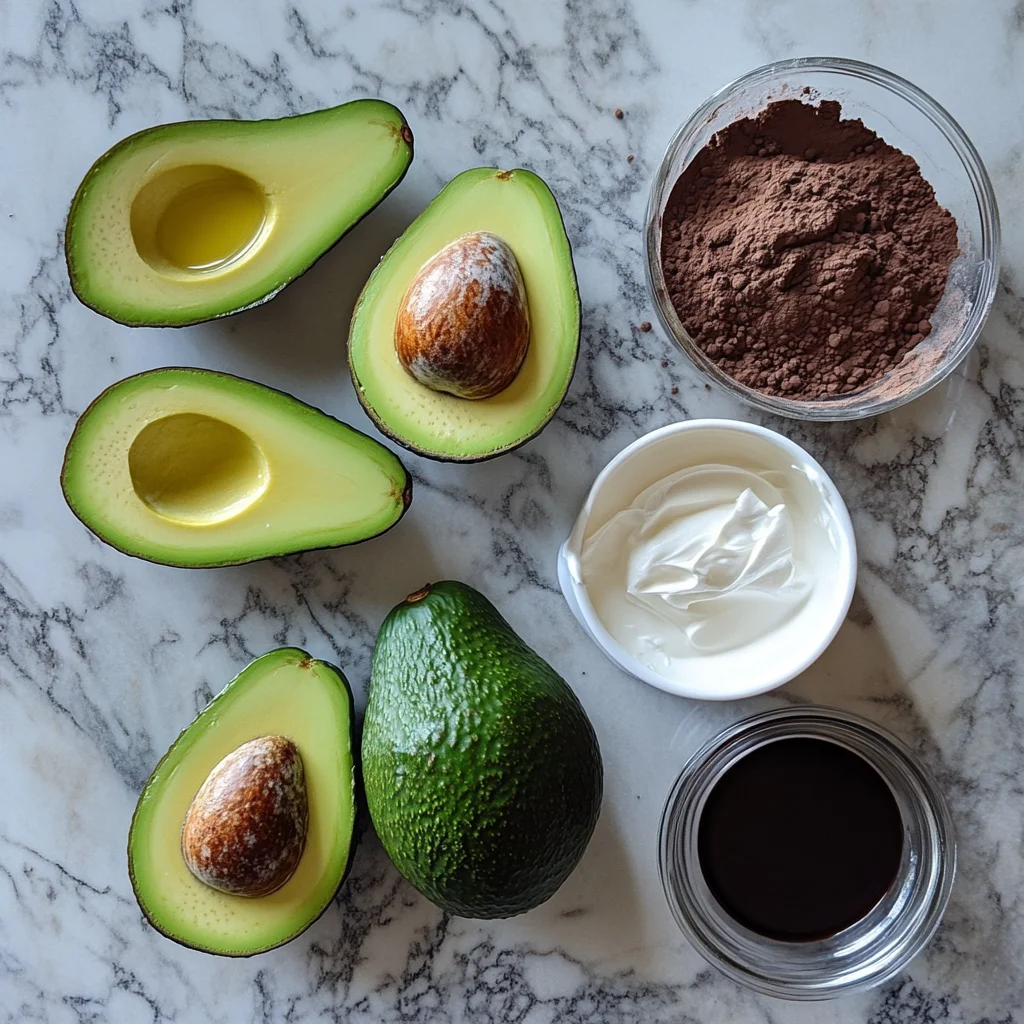
The Essential List:
- 2 ripe avocados (Hass variety work best—they should give slightly when you press them)
- 1/2 cup coconut cream (from the top of a chilled can—I always keep one in the fridge)
- 1/4 cup unsweetened cocoa powder (I use the same Hershey’s cocoa I bake with)
- 1/3 cup maple syrup (or honey if you’re not strictly vegan)
- 1 teaspoon vanilla extract (the real stuff, not imitation)
- 1/4 teaspoon salt (trust me, it makes the chocolate sing)
- 1/4 teaspoon cinnamon (optional, but it adds warmth)
🥑 Scale Maria’s Avocado Chocolate Mousse Recipe
Mousse Ingredients:
Check out No Bake Brownies – The Best Easy Recipe for Summer if you’re looking for another simple and satisfying dessert without the oven.
Maria's Shopping Tips:
Always taste your cocoa powder first; some brands are more bitter than others
Buy your avocados three days before you want to make this—they need time to ripen properly
If you can only find hard avocados, put them in a paper bag with a banana overnight
Full-fat coconut milk is key—the light stuff won't give you the richness you want
Don’t miss our guide to Oreo No Bake Dessert for another quick dessert using simple ingredients you probably already have.
How to Make Perfect Avocado Chocolate Mousse (The Way I Learned Through Trial and Error)
Let me tell you about my first attempt at this recipe. I was so excited to try something new that I rushed through it, used unripe avocados, and wondered why it tasted like grass-flavored chocolate. Sofia took one bite and said, "Mom, this tastes like the lawn." Not my finest moment.
But that's how we learn, right? After a few tries (and one more lawn-flavored disaster), I figured out the secrets.
Looking for inspiration? Try our Frozen Banana Peanut Butter Bites for a kid-friendly, guilt-free snack.
Step-by-Step Instructions:
Step 1: Prep Like a Pro Cut your avocados in half and remove the pits. Use a spoon to scoop out every bit of flesh—don't waste any of that creamy goodness. If you're using a regular blender like I do (not one of those fancy high-speed ones), cut the avocado into smaller pieces first.
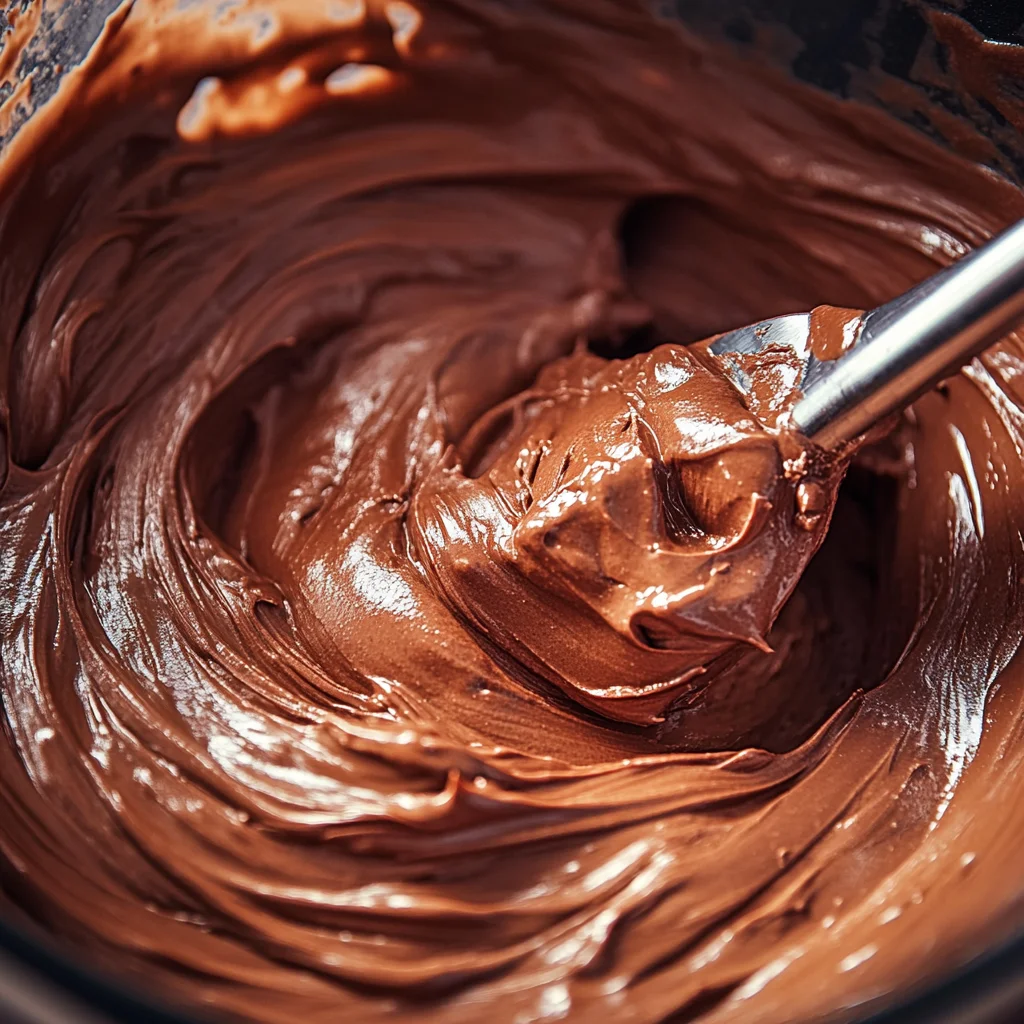
Step 2: The Magic Blend Add everything to your blender: avocado, coconut cream (just the thick part from the top of the can), cocoa powder, maple syrup, vanilla, salt, and cinnamon. Here's where I learned my lesson—blend in stages. Start slow, then work up to high speed.
Step 3: Scrape and Blend Again Stop the blender and scrape down the sides with a spatula. Those little bits hiding on the walls will give you chunks in your final mousse, and nobody wants that. Blend again until it's completely smooth—about 2 minutes total.
Step 4: Taste and Adjust This is the fun part. Taste it and decide if you need more sweetness. Remember, it'll taste slightly less sweet once it's chilled, so err on the side of a little sweeter than you think you want.
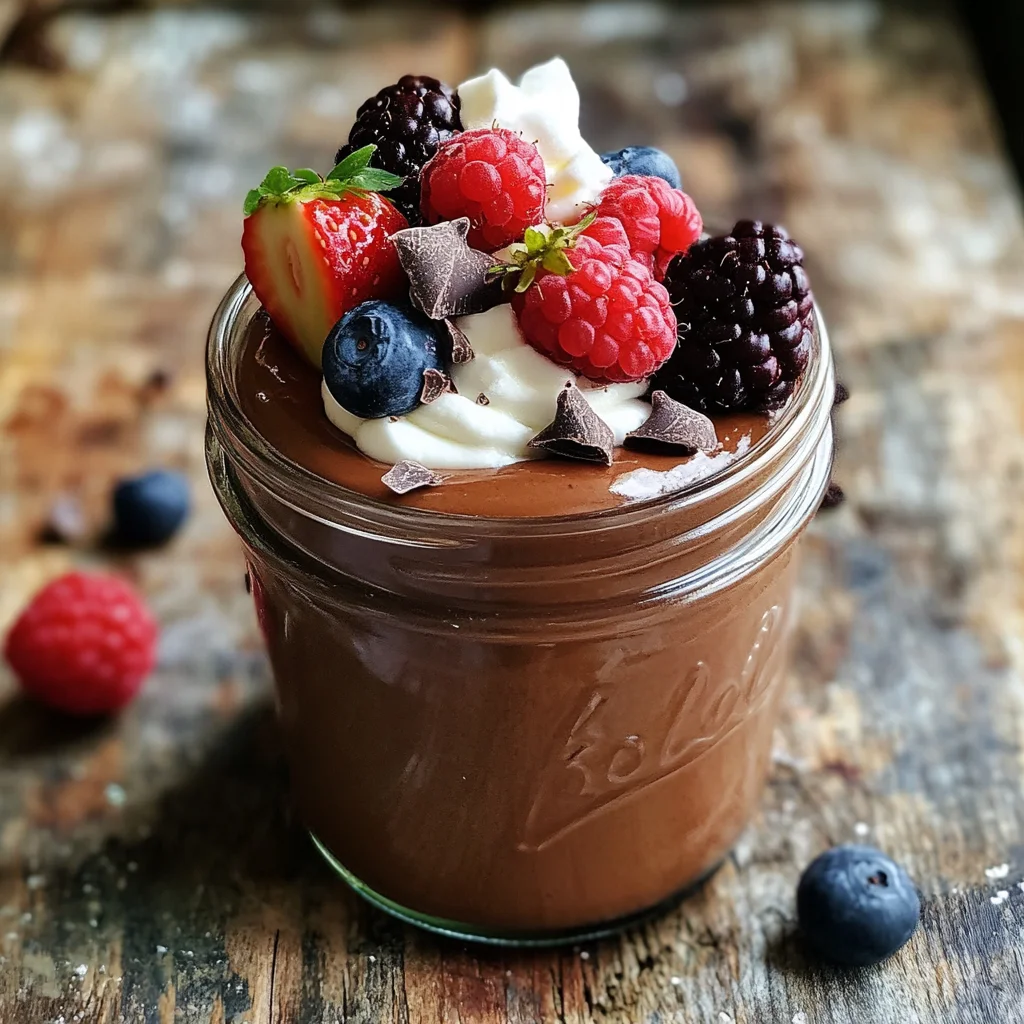
Step 5: Chill and Serve Divide between four small bowls or mason jars. I use the little canning jars I inherited from my abuela—they're perfect for this. Chill for at least an hour, but overnight is even better.
Check out No Bake Brownies – The Best Easy Recipe for Summer if you’re craving another simple treat you can prep in minutes.
My Hard-Learned Tips:
- If your mousse is too thick, add coconut cream one tablespoon at a time
- If it's too thin, add more cocoa powder or chill longer
- Always make this at least an hour before you want to serve it
- Leftover mousse keeps for two days in the fridge—if it lasts that long
Flavor Variations That Make This Recipe Your Own
Sofia loves experimenting with flavors, and this base recipe is perfect for that. We've tried so many variations over the years, and these are our family favorites:
Mexican Chocolate Version
Add an extra pinch of cinnamon and a tiny bit of cayenne pepper. It reminds me of the chocolate caliente my abuela made on cold mornings. Sofia calls this the "grown-up version."
Mint Chocolate
Add 1/4 teaspoon peppermint extract. Perfect for summer, and it makes the house smell amazing. Be careful though—a little peppermint goes a long way.
Looking for another no-fuss treat? Don’t miss our Coconut Candy Bars – The Best 2025 Homemade + Store-Bought Guide.
Coffee Lover's Dream
Mix in a teaspoon of instant espresso powder. This is my personal favorite for when I need dessert after a long day. The coffee deepens the chocolate flavor in the most wonderful way.
Orange Zest Surprise
Grate in the zest of half an orange. It brightens everything up and makes it feel fancy enough for company. Mrs. Johnson always asks for this version when I bring dessert to the neighborhood potlucks.
Peanut Butter Swirl
Blend in a tablespoon of natural peanut butter, or swirl it in after blending for a marbled effect. This is Sofia's favorite variation—she says it tastes like a Reese's cup but better.
Don’t miss our refreshing No Bake Brownies – The Best Easy Recipe for Summer if you're in the mood for something chewy and chocolaty.
Storage and Serving Ideas (From Someone Who's Tried It All)
I've learned the hard way that presentation matters, especially with teenagers. The first time I made this, I just scooped it into regular bowls, and Sofia barely touched it. But put the same mousse in a pretty jar with some berries on top? Suddenly it's Instagram-worthy.
Storage Basics:
- Keep it in the fridge for up to three days (though it never lasts that long in our house)
- Press plastic wrap directly onto the surface to prevent browning
- Don't freeze it—the texture gets weird when it thaws
- Make it in individual portions if you can; it's easier to grab and go
Serving Ideas That Work:
- For everyday: Small mason jars with a dollop of whipped coconut cream
- For company: Wine glasses layered with berries and a mint leaf
- For kids: Small bowls with fun toppings they can choose themselves
- For potlucks: Clear plastic cups so everyone can see how pretty it is
Toppings We Love:
Dark chocolate shavings
Fresh berries (strawberries are Sofia's favorite)
Toasted coconut flakes
Chopped nuts (pecans from the tree in our backyard)
A sprinkle of sea salt (sounds weird but tastes amazing)
Whipped coconut cream
Check out our Frozen Banana Peanut Butter Bites for another customizable no-bake dessert packed with flavor.
Troubleshooting (Because We've All Been There)
Let me save you from the mistakes I've made over the years. Trust me, I've messed up this "simple" recipe more times than I care to admit.
When It's Too Thin:
This usually happens when you use coconut milk instead of the thick cream from the top of the can. Fix it by adding more cocoa powder, a tablespoon at a time, or by chilling it longer. Sometimes I add a tablespoon of chia seeds and let it sit—they plump up and thicken everything naturally.
When It Tastes Bitter:
You either used too much cocoa powder or your avocados were overripe. Add more maple syrup, a pinch more salt, or blend in half a banana for natural sweetness. The banana actually works really well and adds extra creaminess.
When It's Lumpy:
Your blender might not be powerful enough to break down everything completely. Strain it through a fine mesh sieve, or blend longer and scrape the sides more often. Sometimes I add a tablespoon of warm coconut milk to help everything blend smoother.
When It Turns Brown:
This is just oxidation from the avocados. It's still perfectly safe to eat, but it doesn't look as pretty. Next time, press plastic wrap directly onto the surface before refrigerating, and add a squeeze of lime juice to the recipe—it helps prevent browning.
Looking for more ideas? Don’t miss our Coconut Candy Bars – The Best 2025 Homemade + Store-Bought Guide for ways to incorporate natural sweetness in desserts.
Why This Dessert Fits Our Life (And Maybe Yours Too)
Between Sofia's school schedule, my mother's doctor appointments, and trying to keep up with my blog, I need recipes that work with real life, not against it. This mousse has become our go-to dessert because it's flexible, foolproof, and actually good for us.
When Sofia brings friends over after school, I can whip this up while they're doing homework, and by the time they're ready for a snack, we have something that feels special. When I need to bring dessert to a church potluck, I make individual portions in clear cups, and everyone thinks I spent hours in the kitchen.
My abuela always said the best recipes are the ones that bring people together without stressing out the cook. This avocado chocolate mousse does exactly that—it's impressive enough for company but simple enough for a Tuesday night when everyone's tired and you just want something sweet.
Don’t miss our Oreo No Bake Dessert – The Best 2025 Creamy No-Bake Recipe if you’re stocking your fridge with indulgent options that last.
Vegan Avocado Chocolate Mousse – The Best 2025 Healthy No-Bake Dessert
Course: dessertCuisine: AmericanDifficulty: Easy4
servings5
minutes1
hour348
kcal1
hour5
minutesWhip up a healthy dessert in minutes with this easy Vegan Chocolate Avocado Mousse recipe. Made with just a handful of ingredients, it's the perfect treat to satisfy your sweet tooth.
Ingredients
2 ripe avocados (Hass variety work best—they should give slightly when you press them)
1/2 cup coconut cream (from the top of a chilled can—I always keep one in the fridge)
1/4 cup unsweetened cocoa powder (I use the same Hershey’s cocoa I bake with)
1/3 cup maple syrup (or honey if you’re not strictly vegan)
1 teaspoon vanilla extract (the real stuff, not imitation)
1/4 teaspoon salt (trust me, it makes the chocolate sing)
1/4 teaspoon cinnamon (optional, but it adds warmth)
Directions
- Cut your avocados in half and remove the pits. Use a spoon to scoop out every bit of flesh—don’t waste any of that creamy goodness. If you’re using a regular blender like I do (not one of those fancy high-speed ones), cut the avocado into smaller pieces first.
- Add everything to your blender: avocado, coconut cream (just the thick part from the top of the can), cocoa powder, maple syrup, vanilla, salt, and cinnamon. Here’s where I learned my lesson—blend in stages. Start slow, then work up to high speed.
- Again Stop the blender and scrape down the sides with a spatula. Those little bits hiding on the walls will give you chunks in your final mousse, and nobody wants that. Blend again until it’s completely smooth—about 2 minutes total.
- This is the fun part. Taste it and decide if you need more sweetness. Remember, it’ll taste slightly less sweet once it’s chilled, so err on the side of a little sweeter than you think you want.
- Divide between four small bowls or mason jars. I use the little canning jars I inherited from my abuela—they’re perfect for this. Chill for at least an hour, but overnight is even better.
Notes
- The Power of Patience: This mousse tastes even better the next day! Chilling it overnight allows the flavors to deepen and the texture to become perfectly rich and firm, so make it ahead of time if you can.
- Ripe Avocados are Non-Negotiable: The key to a silky-smooth mousse is using very ripe, almost-too-soft avocados. If yours are a little hard, try the paper bag trick with a banana mentioned earlier in the article. It works like magic!
- Adjust to Your Taste: The base recipe is a great starting point, but don't be afraid to make it your own. If you prefer a less-sweet mousse, start with half the maple syrup and add more to your liking. A tiny pinch of cayenne or a bit of espresso powder can also enhance the chocolate flavor in a surprising way.
🥑 Frequently Asked Questions
Traditional chocolate mousse originated in France and typically includes whipped cream, eggs, and sugar to create its airy, rich texture. While it's undeniably delicious, it's also high in saturated fat and cholesterol. The vegan avocado version replaces those heavy ingredients with plant-based alternatives, offering a lighter, heart-healthier option that's just as indulgent. The key difference lies in the use of ripe avocados and natural sweeteners like maple syrup to create that same luxurious mouthfeel without dairy or eggs.
Avocado chocolate mousse combines indulgence with nutrition. Avocados are rich in healthy monounsaturated fats, fiber, potassium, and antioxidants—all of which support heart health, lower inflammation, and keep you feeling full. Unlike typical desserts, this mousse won't spike your blood sugar or leave you feeling sluggish. It's also gluten-free, dairy-free, and naturally vegan, making it a safe, satisfying option for a wide range of diets and lifestyles.
You can safely store vegan avocado chocolate mousse in an airtight container in the refrigerator for up to 2 days. While it's best enjoyed fresh, chilling actually enhances the flavor and thickens the texture. To prevent oxidation (and browning), press plastic wrap or parchment paper directly onto the surface of the mousse before sealing. It's not ideal for freezing, as the texture can break down after thawing.
If your mousse isn't thickening, there could be a few culprits: You used the liquid part of coconut milk instead of the thick cream • Your avocados were underripe, resulting in a watery base • Too much maple syrup or sweetener was added. To fix it, chill the mousse for at least an hour, or add a tablespoon of chia seeds or extra cocoa powder to help firm it up naturally.
When made properly with ripe avocados and the right balance of cocoa and sweeteners, you shouldn't taste the avocado at all! The avocado provides the creamy texture while the chocolate flavor dominates. If you can taste avocado, try adding more cocoa powder or a pinch more salt to enhance the chocolate flavor, or make sure your avocados are perfectly ripe—not overripe or underripe.
If you don't have coconut cream, you can substitute with: Cashew cream (soaked cashews blended with water) • Silken tofu for extra protein • Greek yogurt if you're not strictly vegan • Heavy cream for a non-vegan version. The key is using something thick and creamy to maintain that luxurious mousse texture.
The Final Scoop
I never thought I'd be writing about putting avocados in dessert, but here we are. Sometimes the best recipes come from the most unexpected places—from teenagers going through phases, from trying to eat healthier without giving up the foods we love, from wanting to make something special without breaking the budget or spending all day in the kitchen.
This vegan avocado chocolate mousse has earned its place in our family rotation. It's the dessert that made Sofia's vegetarian friends feel welcome at our dinner table, the one that impresses neighbors, and the one that lets me feel good about serving something sweet to the people I love.
Trust me on this one—try it once, and you'll understand why we keep coming back to it. It's all about the love you put into it, and this recipe makes it easy to share that love, one creamy, chocolate spoonful at a time.
Check out another wholesome favorite: No Bake Brownies – The Best Easy Recipe for Summer
For more recipes follow us on Facebook and Pinterest.